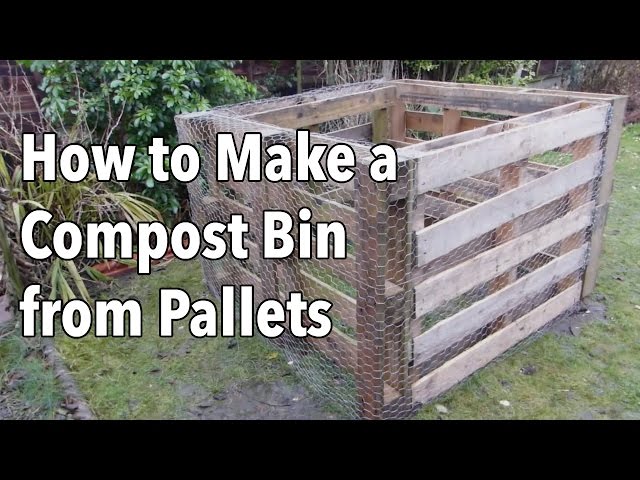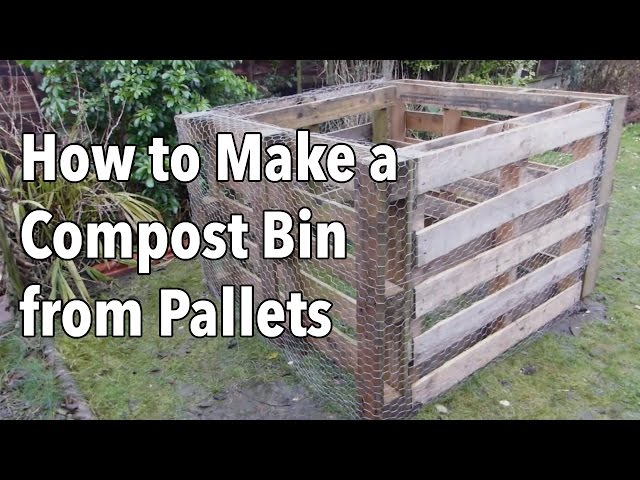
Simple Homesteading Wins: DIY Pallet Compost Bin
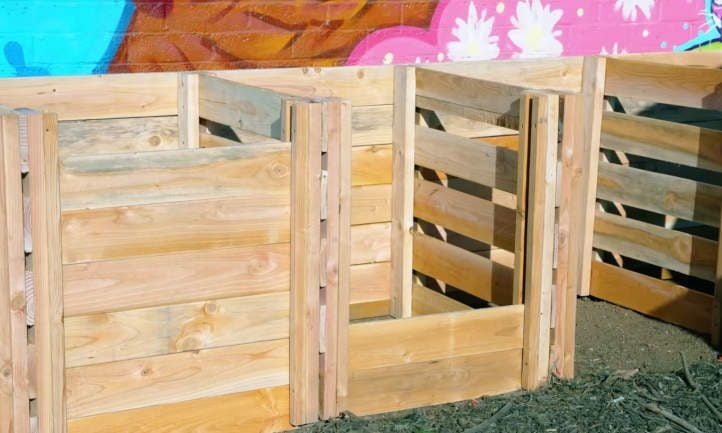
Remember that time you threw away a bag of wilted lettuce, feeling guilty about the waste? Or when you shelled out big bucks for store-bought compost, wishing there was a cheaper, more sustainable way? We’ve all been there! As homesteaders, we strive to live in harmony with nature, minimizing our waste and maximizing our resources. But sometimes, getting started can feel overwhelming. That's why we're excited to share a simple, yet incredibly effective project that will make a huge difference on your homestead: a DIY Pallet Compost Bin!
This project is perfect for beginner homesteaders like Sarah. It’s affordable, uses readily available materials, and requires minimal tools. Not only will you reduce your household waste and save money on fertilizer, but you’ll also create nutrient-rich compost to nourish your garden, resulting in healthier plants and bigger harvests. It’s a win-win for your wallet, your garden, and the environment. Let’s dive in!
Why a Compost Bin Matters
Composting is nature's way of recycling. By creating a compost bin, you're essentially mimicking the forest floor, where organic matter decomposes and enriches the soil. For the frugal homesteader, this means turning "waste" into a valuable resource. Imagine transforming your kitchen scraps, yard waste, and even shredded paper into a rich, dark soil amendment that your plants will love. You’ll be amazed at how much you can reduce your reliance on store-bought fertilizers and improve the overall health of your garden ecosystem. Plus, it's a fantastic way to teach your children about sustainability and the importance of reducing waste.
Gathering Your Materials – Frugal is Key!
The beauty of this project lies in its simplicity and affordability. Here's what you'll need:
- Pallets: 4-6 wooden pallets of the same size. Check with local businesses (grocery stores, construction sites, landscaping companies) – they often give them away for free! Important: Look for pallets marked "HT" (heat treated) which means they haven’t been treated with harmful chemicals. Avoid pallets marked "MB" (methyl bromide), as this is a toxic fumigant.
- Hardware Cloth (optional): If you want to keep rodents out, you can line the inside of the bin with hardware cloth. Find it here on Amazon.
- Staple Gun (if using hardware cloth): A heavy-duty staple gun will make attaching the hardware cloth much easier. Consider this one.
- Heavy-Duty Staples: For the staple gun.
- Gloves: To protect your hands.
- Safety Glasses: Always protect your eyes!
- Measuring Tape: To ensure accurate cuts and measurements.
- Saw (Hand Saw or Circular Saw): To cut the pallets if needed. A hand saw will work, but a circular saw will save time and effort.
- Drill with Screws (optional): For added stability, you can screw the pallets together.
- Hammer and Nails (optional): Another option for securing the pallets.
Sourcing Alternatives:
- Pallets: Don't be afraid to ask around! Local businesses are usually happy to get rid of unwanted pallets. Check online classifieds as well.
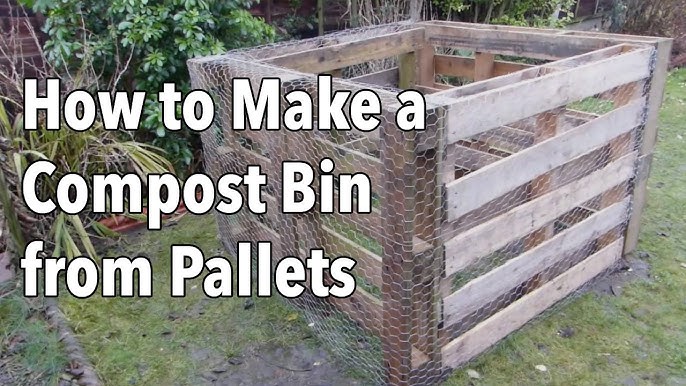
- Hardware Cloth: If you don't have hardware cloth, you can use chicken wire as a less expensive alternative.
Step-by-Step Instructions: Building Your Pallet Compost Bin
Okay Sarah, let's get building! Here are the detailed instructions. Don't worry, it's easier than it looks!
Step 1: Preparing the Pallets
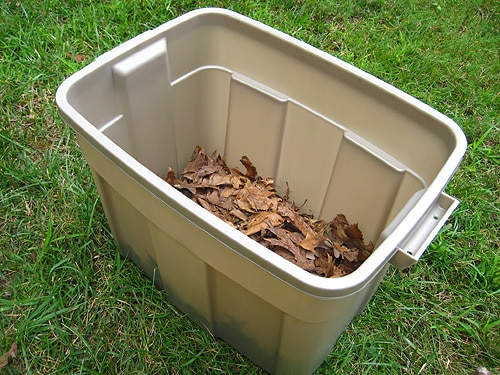
- Lay out your pallets and inspect them for any loose nails or splintered wood. Remove or hammer down any hazards.
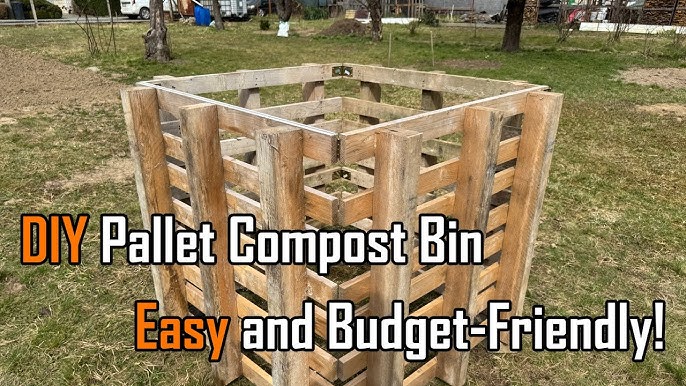
- Decide on the size of your compost bin. A good starting point is a 3-sided bin, using 3 pallets. For a larger bin, use 4 or more pallets, creating multiple sections.
Step 2: Assembling the Frame
- Stand two pallets upright, side by side. These will be the sides of your bin.
- Place a third pallet between them, forming the back of the bin.
- Secure the pallets together. You can use screws, nails, or even heavy-duty zip ties. If using screws, pre-drill pilot holes to prevent the wood from splitting.
Step 3: Adding a Front (Optional but Recommended)
- For easy access to your compost, you can create a removable front. This can be another pallet that you simply lean against the open side, or you can build a simple gate using scrap wood.
- Another option is to cut a pallet in half to create a lower front for easier access.
Step 4: Lining with Hardware Cloth (Optional)
- If you’re concerned about rodents, now is the time to line the inside of the bin with hardware cloth.
- Cut the hardware cloth to size and staple it to the inside of the pallets using a staple gun.
- Make sure to overlap the edges of the hardware cloth to prevent any gaps.
Step 5: Choosing a Location
- Select a well-drained location for your compost bin. Ideally, it should be in a shady spot to prevent the compost from drying out too quickly.
- Make sure the location is easily accessible with a wheelbarrow or garden cart.
- Place the assembled bin in your chosen location.
Step 6: Start Composting!
- Now for the fun part! Start layering your "browns" (carbon-rich materials like dried leaves, straw, shredded paper) and "greens" (nitrogen-rich materials like kitchen scraps, grass clippings).
- Remember to turn your compost regularly to aerate it and speed up the decomposition process.
Visual Aid: Check out this helpful video demonstrating the pallet compost bin construction process:
Composting 101: The Browns and Greens
Understanding the right balance of "browns" and "greens" is crucial for successful composting.
- Browns (Carbon-Rich): Dried leaves, straw, shredded newspaper (not glossy), cardboard, sawdust (untreated).
- Greens (Nitrogen-Rich): Kitchen scraps (vegetable and fruit peels, coffee grounds), grass clippings, garden waste.
Aim for a ratio of approximately 2:1 or 3:1 browns to greens. Too much green material can make your compost bin smell bad, while too much brown material can slow down the decomposition process.
Troubleshooting Common Problems
- Smelly Compost: This usually indicates too much green material or not enough aeration. Add more browns and turn the compost more frequently.
- Compost is Too Dry: Add water until the compost is damp, like a wrung-out sponge.
- Compost is Not Decomposing: Make sure you have a good balance of browns and greens, and that the compost is moist and aerated. You can also add a compost starter to help kickstart the process.
- Pests: Ensure you bury food scraps well. If rodents are a problem, line the bin with hardware cloth.
Safety First!
- Always wear gloves and safety glasses when working with pallets and tools.
- Be careful when handling pallets, as they can be heavy and have sharp edges.
- Supervise children closely when they are helping with the project.
- Choose heat-treated pallets and avoid those treated with chemicals.
Further Resources
- Your Local County Extension Office: Search for your local extension office for localized advice on composting and gardening.
- EPA Composting Information: Learn more about composting from the EPA.
Related Articles on Better Homes and Harvests:
- Gardening on a Budget: Thrifty Tips for a Bountiful Harvest
- Beginner's Guide to Organic Gardening
- 5 Ways to Reduce Waste on Your Homestead
Call to Action
Ready to turn your kitchen scraps into garden gold, Sarah? Give this DIY Pallet Compost Bin project a try and share your results in the comments below! We'd love to see your creations and hear about your composting journey. What other beginner-friendly homesteading projects would you like to see covered on Better Homes and Harvests? Let us know! Happy composting!
Conclusion
Building a DIY pallet compost bin is a fantastic way for beginner homesteaders to embrace sustainability, reduce waste, and create nutrient-rich compost for their gardens. It's a simple, affordable project that yields significant benefits, contributing to a healthier environment and a more self-sufficient lifestyle. By following these easy steps and troubleshooting tips, you'll be well on your way to transforming your kitchen scraps and yard waste into garden gold. So, grab some pallets, gather your tools, and get composting!
