
Share Your Homesteading Genius: Craft a DIY Guide for Better Homes and Harvests
Have you ever wrestled with a problem on your homestead and thought, "There has to be a better way?" That's exactly how our journey to build a DIY root cellar began. We were tired of watching our hard-earned harvest spoil before its time. Store-bought produce simply lacked the vibrant flavor and nutrient density we knew our garden could provide. We needed a solution for long-term, affordable food storage that didn’t rely on electricity. So, we rolled up our sleeves and got to work! Today, I’m excited to share our step-by-step guide to building a simple, effective root cellar that has transformed our homestead's self-sufficiency. If you're looking for a way to preserve your harvest and embrace a more sustainable lifestyle, you've come to the right place.

Project: Building a DIY Root Cellar for Food Storage
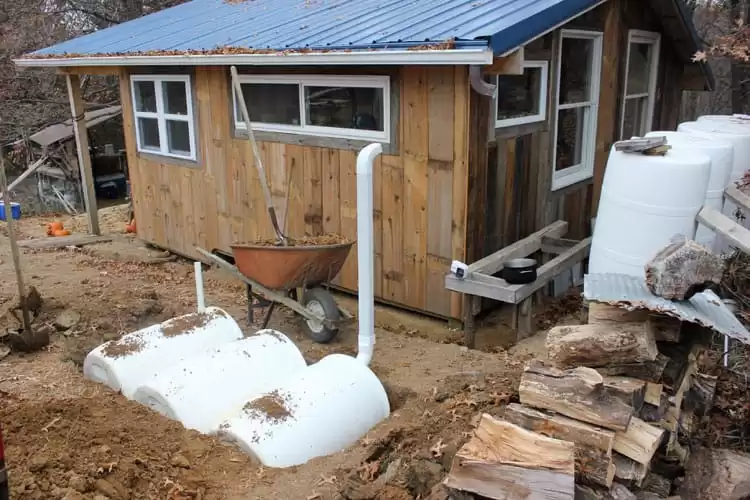
Our project focuses on constructing an in-ground root cellar, perfect for maintaining the cool, humid environment necessary for preserving fruits and vegetables throughout the winter months. This DIY homestead project will dramatically reduce your reliance on grocery stores during the off-season and allow you to enjoy the fruits (and vegetables!) of your labor year-round. This is a great sustainable homesteading DIY project!
Materials and Tools Needed:
Before you begin, gather these essential materials and tools. Estimated cost is approximately $300-$500, depending on reclaimed material availability.
- Concrete Blocks or Cinder Blocks: (approximately 100-150, depending on size) for the walls
- Gravel: For the base and drainage.
- Sand: To level the base.
- Wooden Beams or Metal Roofing: For the roof structure. Reclaimed materials work great here!
- Insulation: Rigid foam insulation boards.
- Moisture Barrier: Heavy-duty plastic sheeting.
- Door: A solid, insulated door.
- Ventilation Pipes: PVC pipes for air circulation.
- Cement Mix: To bind the blocks together.
- Tools: Shovels, wheelbarrow, level, trowel, measuring tape, saw, drill, safety glasses, and gloves.
Step-by-Step Guide to Building Your Root Cellar
Here’s a breakdown of how we constructed our root cellar. Remember to always prioritize safety and wear appropriate protective gear.
Step 1: Site Selection and Preparation
- Choose a Location: Select a well-drained area, ideally on a slight slope, to prevent water accumulation. A north-facing slope is preferable to minimize sun exposure and maintain cooler temperatures.
- Dig the Hole: Excavate a hole to the desired dimensions. We opted for an 8ft x 6ft x 6ft deep rectangular shape, sufficient for our family's needs. Ensure the sides are stable and properly sloped to prevent collapse.
Step 2: Laying the Foundation
- Gravel Base: Add a layer of gravel (about 6 inches deep) to the bottom of the hole for drainage.
- Sand Leveling: Compact a layer of sand over the gravel to create a level surface for the concrete blocks. This ensures the walls are stable and even.
Step 3: Constructing the Walls
- Mortar the Blocks: Mix the cement according to the manufacturer's instructions.
- Lay the First Course: Begin laying the first course of concrete blocks, ensuring they are level and aligned. Use a level frequently to check for accuracy.
- Stagger the Joints: Stagger the joints in subsequent courses to increase the wall's strength.
- Build to Desired Height: Continue laying blocks until you reach the desired wall height (typically around 5-6 feet).
Step 4: Installing Ventilation
- Placement: Install two ventilation pipes – one near the floor and one near the ceiling – to promote air circulation. This prevents moisture buildup and keeps the air fresh.
- PVC Pipes: Use PVC pipes that extend outside the root cellar. Cover the outside openings with mesh to prevent pests from entering.
Step 5: Building the Roof
- Support Structure: Construct a support structure using wooden beams or metal roofing. Ensure the structure is strong enough to support the weight of the soil and any potential snow load.
- Insulation: Cover the support structure with rigid foam insulation boards to maintain a consistent temperature inside the root cellar.
- Moisture Barrier: Apply a heavy-duty plastic sheeting over the insulation to prevent moisture from seeping in.
Step 6: Backfilling and Sealing
- Backfill: Carefully backfill around the walls of the root cellar, compacting the soil to provide support.
- Seal: Ensure all seams and joints are properly sealed to prevent water infiltration.
Step 7: Installing the Door
- Frame: Construct a sturdy frame for the door opening.
- Insulated Door: Install a solid, insulated door to maintain a consistent temperature inside the root cellar.

Step 8: Interior Design and Organization
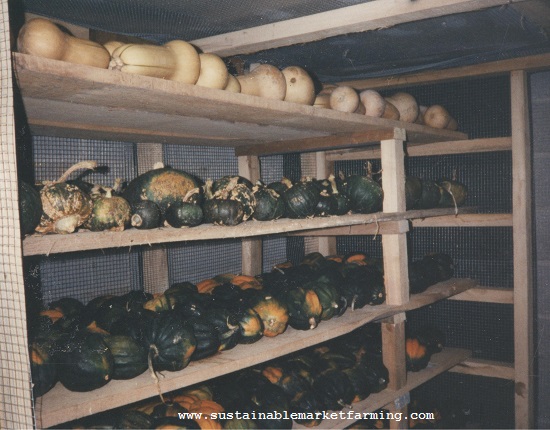
- Shelving: Install shelving to organize your produce. Use wooden planks or wire racks for good air circulation.
- Storage Containers: Utilize crates, baskets, and bins to store different types of fruits and vegetables.
Challenges and Solutions
We encountered a few hurdles during the construction process:
- Water Drainage: Initially, we underestimated the importance of proper drainage. After a heavy rain, water started to seep into the root cellar. We resolved this by adding more gravel around the base and improving the slope of the surrounding land.
- Temperature Fluctuations: Maintaining a consistent temperature proved challenging. We added an extra layer of insulation to the roof and door to minimize temperature fluctuations.
Benefits of Our DIY Root Cellar
Since completing our root cellar, we've experienced numerous benefits:
- Extended Harvest: We can now enjoy our homegrown produce well into the winter months, reducing our reliance on store-bought items.
- Cost Savings: We've significantly reduced our grocery bills by preserving our harvest.
- Improved Food Quality: Our stored produce retains its flavor and nutritional value, providing us with healthier meals.
- Increased Self-Sufficiency: Building the root cellar has empowered us to become more self-reliant and sustainable homesteaders.
Connect with the Community
We encourage you to try this project on your homestead! Share your results and any tips or variations you discover in the comments below. If you found this guide helpful, please share it with other homesteaders. What are some of your favorite food preservation techniques? What challenges have you faced in extending your harvest? We'd love to hear your stories and learn from your experiences. Let's build a more sustainable future together!
Keywords and SEO Considerations
Remember to incorporate these keywords naturally throughout your blog post: Homesteading DIY, DIY Homestead Projects, Sustainable Homesteading DIY, Self-Sufficient Homesteading, Homesteading Projects, DIY Homesteading Guide, Homestead Improvement Projects, Off-Grid Living Projects, Sustainable Living DIY, Homesteading Skills, DIY Sustainable Solutions, Simple Homestead Projects, Beginner Homestead Projects, "How to build a root cellar for food storage", Affordable homesteading projects on a budget, Step-by-step guide to building a compost bin, Permaculture, Organic Gardening, Food Preservation, Off Grid, Renewable Energy, Self-Reliance, Home Improvement, Green Living, Sustainable Agriculture, Backyard Homestead, Renewable resources, Aquaponics, "What are the best DIY homesteading projects?", "How can I improve my homestead sustainably?", "How can I become more self-sufficient on my homestead?", "What DIY projects save money on the homestead?", "What are some easy homesteading projects for beginners?".
Conclusion: Your Path to a More Self-Sufficient Homestead
Building a DIY root cellar is a rewarding project that offers tangible benefits for any homesteader. By following these steps, you can create a reliable and affordable food storage solution that enhances your self-sufficiency and sustainability. Embrace the challenge, learn from your experiences, and connect with the community to share your knowledge. Together, we can build better homes and harvests!
Meta Description (150 characters):
Build your own DIY root cellar for affordable, sustainable food storage! Our step-by-step guide helps homesteaders extend their harvest & embrace self-sufficiency.
