
Savoring the Season: Sweet Corn Fritters, Seed Saving, and Sustainable Starts
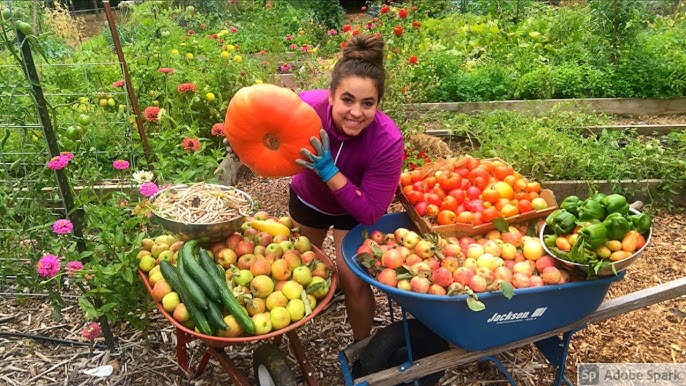
The air hangs thick and sweet with the scent of drying corn stalks, a golden hue painting the fields as summer slowly yields to autumn. Bees hum a final, drowsy tune amongst the last of the blackberry brambles, their fuzzy bodies heavy with nectar. It’s a time of abundance, a moment to pause and appreciate the fruits of our labor, and a subtle call to prepare for the quieter months ahead. We find ourselves wanting to bottle this warmth, this richness, to hold onto the sunshine just a little bit longer. One of the best ways to do that is to bring the harvest into our kitchens and gardens, transforming it into something delicious and enduring.
Today, we'll explore a trio of homesteading joys: creating DIY seed tape for extending the growing season, indulging in a batch of sweet corn fritters drizzled with homemade blackberry lavender syrup, and laying the foundation for next year's bounty with a hugelkultur raised garden bed. These are simple acts of self-sufficiency, small steps towards a more connected and sustainable life.

Section 1: Sweet Corn Fritters with Blackberry Lavender Syrup
Subheading: The Taste of Late Summer Sunshine
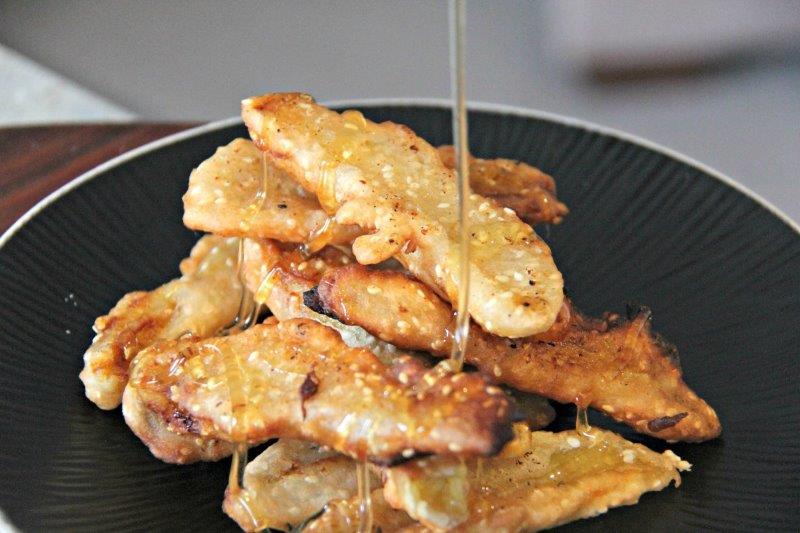
I remember the first year we planted sweet corn. The anticipation was almost unbearable. Each day, we'd check the stalks, watching as the silky tassels turned brown, signaling that the ears were almost ready. The moment we finally peeled back the husks and saw those perfect rows of plump, juicy kernels was pure magic. Now, the yearly harvest is a tradition – a celebration of the land's generosity and the simple pleasure of homegrown food. And what better way to celebrate than with these delightful sweet corn fritters? The blackberries, too, are a cherished summer bounty, yielding gallons of delicious juice and preserves.

Subheading: Ingredients
Sweet Corn Fritters:
- 2 cups fresh sweet corn kernels (cut from about 4-5 ears)
- 1 cup all-purpose flour
- 1 tsp baking powder
- 1 tbsp sugar
- 1/2 tsp salt
- 1 large egg
- 1/2 cup milk
- 2 tbsp melted butter
Blackberry Lavender Syrup:
- 1 cup fresh blackberries
- 1/2 cup water
- 1/2 cup sugar
- 1 tsp dried lavender buds (culinary grade)
Subheading: Instructions
Prepare the Fritters: In a large bowl, whisk together the flour, baking powder, sugar, and salt. In a separate bowl, whisk the egg, milk, and melted butter. Add the wet ingredients to the dry ingredients and stir until just combined. Be careful not to overmix; a few lumps are perfectly fine. Gently fold in the corn kernels.
Cook the Fritters: Heat a lightly oiled griddle or frying pan over medium heat. Drop spoonfuls of batter onto the hot surface, creating small, round fritters. Cook for 2-3 minutes per side, or until the fritters are golden brown and crispy around the edges.
Make the Syrup: While the fritters are cooking, combine blackberries, water, and sugar in a small saucepan. Bring to a simmer over medium heat, crushing the berries gently with a spoon to release their juices. Simmer for 10 minutes, stirring occasionally.
Infuse the Syrup: Stir in the dried lavender buds and simmer for another minute. Remove from heat and let the syrup steep for 5 minutes to allow the lavender flavor to infuse.
Strain the Syrup: Strain the syrup through a fine-mesh sieve to remove the blackberry seeds and lavender buds, leaving you with a smooth, jewel-toned syrup.
Serve: Drizzle the warm blackberry lavender syrup generously over the sweet corn fritters. Serve immediately and enjoy the taste of late summer sunshine!
Tip: Adjust the sweetness of the syrup to your liking by adding more or less sugar. You can also substitute other berries, such as raspberries or blueberries, for the blackberries.
Section 2: Building a Hugelkultur Raised Garden Bed
Subheading: A Sustainable Start: Building a Hugelkultur Bed
As we savor the last tastes of summer, our thoughts naturally turn to planning for the future. Building a hugelkultur raised garden bed is a fantastic way to prepare for next year's growing season in a sustainable and eco-friendly manner. Hugelkultur (German for "mound culture") is a gardening technique that mimics natural forest decomposition, creating a self-sustaining ecosystem right in your backyard.
The benefits of a hugelkultur bed are numerous. The decomposing wood acts like a sponge, providing excellent water retention, which is especially helpful during dry spells. As the wood breaks down, it slowly releases nutrients into the soil, enriching it over time. Plus, hugelkultur beds require less tilling and watering than traditional garden beds, making them a low-maintenance option for the busy homesteader.
Subheading: Materials
- Logs (rotting or partially rotten are ideal)
- Branches
- Twigs
- Leaves (especially autumn leaves)
- Grass clippings
- Compost
- Soil
- Garden fabric (optional, for weed suppression)
Subheading: Step-by-Step Instructions
Choose a Location: Select a sunny location in your garden where you want to build your hugelkultur bed.
Dig a Trench: Dig a shallow trench, about 1-2 feet deep, in the area you've chosen.
Layer the Logs: Fill the trench with logs and branches, layering larger pieces at the bottom. The more decomposed the wood, the better.
Add Organic Matter: Cover the logs and branches with twigs, leaves, grass clippings, and compost. This layer will provide additional nutrients and help retain moisture.
Top with Soil: Top the entire bed with soil, creating a raised bed effect. The bed should be mounded, resembling a gently sloping hill.
Water Thoroughly: Water the bed thoroughly to help settle the materials and initiate the decomposition process.
Optional Weed Suppression: If desired, cover the bed with garden fabric to suppress weeds before planting.
Tip: Source materials from your own property or from local tree trimming services. Avoid using treated wood, as it can leach harmful chemicals into the soil.

Section 3: DIY Seed Tape: Saving Seeds for Next Season
Subheading: Extend the Harvest: Making DIY Seed Tape
As the growing season winds down, it's the perfect time to start saving seeds for next year. But planting those tiny seeds can be a challenge, especially when it comes to achieving even spacing. That's where DIY seed tape comes in! Making your own seed tape is a simple and effective way to ensure easy planting, even spacing, and reduced thinning, ultimately extending the harvest and maximizing your yields.
Subheading: Materials
- Dried seeds (saved from your own garden or purchased from a reputable source)
- Strips of paper towel or newspaper (cut into 1-inch wide strips)
- Flour and water paste (or cornstarch paste): Mix 1 tablespoon of flour (or cornstarch) with 2 tablespoons of cold water. Heat over low heat, stirring constantly, until the mixture thickens into a smooth paste. Let cool completely.
- Small brush or toothpick
Subheading: Instructions
Prepare the Paste: Mix flour and water to create a thin paste.
Cut Paper Strips: Cut paper towels or newspaper into strips about 1 inch wide.
Apply Paste Dots: Place small dots of paste along the strips, spacing them according to the recommended planting distance for the seeds you're using. You can find this information on the seed packet or online.
Place the Seeds: Carefully place one or two seeds onto each paste dot.
Allow to Dry: Allow the seed tape to dry completely. This may take several hours or overnight.
Store Properly: Once dry, store the seed tape in a cool, dry place until you're ready to plant.
Tip: Use a fine-tipped brush or toothpick to apply the paste and position the seeds accurately. For very small seeds, like lettuce or carrots, you may need to use a magnifying glass.
Closing Reflection
As the days grow shorter and the nights grow cooler, it's easy to feel a sense of melancholy, a longing for the warmth and vibrancy of summer. But late summer is also a time of incredible opportunity, a chance to harvest the fruits of our labor, prepare for the coming year, and embrace the slow rhythms of homesteading.
Whether you're whipping up a batch of sweet corn fritters with blackberry lavender syrup, building a hugelkultur raised garden bed, or crafting DIY seed tape, remember that even small steps towards self-sufficiency can make a big difference. These are acts of connection – connection to the land, to our food, and to a more sustainable way of life.
So, take a moment to savor the season, to appreciate the abundance around you, and to find joy in the simple acts of creating and preparing. And be sure to share your own experiences with seed saving, hugelkultur beds, and late summer recipes in the comments below! We’d love to hear from you. Embrace the cozy living and enjoy all that farmhouse life has to offer! These backyard projects will contribute to a more sustainable home.