Savor September: 5 Simple Ways to Preserve Your Late-Summer Garden's Bounty (Before the Frost Hits!)
Ah, September. The air is crisp, the sun still warm on your face, and your garden…well, your garden is bursting with the last hurrah of summer’s bounty. The scent of ripe tomatoes hangs heavy in the air, bees buzz lazily around the last of the blossoms, and you can almost taste the sunshine in every perfectly formed pepper. But with the sweet joy of harvest comes a touch of bittersweetness. The days are getting shorter, and that first frost is lurking just around the corner. Don't let your hard work go to waste! Discover 5 simple ways to savor the flavors of September all winter long.

Quick & Easy Freezing for Busy Gardeners
Let’s be honest, sometimes life gets in the way of elaborate preserving projects. That's where freezing comes to the rescue. It's the perfect option for busy gardeners who want to capture the fresh flavors of their harvest without spending hours in the kitchen.
Here's how to do it:
- Wash and prep: Thoroughly wash your vegetables and cut them into the desired size.
- Blanch (optional but recommended): Blanching helps preserve color, texture, and nutrients. Simply plunge your vegetables into boiling water for a short time (e.g., 2-3 minutes for green beans, 1 minute for spinach), then immediately transfer them to an ice bath to stop the cooking process.
- Dry: Pat the blanched vegetables dry with a clean towel.
- Flash freeze: Spread the vegetables in a single layer on a baking sheet lined with parchment paper. Freeze for 1-2 hours, or until solid. This prevents clumping.
- Transfer to freezer bags: Transfer the frozen vegetables to freezer bags or containers, removing as much air as possible to prevent freezer burn. Label with the date and contents.
September is a great time to freeze green beans, sweet corn, peas, spinach, kale, and zucchini. My grandmother always froze her extra zucchini in shredded form, perfect for adding to breads and muffins throughout the winter.
Sun-Dried Tomato Magic
Capture the intense, concentrated flavor of summer tomatoes with this simple method. Sun-dried tomatoes add a burst of sunshine to pasta dishes, salads, and appetizers. While a dehydrator can speed up the process, you can easily achieve delicious results using your oven.
Here's the method:
- Choose the right tomatoes: Roma or plum tomatoes are ideal due to their meaty texture and low water content.
- Prepare the tomatoes: Wash the tomatoes and cut them in half or quarters, depending on their size. Remove the seeds.
- Season (optional): Arrange the tomatoes on a baking sheet lined with parchment paper. Sprinkle with salt, pepper, herbs (such as oregano or thyme), and a drizzle of olive oil.
- Slow bake: Bake at a low temperature (around 200°F or 95°C) for 6-8 hours, or until the tomatoes are shriveled and leathery but still slightly pliable.
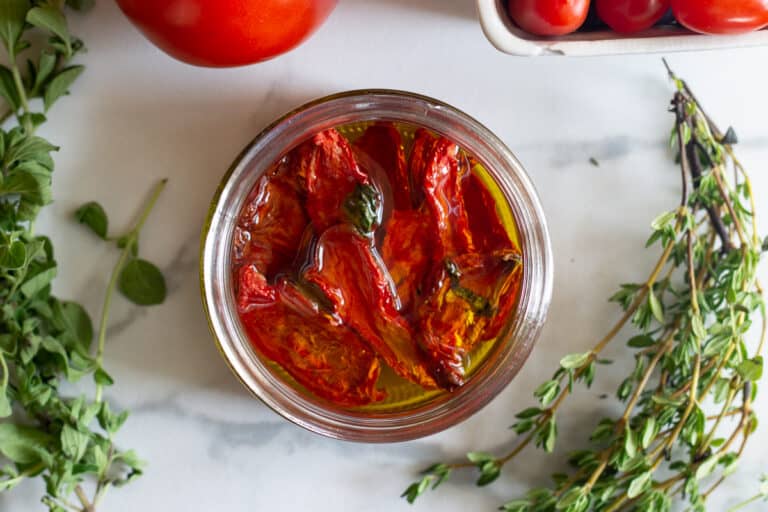
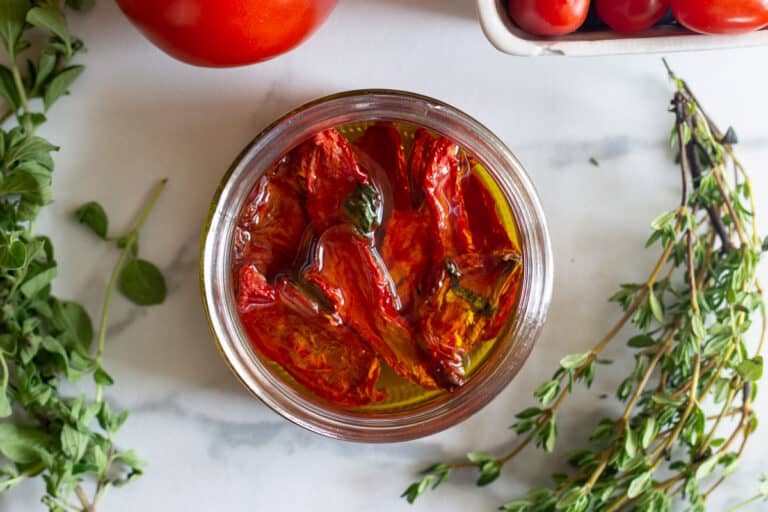
- Cool and store: Let the tomatoes cool completely. Store them in an airtight container in the refrigerator, or pack them in olive oil for extra flavor and preservation.

I remember the first time I made sun-dried tomatoes. I was amazed at how much the flavor intensified! Now, I always make a big batch in September to enjoy throughout the year.
Herb-Infused Oils for Flavor-Packed Cooking
Elevate your cooking with the vibrant flavors of your garden herbs. Herb-infused oils are incredibly versatile and add a gourmet touch to everything from salad dressings to grilled meats.
Here’s a simple guide:
- Choose your herbs: Basil, rosemary, thyme, oregano, and garlic are all excellent choices. Make sure your herbs are completely dry to prevent spoilage.
- Prepare the herbs: Gently crush the herbs to release their oils.
- Combine with oil: Place the herbs in a clean glass jar and cover them with high-quality olive oil.
- Infuse: Seal the jar and let it sit in a cool, dark place for 2-4 weeks, shaking it occasionally.
- Strain and store: Strain the oil through a fine-mesh sieve or cheesecloth to remove the herbs. Store the infused oil in a clean, airtight container in the refrigerator.
In September, my basil plant is always overflowing, so I make a big batch of basil-infused oil to use in pesto and Caprese salads all winter long. The taste of fresh basil in January is a little piece of summer magic.
The Art of Small-Batch Jams & Jellies (No Special Equipment Needed!)
There's something incredibly comforting about a jar of homemade jam or jelly. And you don’t need fancy equipment to get started! Small-batch recipes are perfect for using up smaller quantities of fruit from your garden.
Basic Jam Instructions:
- Choose your fruit: Berries, peaches, plums, and apples are all great choices for September jams.
- Prepare the fruit: Wash, hull, and chop the fruit.
- Combine ingredients: In a large pot, combine the fruit with sugar (usually equal parts fruit and sugar, but adjust to taste), and a squeeze of lemon juice (the lemon juice helps with pectin activation, which helps the jam set).
- Cook the jam: Bring the mixture to a boil over medium-high heat, stirring constantly to prevent sticking.
- Test for doneness: To test if the jam is ready, place a small spoonful on a chilled plate. If it wrinkles when you push it with your finger, it’s ready.
- Ladle into jars: Ladle the hot jam into sterilized jars, leaving about 1/4 inch of headspace.
- Process (optional): For longer shelf life, process the jars in a boiling water bath for the recommended time (usually 10-15 minutes, depending on your altitude and the type of jam). However, if you're making a small batch and plan to store it in the refrigerator, this step is not necessary.
My favorite September jam is made with late-season raspberries and a hint of vanilla. The aroma alone fills the kitchen with warmth and happiness!
Pickled Peppers: A Spicy Kick for Winter Meals
Add some zest to your winter meals with pickled peppers! This is a fantastic way to preserve those late-season peppers that are bursting with flavor.
Here’s how to pickle:
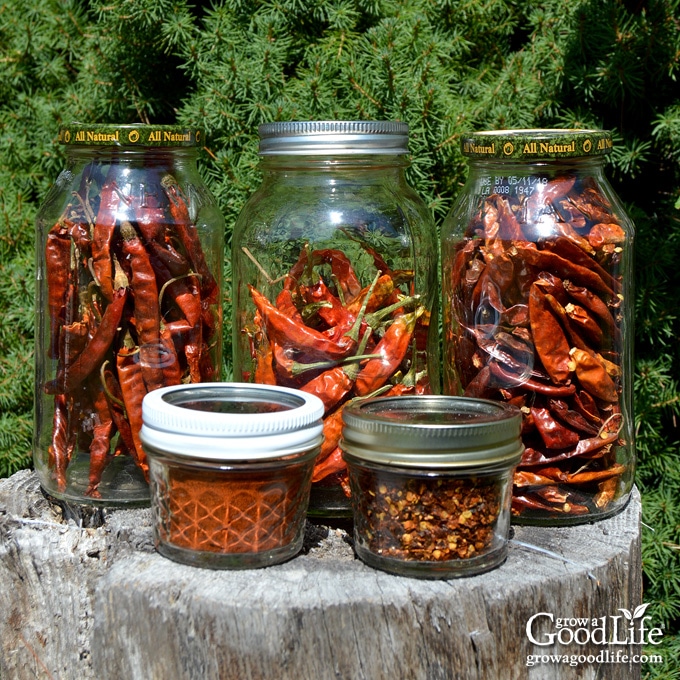
- Choose your peppers: Jalapeños, banana peppers, bell peppers, and poblano peppers all work well.
- Prepare the peppers: Wash the peppers and cut them into rings or leave them whole.
- Make the brine: In a large pot, combine vinegar (white or apple cider vinegar), water, salt, sugar, and spices (such as garlic, peppercorns, and mustard seeds). Bring to a boil.
- Pack the peppers: Pack the peppers into sterilized jars, leaving about 1/2 inch of headspace.
- Pour in the brine: Pour the hot brine over the peppers, leaving about 1/2 inch of headspace.
- Process (optional): Process the jars in a boiling water bath for the recommended time (usually 10-15 minutes, depending on your altitude and the type of pepper). However, if you're making a refrigerator pickle, this step is not necessary.

I love adding pickled jalapeños to tacos, pizzas, and even scrambled eggs for a spicy kick. It's like a little taste of summer heat in the middle of winter!
Actionable Tips for Preservation Success
- Freeze herbs in ice cube trays: Chop fresh herbs and pack them into ice cube trays. Cover with water or olive oil and freeze. Once frozen, transfer the cubes to a freezer bag for easy use in soups, stews, and sauces.
- Store dried tomatoes in olive oil: This not only adds flavor but also helps to soften the tomatoes.
- Use a candy thermometer for jam-making: This will help you accurately determine when your jam has reached the setting point.
- Make refrigerator pickles for a quick and easy option: These pickles don't require processing and can be stored in the refrigerator for several weeks. They have a slightly softer texture than traditionally canned pickles.
- Use your preserved tomatoes in homemade tomato sauce: My favorite winter comfort food is a big pot of homemade tomato sauce made with my preserved tomatoes and herbs.
If you're looking for inspiration, try using your sun-dried tomatoes in a delicious pesto, your herb-infused oil to roast vegetables, and your pickled peppers to top nachos! And be sure to check out our post on Seed Saving for Beginners so you're ready for next year's garden!
Closing Reflection
Preserving your garden's bounty is more than just a way to stock your pantry; it's a way to capture the warmth and flavor of summer, bringing joy to your table all winter long. It's a connection to the earth, to your hard work, and to the simple pleasures of homemade food.
What are your favorite ways to preserve your garden's harvest? Share your tips in the comments below! And don't forget to start your fall cover crops soon!