Rustic Pear Crisp with Maple Oat Topping: A Cozy Harvest Dessert
Do you find yourself with an abundance of pears after a fruitful harvest? Are you searching for a warm, comforting dessert that celebrates the flavors of autumn without spending all day in the kitchen? This rustic pear crisp, baked right in your cast iron skillet and topped with a sweet maple oat crumble, is the answer! It's the perfect way to enjoy the bounty of the season and warm up those chilly evenings.

Alt text: A rustic basket filled with apples and colorful autumn leaves evokes the spirit of the harvest season and the inspiration behind this pear crisp recipe.
Every year, our pear tree explodes with more fruit than we can possibly eat fresh. While we love canning them and making pear butter, sometimes we crave something simpler, something that highlights the pears' natural sweetness and warming spices. This year, instead of hours spent on elaborate pies, we opted for this incredibly easy and satisfying crisp. It’s become a family favorite, and I’m so excited to share it with you.
Why You’ll Love This Recipe
This pear crisp isn’t just delicious; it’s also incredibly practical and aligns perfectly with our homesteading values. Here's why you'll love it:
- Uses Up Your Harvest: It's a fantastic way to use up those extra pears (or apples, or any other fall fruit!).
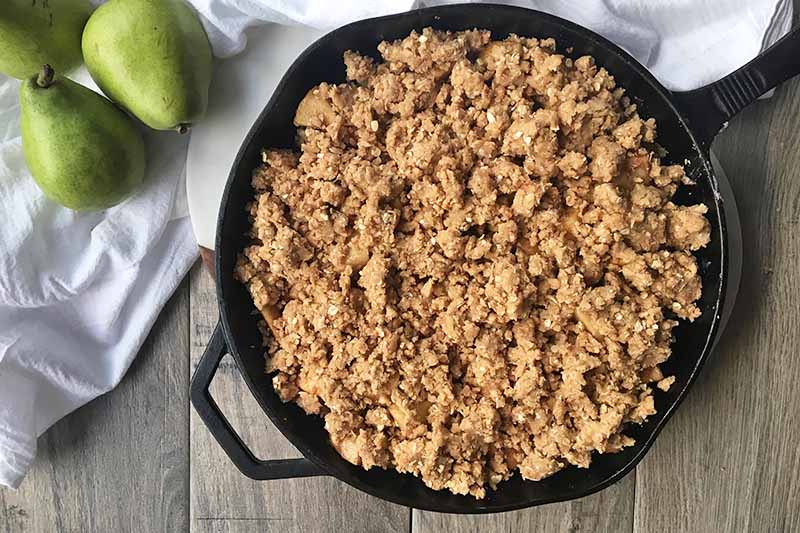
- One-Skillet Wonder: Baking in a cast iron skillet minimizes cleanup and adds a beautiful rustic touch.
- Pantry-Friendly: Most of the ingredients are likely already in your pantry.
- Naturally Sweetened (Mostly!): We use maple syrup and just a touch of brown sugar for a naturally sweet and warm flavor.
- Customizable: Easily adapt the spices and topping to your liking.
- Dietary Considerations: The recipe can be made gluten-free by using gluten-free oats and all-purpose gluten-free flour blend.
This recipe truly embodies the spirit of from-scratch cooking. It's about embracing simple ingredients, minimizing waste, and creating something truly special with your own two hands.
Ingredients List
Here’s what you’ll need to create this delightful pear crisp. Don't be afraid to make substitutions based on what you have available!
For the Pear Filling:
- 6-8 medium pears (such as Bartlett or Bosc), peeled, cored, and sliced
- 2 tablespoons lemon juice (helps prevent browning)
- 1/4 cup maple syrup (for a less sweet crisp, use half honey, half maple syrup)
- 2 tablespoons all-purpose flour (or gluten-free blend)
- 1 teaspoon ground cinnamon
- 1/2 teaspoon ground ginger
- 1/4 teaspoon ground nutmeg
- Pinch of salt
For the Maple Oat Topping:
- 1 cup rolled oats (use gluten-free oats for a gluten-free crisp)
- 1/2 cup all-purpose flour (or gluten-free blend)
- 1/2 cup packed light brown sugar
- 1/4 teaspoon salt
- 1/2 cup cold unsalted butter, cut into small cubes (for dairy-free, use a vegan butter alternative)
- 1/4 cup maple syrup

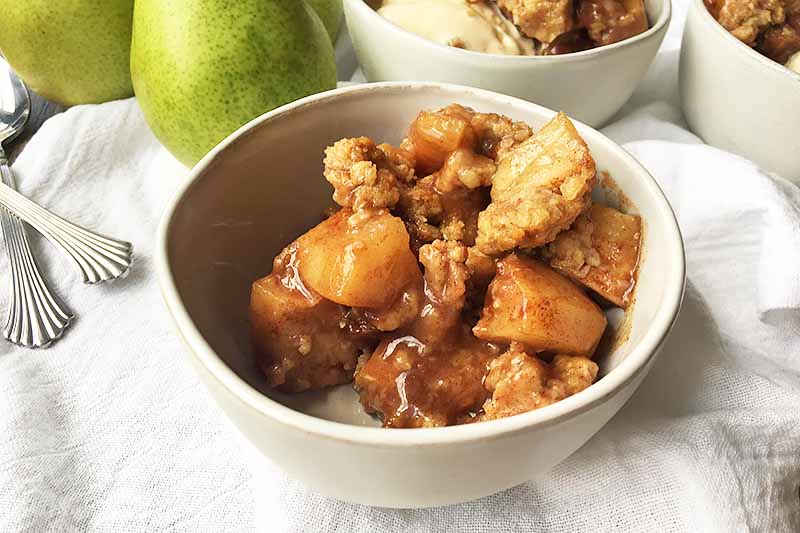
Alt text: A close-up shot of the finished pear crisp with a golden-brown, crunchy oat topping showcases the inviting texture and delicious look of the dessert.
Garden-Grown Goodness: If you grow your own pears, even better! Freshly harvested pears will bring an extra layer of flavor to this crisp. If you have access to a local orchard or farmer's market, that's a great alternative!
Step-by-Step Instructions
Ready to bake? Follow these easy steps:
- Prep the Pears: Preheat your oven to 375°F (190°C). In a large bowl, combine the sliced pears with lemon juice, maple syrup, flour, cinnamon, ginger, nutmeg, and salt. Toss gently to coat.
- Assemble the Filling: Transfer the pear mixture to a 10-inch cast iron skillet (or a similar-sized baking dish). Distribute the pears evenly in the skillet.
- Make the Oat Topping: In a separate bowl, combine the rolled oats, flour, brown sugar, and salt. Add the cold butter cubes and use a pastry blender or your fingertips to cut the butter into the dry ingredients until the mixture resembles coarse crumbs. Drizzle the maple syrup over the crumb mixture and toss lightly to combine.
- Top the Crisp: Sprinkle the oat topping evenly over the pear filling.
- Bake: Bake for 35-40 minutes, or until the topping is golden brown and the pear filling is bubbly. If the topping starts to brown too quickly, tent the skillet with foil.
- Cool and Enjoy: Let the crisp cool slightly before slicing to prevent it from crumbling. This allows the filling to set up a bit.
Waste Reduction Tip: Save your pear cores and peels to make homemade pear cider vinegar! It's a fantastic way to reduce food waste and create a delicious, tangy ingredient for salad dressings and marinades.
Serving Suggestions
Serve this rustic pear crisp warm for the ultimate comfort food experience. Here are a few ideas:
- Homemade Accompaniments: Top with a dollop of homemade whipped cream, vanilla ice cream, or Greek yogurt.
- Seasonal Pairings: Enjoy it alongside a warm mug of spiced apple cider or a cup of herbal tea.
- Potluck Perfection: This crisp is a guaranteed crowd-pleaser at autumn gatherings and potlucks.
- Breakfast Treat: Serve a small portion for breakfast with a sprinkle of toasted nuts.

Alt text: A pear crisp baked in a casserole dish provides a visual alternative to the cast iron skillet, highlighting recipe adaptability. Notice the topping looks just as tasty!
Closing
This rustic pear crisp is more than just a dessert; it's a celebration of the season, a reminder of the simple pleasures of home cooking, and a way to connect with the earth's bounty. I encourage you to experiment with different spices, fruits, and toppings to create your own unique version of this classic dessert.
What are your favorite ways to use up autumn's harvest? Share your variations of this recipe in the comments below! Happy baking, and happy harvesting! Don't forget to subscribe to Better Homes and Harvests for more seasonal recipes, homesteading tips, and sustainable living inspiration.