Root Cellar on a Budget: A DIY Guide to Winter Food Security
[VISUAL: overflowing garden basket variety vegetables]
Remember that summer afternoon, the sun warm on your back as you harvested the last of your tomatoes, their juicy sweetness a promise of delicious meals to come? The zucchini plant, practically overflowing, threatened to take over the entire garden. But what happens when the first frost hits, and that bounty starts to dwindle? Do you resign yourself to expensive, bland supermarket produce, or rely solely on the hum of the freezer and the clink of mason jars?
For generations, homesteaders have relied on a simpler, more natural way to preserve the fruits (and vegetables!) of their labor: the root cellar. A root cellar isn't just a dark, damp hole in the ground; it's a carefully controlled environment designed to keep your produce fresh and delicious for months. And the best part? It can be built on a budget, saving you money on electricity and preserving the vital nutrients and flavors that are often lost in modern preservation methods.
In this guide, we'll walk you through building your own small, efficient root cellar, perfect for the beginner-to-intermediate homesteader looking to extend the harvest season and achieve greater food security. We'll cover everything from planning and design to construction and storage, all with an eye toward affordability and ease of implementation. Get ready to ditch the processed foods and rediscover the joy of fresh, homegrown produce all winter long!
Section 1: Planning & Design Considerations
[VISUAL: hand-drawn root cellar blueprint notepad]
Before you even pick up a shovel, careful planning is essential. A well-designed root cellar is not just an afterthought; it's an integral part of your homestead's food preservation strategy.
Location, Location, Location: The ideal location for a root cellar is a north-facing slope. This helps maintain a consistently cool temperature by minimizing direct sunlight exposure. The soil should be well-drained to prevent water from seeping into the cellar. Avoid low-lying areas that are prone to flooding. Consider how accessible the root cellar will be from your house and garden, especially during the winter months. No one wants to trek through a blizzard to retrieve a carrot!
Size & Capacity: How much produce do you need to store? Estimate your garden's yield and your family's consumption habits. It's better to start small and expandable than to build a massive structure that goes largely unused. A root cellar that’s 6ft x 8ft can store a significant amount of food for a family of four.
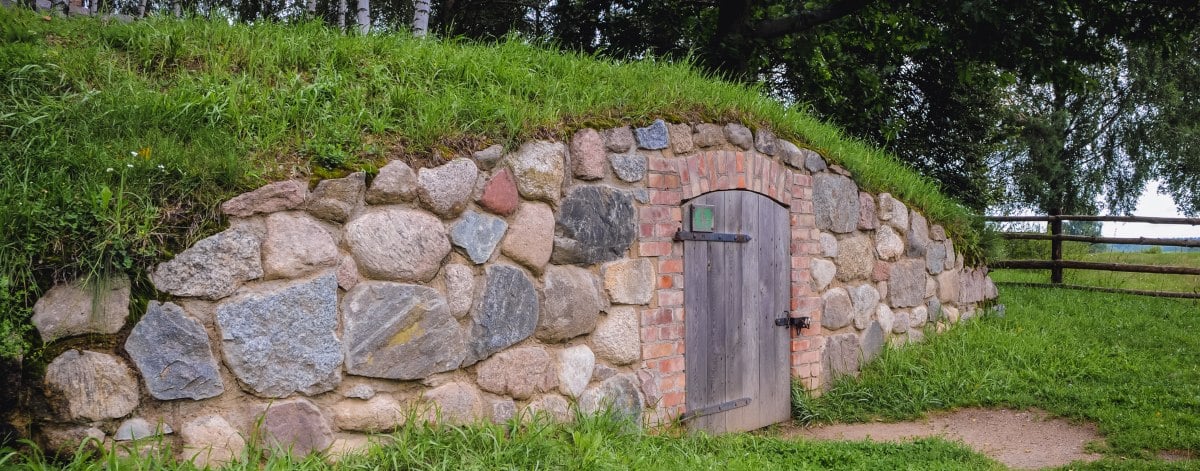
Types of Root Cellars: There are various types of root cellars, from fully in-ground designs to walk-in cellars and even modifications to existing structures like under-porch areas. For beginners, a simple, partially buried design is often the most accessible and cost-effective. This involves excavating part of the cellar into the ground and building the remaining structure above ground, mounding earth against the walls for insulation.
Ventilation & Humidity: Proper ventilation is crucial for preventing mold and maintaining air circulation. You'll need two ventilation pipes: one placed high in the wall to exhaust warm, moist air, and another placed low to draw in cool, fresh air. Humidity control is also vital. The ideal temperature for most root crops is between 32°F and 40°F, with a humidity level of 80-90%.
Material Selection: Opt for readily available, affordable, and durable materials. Concrete blocks are a good choice for the walls due to their strength and insulating properties. Treated lumber can be used for framing the roof and door. Gravel is essential for drainage. Consider repurposing materials like old bricks or concrete blocks to save money.
Key Takeaways: Careful planning ensures your root cellar is appropriately sized, located, and designed for optimal food preservation.
[VISUAL: cross-section diagram root cellar showing ventilation]
Section 2: Gathering Materials & Tools
[VISUAL: neatly organized tools building supplies wheelbarrow]
Before you start digging, get organized! Proper preparation and organization of materials will make the building process smoother and minimize delays.
Detailed Materials List: Create a comprehensive list of all the materials you'll need, including quantities and estimated costs. Here's a sample list:
- Concrete blocks (quantity depends on size of cellar)
- Treated lumber (for framing the roof and door)
- Gravel (for drainage)
- Insulation (rigid foam board or fiberglass)
- Waterproof roofing material (e.g., asphalt shingles)
- Ventilation pipes (PVC or metal)
- Mesh screen (to cover ventilation pipes)
- Door hardware (hinges, latch)
- Concrete mix (if pouring a concrete slab)
- Fasteners (nails, screws)
Necessary Tools:
- Shovel
- Level
- Measuring tape
- Saw
- Drill
- Concrete mixer (optional but highly recommended for larger projects)
- Safety glasses
- Gloves
Sourcing Materials on a Budget:
- Local Hardware Stores: Check for sales, discounts, and closeout items.
- Online Marketplaces: Explore online marketplaces like Craigslist or Facebook Marketplace for used building materials.
- Repurposing: Look for opportunities to repurpose old lumber, bricks, or concrete blocks from demolition sites or salvage yards.
Safety First: Always wear appropriate safety gear when working with tools and materials.
Key Takeaways: Proper preparation and organization of materials will streamline the building process and minimize delays.
[VISUAL: detailed shopping list different materials]
Section 3: Step-by-Step Construction Guide
[VISUAL: constructing root cellar concrete blocks level]
Now for the fun part: building your root cellar! Follow these steps carefully for a structurally sound and effective result.
Step 1: Excavation: Clear the site and excavate the area to the desired depth. Ensure proper drainage and sloping away from the cellar. The depth will depend on your local climate and desired insulation. A good starting point is to dig down 3-4 feet.
Step 2: Foundation: Lay a gravel base (at least 6 inches thick) for drainage. Pour a concrete slab or use concrete blocks for the foundation. Ensure it's level and sturdy. A level foundation is crucial for the stability of the walls.
Step 3: Walls: Build the walls using concrete blocks, treated lumber, or a combination of materials. Stagger the joints between blocks or boards for added strength. Incorporate ventilation pipes into the walls, positioning one high and one low.
Step 4: Roof: Construct a sturdy roof using treated lumber. The roof should be angled to allow for water runoff. Cover the roof with waterproof roofing material like asphalt shingles or a waterproof membrane. Insulate the roof with rigid foam board or fiberglass insulation. For added insulation and a natural look, consider an earthen roof, covering the roof with a layer of soil and planting grass or other vegetation.
Step 5: Door & Entrance: Build a secure, insulated door to prevent temperature fluctuations. The door should fit snugly to minimize air leaks. Create a ramp or steps for easy access.
Step 6: Interior Shelving & Storage: Build shelves using untreated lumber or repurpose old pallets. Optimize space with different shelf heights and depths. Consider using crates, boxes, or baskets for storage.
Key Takeaways: Meticulous execution of each step is crucial for creating a structurally sound and effective root cellar.
[VISUAL: several step-by-step photos during construction]
Section 4: Ventilation & Humidity Control
[VISUAL: ventilation pipe covered mesh preventing critters]
Maintaining the right temperature and humidity levels is key to successful food storage.
Ventilation: As mentioned earlier, you need two ventilation pipes: one high and one low. This creates a natural convection current, drawing in cool air and exhausting warm, moist air. Cover the ends of the pipes with mesh to prevent rodents and insects from entering.
Humidity Management:
- Increase Humidity: If the cellar is too dry, you can increase humidity by adding a damp sand or gravel floor, placing trays of water inside, or spraying the walls with water.
- Decrease Humidity: If the cellar is too humid, increase ventilation or use absorbent materials like straw or wood shavings to soak up excess moisture.
Monitoring Temperature & Humidity: Use a thermometer and hygrometer to monitor conditions inside the cellar. Make adjustments to ventilation as needed to maintain the ideal temperature and humidity levels.
Seasonal Adjustments: Adjust ventilation based on the season. In the winter, you may need to reduce ventilation to prevent the cellar from getting too cold. In the spring and fall, increase ventilation to remove excess moisture.
Key Takeaways: Effective ventilation and humidity control are essential for preventing spoilage and prolonging the storage life of your produce.
[VISUAL: close-up view hygrometer thermometer inside root cellar]
Section 5: Storing Your Harvest
[VISUAL: various fruits vegetables root cellar shelves]
Now that you've built your root cellar, it's time to fill it with your harvest!
Preparation & Sorting: Select only unblemished, disease-free produce for storage. Gently clean off any dirt without washing the produce, as washing can promote spoilage.
Optimal Storage Conditions: Different fruits and vegetables require different storage conditions.
- Root Crops (e.g., potatoes, carrots, beets): Store in bins or crates covered with sand or straw to maintain humidity.
- Apples: Store in single layers in crates or boxes, away from potatoes (as potatoes can cause apples to ripen too quickly).
- Onions & Garlic: Store in mesh bags or crates in a dry, well-ventilated area.
- Winter Squash: Store in a dry, cool place on shelves or pallets.
Storage Methods: Use crates, boxes, baskets, or hanging storage to optimize space and provide adequate ventilation.
Regular Inspection: Regularly check your produce for signs of spoilage. Remove any damaged items immediately to prevent the spread of mold or rot.
Key Takeaways: Proper preparation and storage techniques will maximize the shelf life of your harvest and ensure a bountiful winter.
[VISUAL: chart storage tips specific fruits vegetables]
Section 6: Your Sustainable Underground Pantry
[VISUAL: well-stocked root cellar dim lighting]
Building a root cellar is more than just a DIY project; it's an investment in your homestead's sustainability and food security. You've not only reduced your reliance on electricity and expensive store-bought produce but also taken a significant step towards self-sufficiency and resilience. The satisfaction of harvesting your own food and storing it naturally for the winter months is a reward in itself. And the knowledge that you're preserving nutrients and flavors in a way that's both cost-effective and environmentally friendly makes the effort all the more worthwhile.
Remember, building a root cellar doesn't have to be a daunting task. With careful planning, readily available materials, and a little elbow grease, you can create a functional and affordable storage space that will provide you with fresh, homegrown produce all winter long.
What's stopping you from getting started?
Call-to-Action Suggestions:
- Have you ever considered building a root cellar? Share your questions and ideas in the comments below!
- What are your favorite fruits and vegetables to store in a root cellar? Let us know!
- Check out our other articles on sustainable living and homesteading tips.