Revive Your Homestead: Build a Budget-Friendly Rain Barrel System This Weekend
Are you tired of sky-high water bills and feeling powerless against the unpredictable whims of Mother Nature? Imagine a world where your garden flourishes, your wallet breathes easier, and you’re playing an active role in environmental stewardship. Rainwater harvesting offers all this and more. With increasing drought conditions impacting many regions, including [mention specific region], now is the perfect time to harness the free resource falling from the sky. This weekend, let's embark on a simple DIY project: building a budget-friendly rain barrel system. Even if you're a beginner homesteader, this step-by-step guide will empower you to reduce your reliance on municipal water and create a thriving oasis right in your backyard.
Why Rainwater Harvesting? A Homesteader's Perspective
Before diving into the how-to, let's solidify the "why." Rainwater harvesting is more than just a trendy eco-conscious practice; it's a foundational principle for any self-sufficient homestead. Consider these benefits:
- Cost Savings: Reduce your water bill by using collected rainwater for irrigation.
- Plant Health: Rainwater is naturally soft, free of chlorine and other chemicals, making it ideal for plant growth.
- Environmental Responsibility: Conserve precious water resources and reduce your impact on municipal water systems.
- Drought Resilience: Build a reserve of water to keep your garden thriving, even during dry spells.
- Self-Sufficiency: Gain greater control over your water supply and reduce your dependence on external sources.
Gathering Your Materials: Budget-Conscious Choices
The beauty of this project lies in its simplicity and affordability. Many materials can be repurposed or sourced locally at a fraction of the cost of commercially available systems. Here's a comprehensive list:
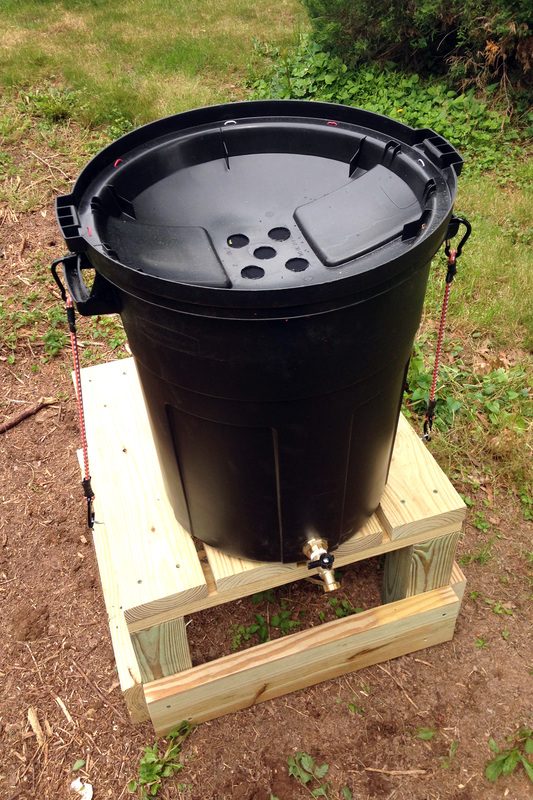
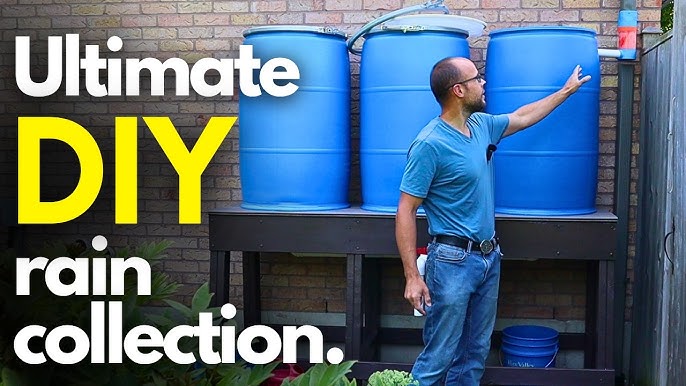
55-Gallon Plastic Drum: Look for food-grade barrels (used or new) from local businesses, craigslist, or online marketplaces. Estimated cost: $15-$50
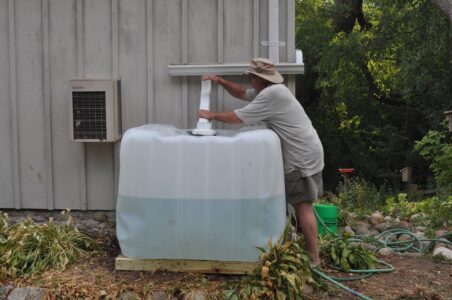
Downspout Diverter: This directs rainwater from your gutter into the barrel. Several types exist, including those that automatically stop filling when the barrel is full. Estimated cost: $20-$40
Spigot: A brass or plastic spigot for dispensing water. Choose one that threads easily into a hole you can drill in your barrel. Estimated cost: $5-$15
Hose Adapter: To connect your garden hose to the spigot. Estimated cost: $3-$7
Screen Mesh: To prevent debris and mosquitoes from entering the barrel. Old window screens or fine mesh fabric work well. Estimated cost: $0-$10 (recycled)
Gutter Extension (optional): To direct water away from your foundation. Estimated cost: $10-$20
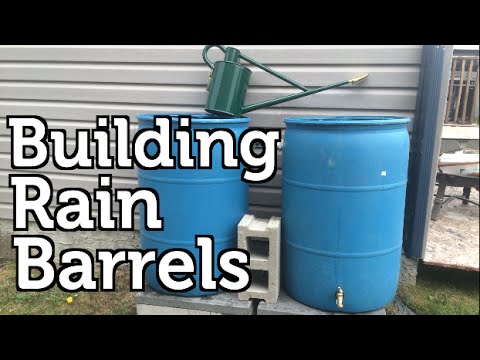
Bricks or Concrete Blocks: To elevate the barrel for better water pressure. Estimated cost: $0-$20 (recycled)
Drill with Hole Saw Attachment: For creating holes for the spigot and overflow.
Safety Glasses: Essential for eye protection.
Gloves: To protect your hands.
Measuring Tape: For accurate measurements.
Silicone Caulk or Plumber's Tape: To seal connections and prevent leaks.
Step-by-Step Guide: Building Your Rain Barrel System
Follow these simple steps to transform your homestead with a functional and affordable rain barrel system.
Step 1: Prepare the Barrel
Thoroughly clean the inside of the barrel with soap and water. If it previously contained food, this is crucial. Rinse thoroughly to remove any residue.
Step 2: Cut the Inlet Hole
Use a hole saw attachment on your drill to create a hole near the top of the barrel, large enough to accommodate your downspout diverter or the inlet hose.
Step 3: Install the Downspout Diverter
Follow the manufacturer's instructions to install the downspout diverter in your existing gutter system. Connect the diverter's hose to the inlet hole on the barrel.
Step 4: Cut the Spigot Hole
Drill a hole near the bottom of the barrel for the spigot. The lower the hole, the more water you'll be able to access.
Step 5: Install the Spigot
Apply plumber's tape or silicone caulk to the spigot threads. Screw the spigot into the hole, ensuring a tight seal.
Step 6: Create an Overflow Outlet
Drill another hole near the top of the barrel, opposite the inlet hole. This will allow excess water to escape when the barrel is full. Attach a short length of hose to direct the overflow away from your foundation.
Step 7: Install the Screen Mesh
Cover the top of the barrel with screen mesh to prevent debris and mosquitoes from entering. Secure it with a bungee cord or zip ties.
Step 8: Elevate the Barrel
Place the barrel on bricks or concrete blocks to elevate it. This will improve water pressure and make it easier to fill watering cans.
Step 9: Connect Your Hose
Attach your garden hose to the spigot using the hose adapter.
Step 10: Test and Enjoy!
Wait for the next rain and watch your rain barrel fill up! Check for leaks and make any necessary adjustments.
Safety First!
- Always wear safety glasses when drilling or cutting.
- Handle the barrel with care, as it can be heavy when full.
- Ensure the barrel is stable and won't tip over.
- Never drink water collected from a rain barrel without proper filtration and purification. Rainwater harvesting for potable water requires a more complex system.
- Be mindful of local regulations regarding rainwater harvesting.
Troubleshooting Common Issues
- Leaks: Apply more plumber's tape or silicone caulk to the affected connection.
- Algae Growth: Clean the barrel regularly with a mild bleach solution.
- Mosquitoes: Ensure the screen mesh is securely in place and free of holes. You can also add mosquito dunks to the barrel.
- Slow Filling: Check for obstructions in the gutters or downspout diverter.
- Clogged Spigot: Clean the spigot and hose adapter regularly.
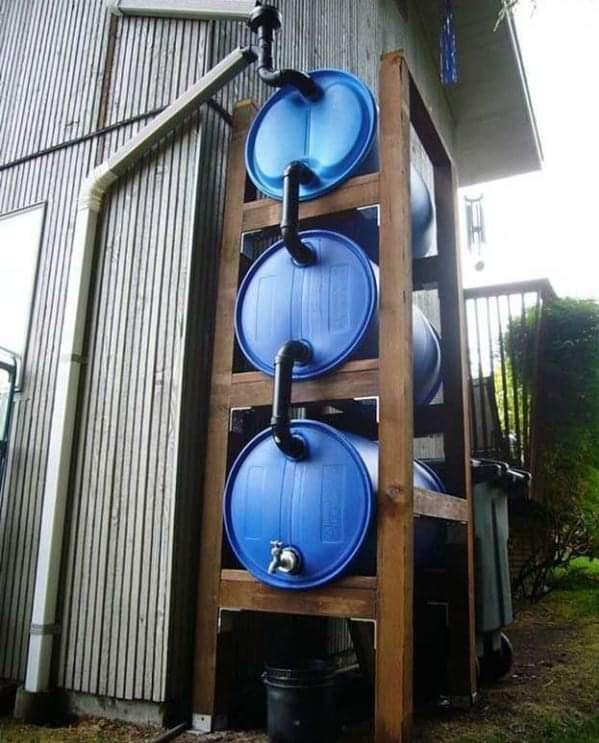
Scaling Up: Connecting Multiple Barrels
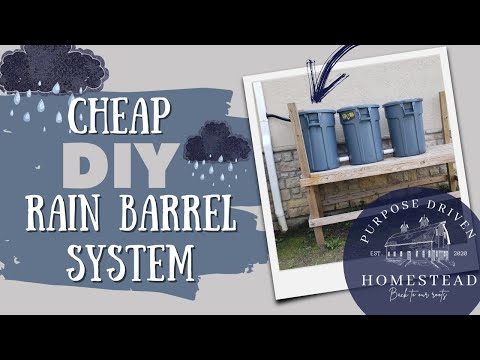
Once you experience the benefits of a single rain barrel, you may want to increase your water storage capacity. Connecting multiple barrels is a simple process.
- Level the Barrels: Ensure all barrels are at the same height.
- Connect with Hoses: Use short lengths of hose to connect the barrels together, near the bottom.
- Overflow System: Ensure the last barrel in the series has an overflow outlet.
Beyond the Basics: Advanced Rainwater Harvesting
This project provides a foundation for more advanced rainwater harvesting systems. You can explore options such as:
- First Flush Diverters: These divert the initial rainwater, which contains the most contaminants.
- Filtration Systems: For removing sediment and other impurities.
- Pressurized Systems: Using a pump to increase water pressure for irrigation.
Conclusion: Embrace the Power of Rainwater
Building a budget-friendly rain barrel system is a tangible step towards a more sustainable and self-sufficient homestead. By harnessing the power of rainwater, you can reduce your water bill, improve your plant health, and contribute to a healthier environment. Don't let another drop of rainwater go to waste! Start building your rain barrel system this weekend and share your experiences and photos in the comments below. Your homestead will thank you for it!