Reclaiming the Forgotten Pantry: Simple Ferments for a Healthier Homestead
The air is crisp, carrying the scent of woodsmoke and fallen leaves. Baskets overflow with the last of the garden's bounty: vibrant cabbages, crunchy carrots, and those final, precious cucumbers. The joy of the harvest is real, but so is the nagging question: how will we preserve all this goodness before winter's chill truly sets in? Before we know it, the beautiful produce we've been nurturing will wither and go bad if not stored properly.
This year, let's move beyond simple canning and freezing. Let's unlock the age-old magic of fermentation! It's not just about preserving food; it's about creating delicious, gut-friendly staples that will nourish your family and enrich your homesteading life. Imagine vibrant sauerkraut, tangy quick pickles, and subtly sweet fermented carrots gracing your table all winter long. We’ll be diving into each of these ferments to show you just how easy they are to make. Let's get started!
The Gut-Boosting Power of Fermentation
Why ferment? The answer lies within the amazing power of probiotics. Fermented foods are teeming with beneficial bacteria that support a healthy gut microbiome. This thriving ecosystem in your digestive tract plays a crucial role in everything from immune function and nutrient absorption to mental well-being and overall energy levels. When we consume fermented foods, we're essentially seeding our gut with these tiny allies, helping to create a balanced and resilient inner world.
The process itself, known as lacto-fermentation, sounds complex, but it’s surprisingly simple. Basically, you're creating an environment where beneficial bacteria (lactobacilli) can thrive while inhibiting the growth of harmful ones. The bacteria consume the natural sugars in the vegetables and produce lactic acid, which acts as a natural preservative and gives fermented foods their characteristic tangy flavor. It is also a very old tradition that has been around for centuries!
Many people hesitate, thinking fermentation is complicated or even dangerous. But fear not! The ferments we'll explore are incredibly simple, safe, and beginner-friendly. With just a few basic ingredients and a little patience, you can transform your garden's abundance into a powerhouse of probiotics.
Fermenting 101: Your Guide to Sauerkraut, Quick Pickles, and Fermented Carrots
Ready to dive in? Here are three easy fermentation projects that are perfect for beginner homesteaders:
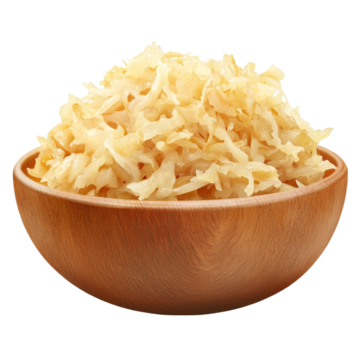
1. Sauerkraut: The King of Fermented Cabbage
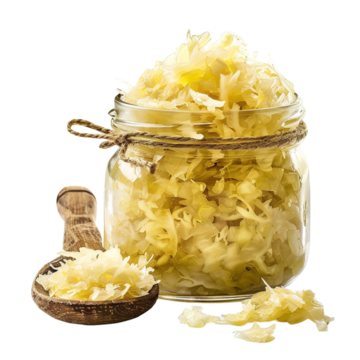
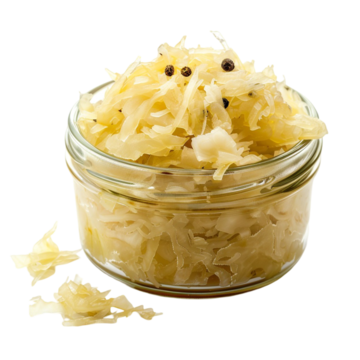
Sauerkraut is a classic ferment, and for good reason! It's incredibly versatile, delicious, and packed with probiotics. Use cabbage fresh from your garden or your local farmer's market for the best flavor!
Ingredients:
- 1 medium head of cabbage
- 1-2 tablespoons sea salt (non-iodized)
- Optional: caraway seeds, juniper berries, garlic cloves
Equipment:
- Large bowl
- Knife or mandoline
- Glass jar (wide-mouth mason jar works well)
- Weight (a small glass jar filled with water or a fermentation weight)
Instructions:
Shred the cabbage finely using a knife or mandoline.
Place the shredded cabbage in a large bowl and sprinkle with salt.
Massage the cabbage with your hands for 5-10 minutes. The cabbage will start to release its juices and become more pliable. This helps create the brine needed for fermentation.
Add any optional seasonings (caraway seeds, juniper berries, garlic).
Pack the cabbage tightly into a clean glass jar, pressing down firmly to release more juices. Make sure the cabbage is completely submerged in the brine.
Place a weight on top of the cabbage to keep it submerged.
Cover the jar loosely with a lid or cloth secured with a rubber band.
Ferment at room temperature (65-75°F) for 1-4 weeks, or until it reaches your desired level of tanginess. Taste it regularly!
Once fermented, store in the refrigerator.
Troubleshooting: If you see mold, discard the batch. If your vegetables float, use a weight to keep them submerged.
2. Quick Pickles: Tangy and Refreshing
These quick pickles are a delicious and easy way to preserve your cucumber harvest. They offer the satisfying crunch of pickles with the added benefit of probiotics.
Ingredients:
- 1 pound cucumbers, sliced
- 2 cups water
- 2 tablespoons sea salt (non-iodized)
- 2-3 cloves garlic, crushed
- 1 teaspoon dill seeds
- Optional: peppercorns, mustard seeds, red pepper flakes
Equipment:
- Glass jar
- Measuring cup
Instructions:
Combine water and salt in a jar. Stir until the salt dissolves.
Add garlic cloves, dill seeds, peppercorns, mustard seeds, and red pepper flakes (if you use them)
Add sliced cucumbers to the jar.
If needed, add more salt water until the cucumber slices are submerged.
Ferment at room temperature for 3-7 days, or until they reach your desired level of tanginess.
Refrigerate to stop fermentation.
Troubleshooting: Taste test them regularly. If they taste bitter, this might not be the recipe for you. Discard if mold appears.
3. Fermented Carrots: Sweet and Savory Delight
Fermented carrots are a surprisingly delicious and healthy snack. They have a slightly sweet and tangy flavor that's incredibly addictive.
Ingredients:
- 1 pound carrots, peeled and sliced or shredded
- 2 cups water
- 1 tablespoon sea salt (non-iodized)
- Optional: ginger, garlic, turmeric, dill
Equipment:
- Glass jar
- Measuring cup
Instructions:
Combine water and salt in a jar. Stir until the salt dissolves.
Add sliced or shredded carrots into the jar.
Add ginger, garlic, turmeric, or dill (if you use them).
If needed, add more salt water until the carrots are submerged.
Ferment at room temperature for 3-7 days, or until they reach your desired level of tanginess.
Refrigerate to stop fermentation.
Troubleshooting: Discard if mold appears. The taste will change throughout the fermentation process; keep tasting them to find out your preference.
Tips for Fermentation Success
Creating the right environment is crucial for successful fermentation. Aim for a consistent temperature between 65-75°F. Cleanliness is also essential – make sure your jars and utensils are thoroughly washed and sterilized.
Don't be afraid to experiment with different flavor combinations! Add garlic, herbs, spices, or even a pinch of chili flakes to your ferments for a unique twist. For storage, once your ferments have reached your desired tanginess, simply transfer them to the refrigerator. The cold temperature will slow down the fermentation process and preserve their flavor.
The great thing about fermentation is that you don't need a ton of fancy equipment to get started. In fact, most of what you need is probably already in your kitchen! All you need are mason jars, some salt, water, and vegetables from your garden or the farmer's market. You can even use a ziplock bag full of water as a weight.
Embracing the Cycle of the Seasons
Fermentation is more than just a way to preserve food; it's a connection to the natural rhythms of the seasons. It's a way to honor the abundance of the harvest and nourish our bodies with the gifts of the earth. It's a skill that our ancestors used and perfected over centuries, a tradition we can embrace today for a healthier, more sustainable lifestyle.
So, reclaim your forgotten pantry, gather your vegetables, and embark on the wonderful world of fermentation. You might just discover a new passion and a delicious way to nourish yourself and your family.
What are your favorite fermentation projects? Share your tips and tricks in the comments below! Don't forget to tag us in your photos using #BetterHomesAndHarvestFerments – we can't wait to see what you create!
And be sure to sign up for the Better Homes and Harvests Newsletter to receive even more great tips, recipes, and homesteading inspiration directly to your inbox!
