Reclaimed & Remarkable: Build Your Own Sustainable Chicken Coop
Better Homes and Harvests is dedicated to helping you achieve a more self-sufficient and sustainable homestead. This week, we're tackling a hands-on DIY/home improvement project that will directly improve your food security and save you money in the long run.
Do you dream of fresh, golden-yolked eggs gracing your breakfast table every morning? Are you tired of supermarket eggs lacking that farm-fresh flavor? Raising backyard chickens can be a rewarding experience, offering a connection to nature, a sustainable source of food, and even some lively companionship. But before you welcome your feathered friends, you'll need a suitable home – a coop that’s both safe and comfortable. This guide will walk you through the process of building a fantastic chicken coop primarily from reclaimed materials. Using recycled resources is not only a fantastic way to save money, but it also minimizes your impact on the environment. Plus, a reclaimed coop has character you just can't buy!

This project is designed for intermediate skill levels. We'll cover everything from planning and material sourcing to construction and finishing touches, ensuring your chickens have a happy and healthy home. Let's turn those scraps into scratches!
Planning Your Reclaimed Chicken Coop: Size, Location, and Materials
Careful planning is essential for a successful coop. Before you start hammering and sawing, consider these factors:
Sizing: How many chickens do you plan to keep? A general rule of thumb is to provide at least 4 square feet of space per chicken inside the coop and 8-10 square feet per chicken in the outdoor run. Overcrowding can lead to stress, disease, and behavioral problems.
Location: The location of your coop will significantly impact your chickens’ well-being and your convenience.
- Sunlight: Chickens need sunlight, but too much direct sun can overheat the coop. Choose a location that receives a mix of sun and shade.
- Drainage: Avoid low-lying areas prone to flooding. Good drainage will prevent muddy conditions and help keep the coop clean.
- Proximity to House: A coop close to your house makes egg collecting and daily chores easier, especially during inclement weather.
- Predator Protection: Place the coop in an area where you can easily monitor for predators like foxes, raccoons, and hawks.
- Local Regulations: Check with your local municipality for any regulations regarding backyard chickens and coop placement (setbacks, permits, etc.).
Sourcing Reclaimed Materials: This is where the fun begins! Finding the right reclaimed materials can transform your project.
- Construction and Demolition Sites: With permission from the site manager, you may be able to salvage usable lumber, pallets, or roofing materials.
- Salvage Yards: Salvage yards are treasure troves of reclaimed building materials. You can often find doors, windows, fencing, and other items at bargain prices.
- Online Marketplaces: Platforms like Craigslist, Facebook Marketplace, and Nextdoor are excellent resources for finding free or low-cost reclaimed materials.
- Friends and Neighbors: Let your friends and neighbors know you're looking for reclaimed materials. They may have items they're willing to donate.
- Pallets: Pallets can be disassembled and used for coop walls, floors, or even the entire structure.
- Old Fencing: Discarded fencing can be repurposed for the coop run or as decorative elements.
- Discarded Doors and Windows: Old doors and windows add character and functionality to your coop. Windows provide natural light and ventilation. Doors create secure access.
- Metal Roofing Scraps: These can be used to build a solid and durable chicken coop roof.
- Lumber: Scraps of lumber are endlessly useful.
- Safety First: Always wear gloves and a mask when handling reclaimed materials. Be sure to check for lead paint, nails, and other hazards.
Design Considerations:
- Nesting Boxes: Provide one nesting box for every 3-4 hens. Standard nesting boxes are 12"x12"x12".
- Roosting Bars: Chickens naturally roost at night. Provide roosting bars at least 2 inches in diameter and placed at varying heights.
- Ventilation: Adequate ventilation is crucial to prevent moisture buildup and respiratory problems. Install vents near the top of the coop.
- Easy Access for Cleaning: Design the coop with easy access for cleaning. A removable floor or a large access door will make your life much easier.
- Secure Fencing: Use chicken wire or hardware cloth to create a secure run perimeter.
- Predator Protection: Extend the fencing at least 12 inches into the ground to prevent digging predators.

Gathering Your Tools and Materials (The Checklist)
Before you begin construction, ensure you have all the necessary tools and materials. This will save you time and frustration in the long run.
Tools Required:
- Hammer
- Circular Saw (a handsaw will work, but a circular saw will greatly expedite the process)
- Drill with various drill bits
- Level
- Measuring Tape
- Safety Glasses
- Gloves
- Square
- Jigsaw (for cutting curves and intricate shapes)
- Sandpaper
- Nail Gun (optional, but highly recommended for speed and efficiency)
Materials Required:
- Reclaimed Pallets: 6-8 standard pallets (depending on the size of your coop)
- Reclaimed Lumber: Various sizes for framing and trim
- Reclaimed Metal Roofing: Sufficient to cover the coop roof
- Old Window(s): At least one window for natural light and ventilation
- Chicken Wire or Hardware Cloth: For the chicken run
- Screws: Various sizes
- Roofing Nails: For attaching the roof
- Hinges: For the coop door and nesting box lids
- Latches: For securing the coop door and nesting boxes
- Non-Toxic Paint or Sealant: (Optional, for weather protection and aesthetics)
- Sand or Gravel: For the coop floor (helps with drainage and sanitation)

Building the Coop Structure: A Step-by-Step Guide
Now for the exciting part – bringing your reclaimed chicken coop to life!
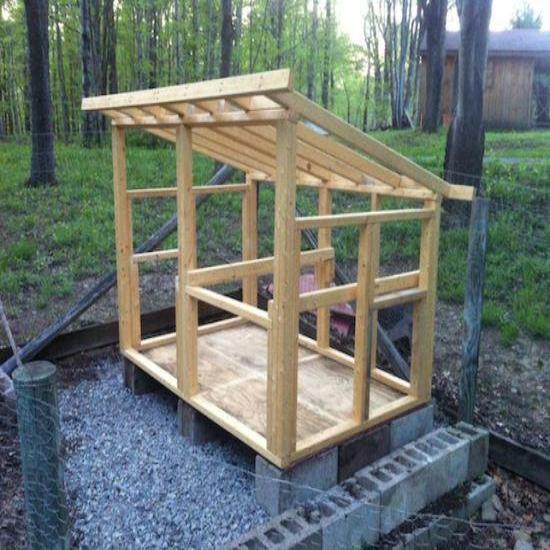
- Foundation: Choose your coop location and level the ground. Place concrete blocks or gravel to elevate the coop and prevent rot. A solid, level foundation is crucial for a stable and long-lasting structure.
- Framing: Using reclaimed lumber, construct the coop frame. Ensure it is square and sturdy. Consider using pallets as the base of the frame, reinforcing them with lumber for added strength.
- Walls: Attach reclaimed pallet wood, fencing, or doors to the frame to create the walls. Be creative with your designs. An old door can become a charming wall, and reclaimed fencing can add character. Create window openings as you build the walls.
- Roof: Construct the roof frame and attach reclaimed metal roofing or other roofing materials. Ensure a proper slope for drainage. Overhangs will protect the walls from rain.
- Door: Build and install a secure door for human access. Use hinges and a latch to ensure it closes tightly.
- Nesting Boxes: Build and install nesting boxes inside the coop. Provide one nesting box for every 3-4 hens. Line the nesting boxes with straw or wood shavings to create a comfortable nesting environment.
- Roosting Bars: Install roosting bars at varying heights. These provide chickens with a place to perch and sleep at night.

Creating a Secure Chicken Run
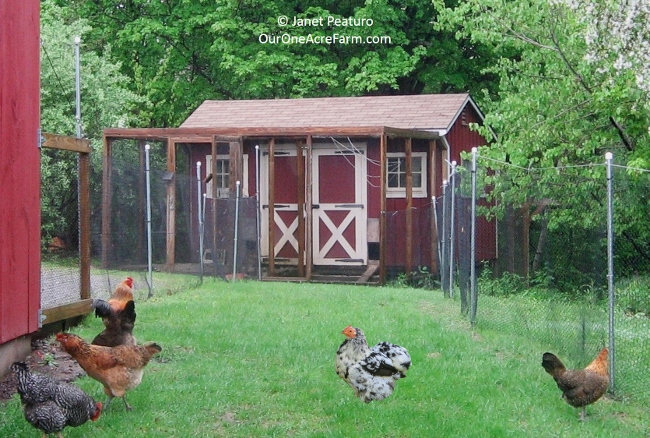
The chicken run provides your flock with an outdoor space to forage, scratch, and dust bathe. A secure run is essential to protect your chickens from predators.
- Fencing: Use chicken wire or hardware cloth to create a secure run perimeter. Bury the fencing at least 12 inches into the ground to prevent digging predators.
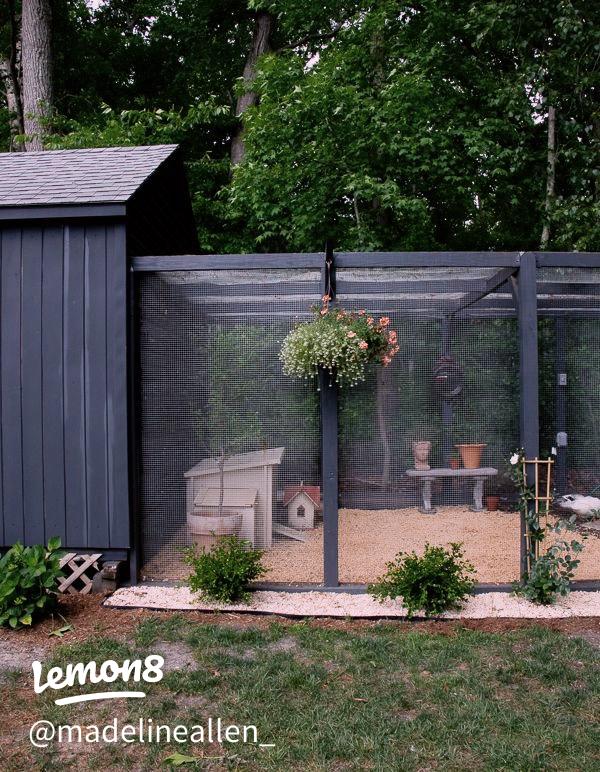
- Framing (Optional): Build a wooden frame for the run to add stability and aesthetics. Using reclaimed materials adds even more charm and keeps with our sustainable goals.
- Roof (Optional): Add a roof to the run for protection from weather and predators. Netting or reclaimed roofing materials can be used.
- Gate: Install a secure gate for easy access.

Finishing Touches and Personalization
The final touches are what will turn your chicken coop from a practical structure into a charming addition to your homestead.
- Ventilation: Ensure adequate ventilation to prevent moisture buildup and respiratory problems. Install vents near the top of the coop.
- Sealing/Painting: Seal or paint the exterior of the coop for weather protection and aesthetic appeal. Use non-toxic paints to ensure the safety of your chickens.
- Interior Design: Add bedding (straw, wood shavings), waterers, and feeders. These create a comfortable and functional environment for your chickens.
- Decorating: Add personalized touches to make the coop unique and attractive. Planters, signs, and other decorative elements can add charm.

Your Flock's New Home & a Victory for Sustainability
Building a reclaimed chicken coop is a rewarding project that combines practicality, sustainability, and creativity. Not only will you provide your chickens with a safe and comfortable home, but you'll also reduce waste, save money, and add a unique touch to your homestead. By repurposing materials, you're actively contributing to a more sustainable lifestyle.
Remember that costs will vary based on what materials you need to purchase new vs. what you reclaim. Here's an estimated cost breakdown:
- Reclaimed Materials: $0 - $50 (depending on availability and your scavenging skills)
- New Materials (screws, nails, hinges, latches, chicken wire): $50 - $100
- Total Estimated Cost: $50 - $150
The return on investment is significant. You'll save money on eggs, reduce your reliance on commercially produced food, and enjoy the satisfaction of providing your chickens with a healthy and sustainable home. Plus, the nitrogen-rich manure your chickens produce is excellent for your garden!
Ready to get started? Gather your materials, dust off your tools, and embrace the joy of building.
:max_bytes(150000):strip_icc()/chicken-coop-with-running-space-GettyImages-1353548298-4fd06951368144d7a062c033579d57c5.jpg)
Share your chicken coop building experiences in the comments below! We can't wait to see what you create!