Reclaim Your Homestead! DIY Project: Earth-Sheltered Root Cellar for Year-Round Abundance
The Better Homes and Harvests community thrives on self-reliance and connecting with the land. This month, we're diving into a practical project that will empower you to extend your harvest season. Many of us dream of a pantry overflowing with homegrown goods. This project is a step in that direction!

Why An Earth-Sheltered Root Cellar? My Homesteading Revelation
For years, I struggled with the same problem: a glut of produce in the fall followed by empty shelves by mid-winter. My canning efforts helped, but some vegetables just don't taste the same pickled or jammed. I tried storing potatoes in the garage, onions in the basement, and carrots in the refrigerator, but nothing really worked. They either rotted, sprouted, or lost their flavor. I needed a better solution – a way to naturally preserve the bounty of my garden without relying on electricity or excessive processing. That’s when I started researching earth-sheltered root cellars. I realized this was the perfect way to extend harvest season. An underground root cellar promised consistent temperature and humidity, creating the ideal environment for long-term food storage. This realization sparked my DIY root cellar journey, and I haven’t looked back since!
Understanding the Earth-Sheltered Root Cellar
Before we dive into construction, let's understand the "why" and "how" of earth-sheltered root cellars. An earth-sheltered root cellar leverages the earth’s natural insulation to maintain a consistent temperature and humidity level. The surrounding soil acts as a buffer, protecting the stored food from extreme temperature fluctuations common in above-ground storage. This passive cooling system allows you to store fruits, vegetables, and even some canned goods for months, reducing waste and saving money. Keyword: Earth Sheltered Root Cellar
The beauty of this system lies in its simplicity. No electricity is needed, reducing your reliance on the grid and minimizing your carbon footprint. It's a sustainable, time-tested method of food preservation that connects us to our ancestors and empowers us to be more self-sufficient.
Planning Your Root Cellar: Location, Location, Location
Choosing the right location is paramount to the success of your root cellar. Consider these factors:
- Slope: A gently sloping site is ideal for drainage and ease of construction.
- Soil: Well-draining soil is crucial to prevent water from seeping into your root cellar. Avoid areas with heavy clay soil if possible.
- Shade: North-facing slopes receive less direct sunlight, helping to keep the cellar cool.
- Accessibility: Think about how you’ll access your root cellar in the winter. A location close to your house or garden is preferable.
- Water Table: Investigate the local water table level to ensure your root cellar won't be submerged in water, especially after heavy rains.

DIY Root Cellar: Step-by-Step Guide
This guide outlines the construction of a small, walk-in earth-sheltered root cellar suitable for a family of four. Adapt the dimensions and materials to suit your specific needs and site conditions.
Step 1: Gather Your Tools and Materials
Before you start digging, gather all the necessary tools and materials. This will save you time and frustration later on.
Tools:
- Shovels and Pickaxes
- Wheelbarrow
- Measuring Tape
- Level
- Circular Saw
- Drill
- Hammer
- Concrete Mixer (optional, for larger projects)
- Safety Glasses
- Work Gloves
- Respirator (for working with concrete or dusty soil)
Materials:
- Treated Lumber (for framing the entrance and roof)
- Concrete Blocks or Poured Concrete (for the walls)
- Gravel (for drainage)
- Plastic Sheeting (for waterproofing)
- Insulation (rigid foam or straw bales)
- Dirt (for backfilling)
- Ventilation Pipes
- Door (insulated)
- Hardware (nails, screws, hinges)
You may be able to find some of these items used or at a discount.
Step 2: Excavation
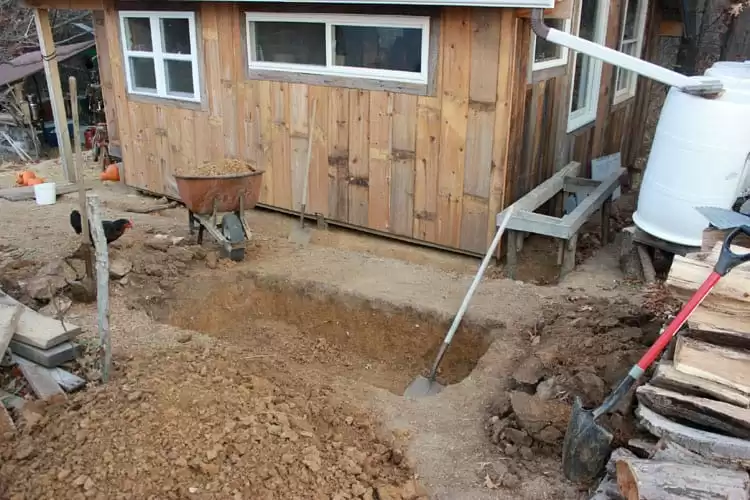
This is the most labor-intensive part of the project, but proper excavation is crucial for a stable and functional root cellar.
- Mark out the perimeter of your root cellar based on your plans. Allow extra space for the walls and drainage.
- Start digging, removing the topsoil and setting it aside for later use in backfilling.
- Dig down to the desired depth, ensuring the floor is level and compacted.
- Create a slight slope away from the entrance to facilitate drainage.

Step 3: Foundation and Walls
A solid foundation and sturdy walls are essential for the structural integrity of your root cellar.
- Foundation: Pour a concrete slab or create a gravel bed foundation. A gravel bed offers better drainage in some soil types. Ensure it is level and compacted.
- Walls: Construct the walls using concrete blocks or poured concrete. Concrete blocks are generally easier for DIYers to work with. Stagger the joints for added strength and use mortar to secure the blocks. Ensure walls are properly level and plumb.
- Waterproofing: Apply a waterproof sealant to the exterior of the walls to prevent moisture from seeping into the root cellar. Cover with plastic sheeting for added protection.
Step 4: Roof Construction
The roof needs to be strong enough to support the weight of the soil and provide adequate insulation.
- Construct a frame using treated lumber. The frame should be slightly sloped to facilitate drainage.
- Cover the frame with plywood or corrugated metal.
- Apply a layer of plastic sheeting for waterproofing.
- Add a layer of insulation, such as rigid foam or straw bales.
- Cover the insulation with another layer of plastic sheeting.
Step 5: Backfilling
Careful backfilling is essential for proper insulation and drainage.
- Backfill the sides and top of the root cellar with the soil you excavated earlier.
- Compact the soil in layers to prevent settling.
- Create a slight slope away from the entrance to direct water away from the structure.
Step 6: Ventilation and Entrance
Proper ventilation and an insulated entrance are crucial for maintaining the ideal temperature and humidity levels inside the root cellar.
- Install ventilation pipes at opposite ends of the root cellar to promote airflow. One pipe should be near the floor, and the other near the ceiling.
- Install an insulated door to minimize temperature fluctuations. A solid wood door with weather stripping is a good option.
- Consider adding an airlock or vestibule to further insulate the entrance.
Step 7: Interior Finishing
The interior of your root cellar should be functional and easy to clean.
- Install shelving to organize your stored food. Use untreated lumber or metal shelving.
- Consider adding a gravel floor for better drainage and air circulation.
- Monitor the temperature and humidity levels inside the root cellar. Aim for a temperature between 32°F and 40°F and a humidity level between 80% and 90%.
Quantifying the Benefits: My Homesteading Reality
Since completing my earth-sheltered root cellar, I've seen a significant improvement in my food preservation efforts. I've reduced my grocery bill by approximately 30% during the winter months. I can store potatoes, carrots, beets, apples, and onions for up to six months without significant spoilage. The root cellar has also allowed me to extend my growing season by starting seeds earlier in the spring. Knowing that I have a reliable and sustainable way to store my harvest provides a sense of security and self-sufficiency. Keyword: DIY Root Cellar. Building an Earth Sheltered Root Cellar helps homesteaders become self sufficient.
Troubleshooting and Adaptations
Every homestead is unique, and you may encounter challenges along the way. Here are a few common issues and potential solutions:
- Water Seepage: Improve drainage around the root cellar by adding more gravel or installing a French drain. Ensure proper waterproofing of the walls and roof.
- Mold Growth: Improve ventilation and ensure proper airflow. Consider using a dehumidifier in humid climates.
- Freezing Temperatures: Add more insulation to the roof and walls. Consider using straw bales for added insulation.
- Varying Climates: Adapt the design to suit your specific climate. In warmer climates, focus on maximizing ventilation and shade. In colder climates, focus on maximizing insulation.
For smaller homesteads, consider a smaller, simpler root cellar design, such as a buried trash can root cellar or a small earthbag structure.
A Word About Earthbags
Earthbag construction offers an alternative and affordable way to build a root cellar, especially in areas with readily available soil. Earthbags are polypropylene bags filled with soil, which are then tamped into place to create strong, load-bearing walls. This method is particularly well-suited for curved structures, such as domes, and can be a great option for DIYers on a budget. Keyword: Earthbag Root Cellar
Resources
- Your Local Extension Office (for soil testing and local building codes)
- Root Cellaring: Natural Cold Storage of Fruits & Vegetables (book by Mike and Nancy Bubel)
- Online Homesteading Forums (for advice and support from fellow homesteaders)
Share Your Experience!
Building an earth-sheltered root cellar is a rewarding and empowering project that can significantly improve your homestead's self-sufficiency. Don't be afraid to experiment and adapt the design to suit your specific needs and site conditions. Now it’s your turn! Have you built a root cellar? What challenges did you face, and what lessons did you learn? Share your experiences, ask questions, and offer your own tips in the comments section below. Let's learn from each other and build a stronger, more resilient homesteading community!
