Preserving Your Autumn Harvest: Apple Butter Delight
The air is crisp, the leaves are ablaze with color, and the scent of woodsmoke hangs sweetly in the air. Autumn has arrived, and with it, a bounty of delicious apples ripe for the picking. Imagine a warm slice of crusty bread slathered with a rich, spiced apple butter on a cool autumn morning. This isn't just a dream; it's a reality you can create in your own kitchen! This blog post will guide you through the process of making your very own apple butter, a perfect way to preserve the flavors of fall and enjoy them all year long. Get ready to transform your autumn apple harvest into a delectable treat that will fill your home with warmth and delicious aromas.
Gathering Your Apple Harvest and Supplies
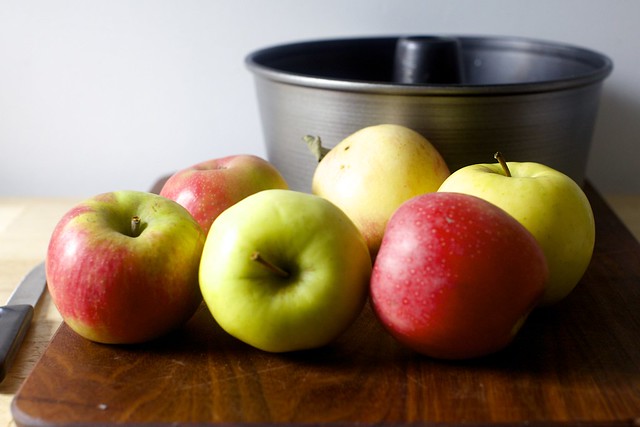
The first step to making incredible apple butter is, of course, acquiring the apples! The best apples for apple butter are a mix of varieties, offering a blend of sweet and tart flavors. Consider using varieties like Gala, Honeycrisp, Fuji, or McIntosh for sweetness, and Granny Smith or Winesap for a tart counterpoint. If you have apple trees in your backyard, that’s fantastic! Otherwise, a trip to your local orchard or farmer’s market is in order.
You'll need:
- Apples: About 6-8 pounds, depending on the size of your pot.
- Sugar: 1-2 cups, granulated or brown sugar (adjust to taste).
- Spices: 1-2 teaspoons ground cinnamon, 1/2-1 teaspoon ground nutmeg, 1/4-1/2 teaspoon ground cloves (or your favorite spice blend).
- Liquid: 1 cup apple cider or water.
- Lemon juice: 2 tablespoons (acts as a preservative and brightens the flavor).
- Large pot or slow cooker: A heavy-bottomed pot is ideal to prevent scorching.
- Immersion blender or food mill: For a smooth consistency.
- Canning jars and lids: Properly sanitized for safe storage.
The Apple Butter Making Process: A Step-by-Step Guide
Now, let's dive into the apple butter-making magic!
- Prepare the Apples: Wash, peel, core, and chop the apples into uniform pieces. This ensures even cooking.
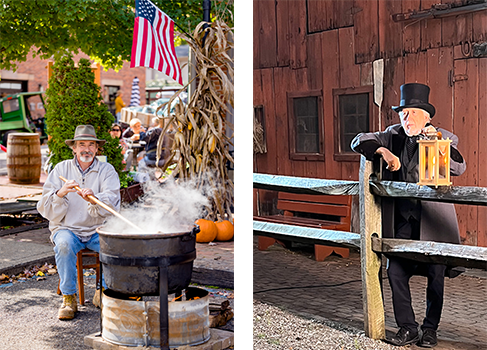
Combine Ingredients: In your large pot or slow cooker, combine the chopped apples, sugar, spices, and apple cider (or water). Stir well to ensure the apples are coated.
Cooking Time:
- Stovetop: Bring the mixture to a simmer over medium heat, then reduce the heat to low, cover, and cook for 2-3 hours, stirring occasionally to prevent sticking.
- Slow Cooker: Cook on low for 6-8 hours, or on high for 3-4 hours.
Achieving the Right Consistency: The apple mixture will gradually soften and thicken as it cooks. You'll know it's ready when the apples are very tender and easily mashed with a spoon.

Blend for Smoothness: Once the apples are cooked, remove the pot from the heat or turn off the slow cooker. Use an immersion blender to puree the mixture until smooth. Alternatively, you can use a food mill for a very fine texture. Be careful when blending hot liquids!
Adding Lemon Juice and Final Simmer: Stir in the lemon juice. Return the pot to the stovetop (if you used a slow cooker) and simmer uncovered for another 1-2 hours, stirring frequently, until the apple butter reaches your desired thickness. The color will deepen, and the mixture will become more concentrated. Be patient; this is where the magic truly happens!

Canning for Safe Storage (Optional)
If you want to preserve your apple butter for long-term storage, canning is the way to go.
- Sanitize Jars and Lids: Wash canning jars and lids in hot, soapy water. Sterilize them by boiling in water for 10 minutes. Keep the jars hot until ready to fill.
- Fill Jars: Ladle the hot apple butter into the sterilized jars, leaving 1/4-inch headspace. Wipe the jar rims clean.
- Process in a Water Bath Canner: Place the filled jars in a boiling water bath canner, ensuring they are covered by at least 1 inch of water. Bring the water to a rolling boil and process for 10 minutes (adjust processing time for altitude).
- Cool and Check Seals: Carefully remove the jars from the canner and let them cool completely on a towel-lined surface. As they cool, you should hear a popping sound as the lids seal. Check the seals by pressing on the center of each lid. If the lid doesn't flex, it's sealed properly. If it flexes, refrigerate that jar and use it within a few weeks.
Actionable Tips & Troubleshooting
- Scorching: To prevent scorching, use a heavy-bottomed pot and stir frequently, especially during the final simmering stage. If scorching does occur, transfer the apple butter to a clean pot immediately.
- Thickness: If your apple butter isn't thickening enough, continue to simmer it uncovered for a longer period. You can also add a tablespoon of cornstarch mixed with water as a last resort, but this may affect the texture.
- Spice Adjustment: Adjust the amount of spices to your liking. Start with the recommended amounts and taste as you go.
- No Immersion Blender? If you don't have an immersion blender or food mill, you can carefully blend the cooked apples in a regular blender in small batches.
Creative Ways to Use Your Apple Butter
Beyond the classic toast topping, apple butter is incredibly versatile!
- Baking: Add it to muffins, cakes, or cookies for a moist and flavorful twist.
- Savory Dishes: Use it as a glaze for pork or chicken.
- Cheese Boards: Serve it alongside cheese and crackers for a sweet and savory appetizer.
- Gift Giving: Package it in decorative jars for a thoughtful homemade gift.
- Yogurt and Oatmeal Topping: Enhance your breakfast with a spoonful of homemade goodness.
A Taste of Autumn, All Year Round
Making apple butter is more than just preserving food; it’s preserving a feeling, a memory of the autumn season. The warm spices, the sweet aroma, and the satisfying feeling of creating something delicious from scratch – it’s an experience that connects us to the land and to the traditions of generations past. Embrace the beauty of the seasonal harvest and enjoy the fruits (literally!) of your labor. What are your favorite ways to use apple butter? Share your creative ideas and photos on social media using #BetterHomesAndHarvests and tag us @BetterHomesHarvest. Happy preserving!
