Preserving Autumn's Harvest: A Simple Guide to a Cozy Pantry
The air is crisp, the leaves are turning, and the garden is overflowing with the last gifts of summer. Zucchinis the size of your arm, tomatoes stubbornly clinging to their vines, and the fragrant scent of herbs drying in the sun – it's a magical time of year! But as the days grow shorter, we're often faced with a challenge: what to do with all this bounty? This year, don't let that hard-earned harvest go to waste! We'll show you how to easily preserve the flavors of summer and autumn to enjoy all winter long, transforming your kitchen into a cozy haven and filling your pantry with the fruits (and vegetables!) of your labor. There's a deep satisfaction in knowing you're prepared for the colder months, nourished by food you grew yourself.

Let's explore some simple, time-honored techniques that will help you create a pantry brimming with organic gardening goodness. No fancy equipment or years of experience required!
Freezing Herbs in Olive Oil: Aromatic Bliss at Your Fingertips
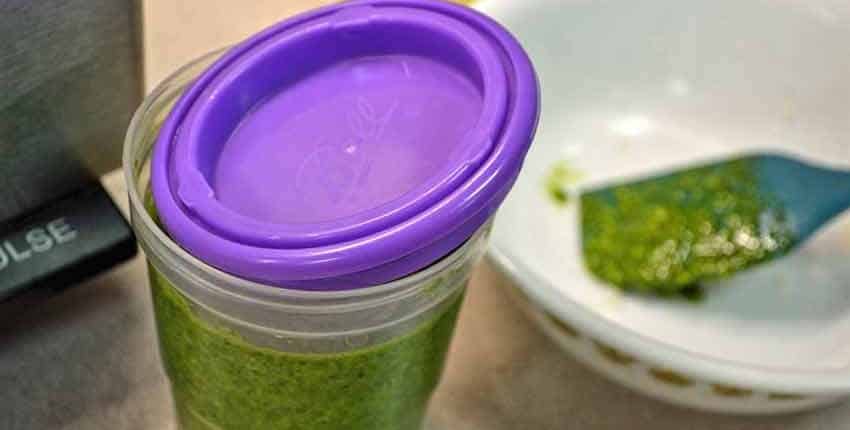
Fresh herbs add so much flavor to our cooking, but they can be fleeting. Freezing them in olive oil is a fantastic way to preserve their vibrant taste and aroma. This method works particularly well for herbs like basil, oregano, thyme, and rosemary.
How do I freeze herbs in olive oil?
Here's the simple process:
- Harvest and Clean: Pick your herbs early in the morning after the dew has dried. Gently wash them and pat them completely dry. Excess moisture will lead to freezer burn.
- Chop or Leave Whole: You can finely chop the herbs or leave small sprigs whole.
- Fill Ice Cube Trays: Pack the herbs into ice cube trays.
- Cover with Olive Oil: Pour good quality olive oil over the herbs, ensuring they are completely submerged.
- Freeze: Place the trays in the freezer for several hours, or until solid.
- Transfer to Freezer Bags: Once frozen, pop the herb cubes out of the trays and transfer them to freezer bags or containers. Label with the herb type and date.
Tips for Success:
- Use high-quality olive oil for the best flavor.
- Don't overcrowd the ice cube trays.
- For a flavor boost, add a clove of minced garlic to the herb and oil mixture before freezing.
- Use frozen herb cubes in soups, stews, sauces, and stir-fries.
- Remember to add the cube to the pot frozen. Thawing will make the herbs mushy.
Last year, I had a basil explosion in my backyard garden! I froze so many cubes that my family enjoyed Caprese salads all winter. It was like a little taste of summer sunshine on even the coldest days. Picture yourself pulling out a vibrant green cube in January, instantly infusing your kitchen with the scent of summer!
Quick Tomato Sauce Canning: Capture Summer's Sweetness
There's nothing quite like homemade tomato sauce, especially when it's made with tomatoes you've grown yourself. Canning is a rewarding way to preserve that delicious flavor and have it on hand for pasta dishes, pizzas, and more. This is a simplified process using a water bath canner, ideal for sauces with added acidity (like lemon juice).
Water Bath Canning Simplified
- Select Ripe Tomatoes: Choose ripe, unblemished tomatoes. Roma or San Marzano varieties are excellent for sauce.
- Prepare Tomatoes: Wash, core, and roughly chop the tomatoes. You can blanch them briefly to remove the skins if desired, but it's not essential.
- Simmer the Sauce: In a large pot, combine the tomatoes with your favorite sauce ingredients: onions, garlic, herbs (basil, oregano), salt, pepper, and a tablespoon or two of lemon juice (for acidity – crucial for safe water bath canning!). Simmer over medium heat, stirring occasionally, until the tomatoes break down and the sauce thickens to your desired consistency.
- Prepare Jars and Lids: Wash canning jars and lids in hot, soapy water. Sterilize the jars by boiling them in a water bath canner for 10 minutes. Keep the jars hot until ready to fill. Simmer the lids in hot water (not boiling) to soften the sealing compound.
- Fill Jars: Ladle the hot tomato sauce into the hot jars, leaving 1/2 inch of headspace (the space between the sauce and the top of the jar).
- Remove Air Bubbles: Run a non-metallic spatula or bubble popper around the inside of the jar to release any trapped air bubbles.
- Wipe Rims: Wipe the rims of the jars with a clean, damp cloth to ensure a good seal.
- Place Lids and Rings: Place the lids on the jars and screw on the bands finger-tight (not too tight!).
- Process in Water Bath Canner: Place the jars in a water bath canner filled with boiling water, ensuring the water covers the jars by at least 1 inch. Process for the recommended time based on your altitude and jar size (usually 35-40 minutes for quart jars). Consult a reliable canning resource for specific processing times.
- Cool and Check Seals: Carefully remove the jars from the canner and place them on a towel-lined surface to cool. As they cool, you should hear a "popping" sound as the lids seal. After 12-24 hours, check the seals by pressing down on the center of each lid. If the lid doesn't flex, it's sealed properly. If it flexes, the jar isn't sealed and should be reprocessed with a new lid, refrigerated and used within a week, or frozen.
Safety First!
- Always follow a tested canning recipe from a reliable source (like the USDA Complete Guide to Home Canning).
- Use only approved canning jars and lids.
- Proper acidity is crucial for safe water bath canning. Always add the recommended amount of lemon juice or citric acid to your tomato sauce.
Picture the glowing jars of tomato sauce lined up on your pantry shelves, a testament to your hard work and a promise of delicious winter meals. Last year my son declared every Wednesday night "Pasta Night" because of the abundance of homemade sauce!
Dehydrating Apple Rings: A Sweet and Healthy Snack
Dehydrating is a simple way to preserve fruits and vegetables, creating healthy and delicious snacks. Apple rings are a classic choice, perfect for lunchboxes, hiking trips, or simply enjoying as a guilt-free treat. The aroma of apples dehydrating is divine!
How to Dehydrate Apple Rings
- Choose Your Apples: Select firm, slightly tart apples like Honeycrisp, Gala, or Fuji.
- Wash and Core: Wash the apples and remove the cores. An apple corer makes this process easier.
- Slice Evenly: Slice the apples into 1/4-inch thick rings. Uniform thickness ensures even drying.
- Pre-treatment (Optional): To prevent browning, you can soak the apple slices in a solution of lemon juice and water (1 tablespoon lemon juice per 4 cups of water) for about 10 minutes.
- Arrange on Dehydrator Trays: Arrange the apple slices in a single layer on dehydrator trays, making sure they don't overlap.
- Dehydrate: Dehydrate at 135°F (57°C) for 6-12 hours, or until the apple rings are leathery and pliable. The drying time will depend on the thickness of the slices and the humidity in your environment.
- Cool and Store: Let the apple rings cool completely before storing them in airtight containers.

Tips for Dehydrating:
- Rotate the dehydrator trays periodically for even drying.
- Test for dryness by removing a few apple rings and letting them cool completely. If they are still sticky, they need more time in the dehydrator.
- Store dehydrated apple rings in airtight containers in a cool, dark place. They should last for several months.
- Sprinkle the apple slices with cinnamon or other spices before dehydrating for added flavor.
I remember one year, our apple tree produced so much fruit we didn't know what to do with it all! Dehydrating saved the day. The kids loved having healthy snacks, and they're still enjoying them! We even added the dehydrated apple slices to homemade granola.
Preserving your autumn harvest doesn't have to be daunting. With a few simple techniques, you can extend the taste of summer into the colder months and savor the fruits (and vegetables!) of your labor. Imagine the satisfaction of knowing exactly where your food comes from and nourishing your family with homegrown goodness all year round.
Now is the time to get started! The clock is ticking, so gather your supplies and get ready to preserve the bounty. The scents, the colors, the satisfaction – it's all waiting for you! What are your favorite ways to preserve your harvest? Share your tips and experiences in the comments below! Happy preserving!