Pine Needle Baskets: A Slow & Seasonal Holiday Craft
The crisp scent of pine needles hangs heavy in the winter air, a welcome contrast to the stale, recycled air of crowded malls and the relentless jingle of commercial Christmas carols. Walking through the forest, the crunch of pine needles underfoot is a grounding reminder of the earth's steady rhythm, a rhythm often drowned out by the frantic pace of the holiday season. This year, let's trade the shopping frenzy for something slower, something more meaningful: crafting pine needle baskets.
This tradition is more than just a craft project; it's an invitation to reconnect with nature, unleash your creative spirit, and create unique, handmade gifts that truly resonate. We're not just making baskets; we're weaving in memories, intention, and a sustainable approach to holiday giving. Beyond its practical use, basket weaving has been a vital skill and art form in many cultures throughout history, connecting people to their environment and providing essential tools for daily life. Let's honor that tradition, while slowing down to savor the moment.

Gathering Your Bounty – Responsible Foraging and Preparation
The first step in creating your pine needle basket is a mindful walk in the woods. Remember, we're guests in this natural space, so ethical and sustainable foraging is paramount.
Ethical and Sustainable Foraging: Never strip a tree bare of its needles. Instead, focus on collecting fallen needles, especially after a windstorm. Look for brown, dry needles that have already detached from the branches. If you're foraging on private land, always obtain permission first. Knowing your local pine trees is also crucial. Longleaf pine needles are prized for their length and flexibility, while loblolly pine offers a slightly shorter, but still workable, needle. Different species will yield slightly different textures and colors in your final product. Pine needles are best harvested after they've fallen naturally, typically in the late fall and winter months.
Preparing the Needles: Once you've gathered your bounty, the preparation begins. Spread the needles out on a tarp or newspaper and sort through them, discarding any that are broken, moldy, or excessively dirty. Gently wash the remaining needles with lukewarm water and a mild soap. Rinse them thoroughly and spread them out to dry completely. Proper drying is essential to prevent mold growth, which can ruin your project. This process can take several days, depending on the humidity. Some crafters choose to dye their pine needles using natural dyes derived from plants, berries, or even coffee grounds. Experiment with different dye techniques to add unique colors to your baskets.
Essential Supplies:
- Pine Needles: (Obviously!) Dried and prepared as described above.
- Waxed Linen Thread or Raffia: Choose a strong, natural fiber that will hold the basket together securely. Waxed linen is a popular choice for its durability and water resistance.
- Sturdy Needle: A long, thick needle with a large eye is essential for threading the waxed linen through the pine needles.
- Scissors: For trimming the thread and needles.
- Base: A wooden disc or thick cardboard circle will provide a solid foundation for your basket. Pre-cut wooden bases are available at craft stores, or you can create your own from recycled cardboard.
- Optional Embellishments: Beads, feathers, dried flowers, seeds, shells – anything that inspires you!
Gathering and preparing these materials is more than just a task; it's a meditative process that connects you to the natural world.

Mastering the Basics – A Step-by-Step Guide to Pine Needle Basket Weaving
Now comes the exciting part: bringing your basket to life!
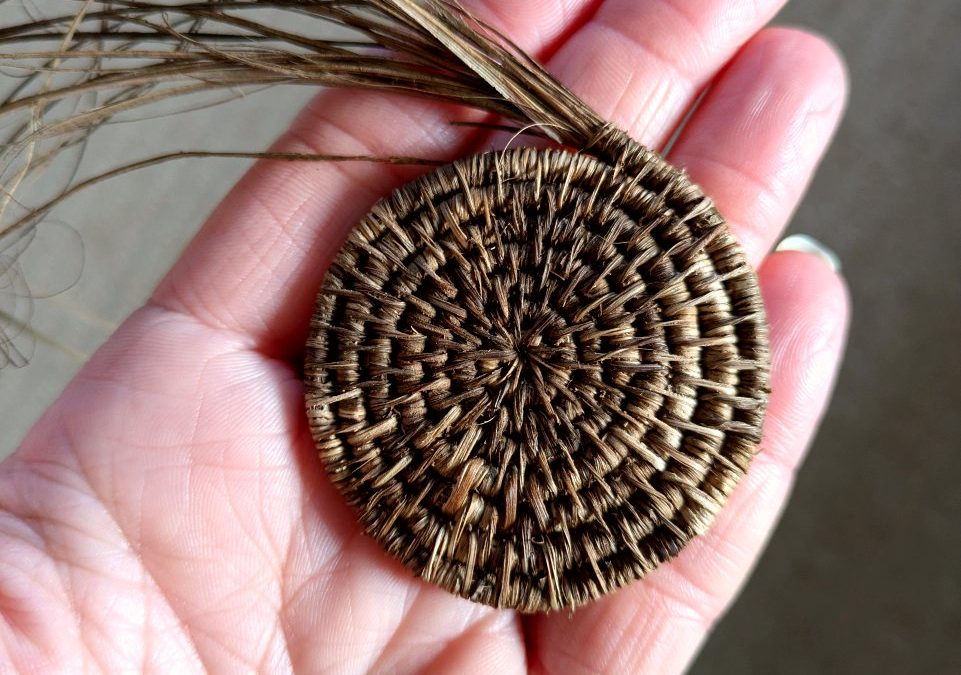
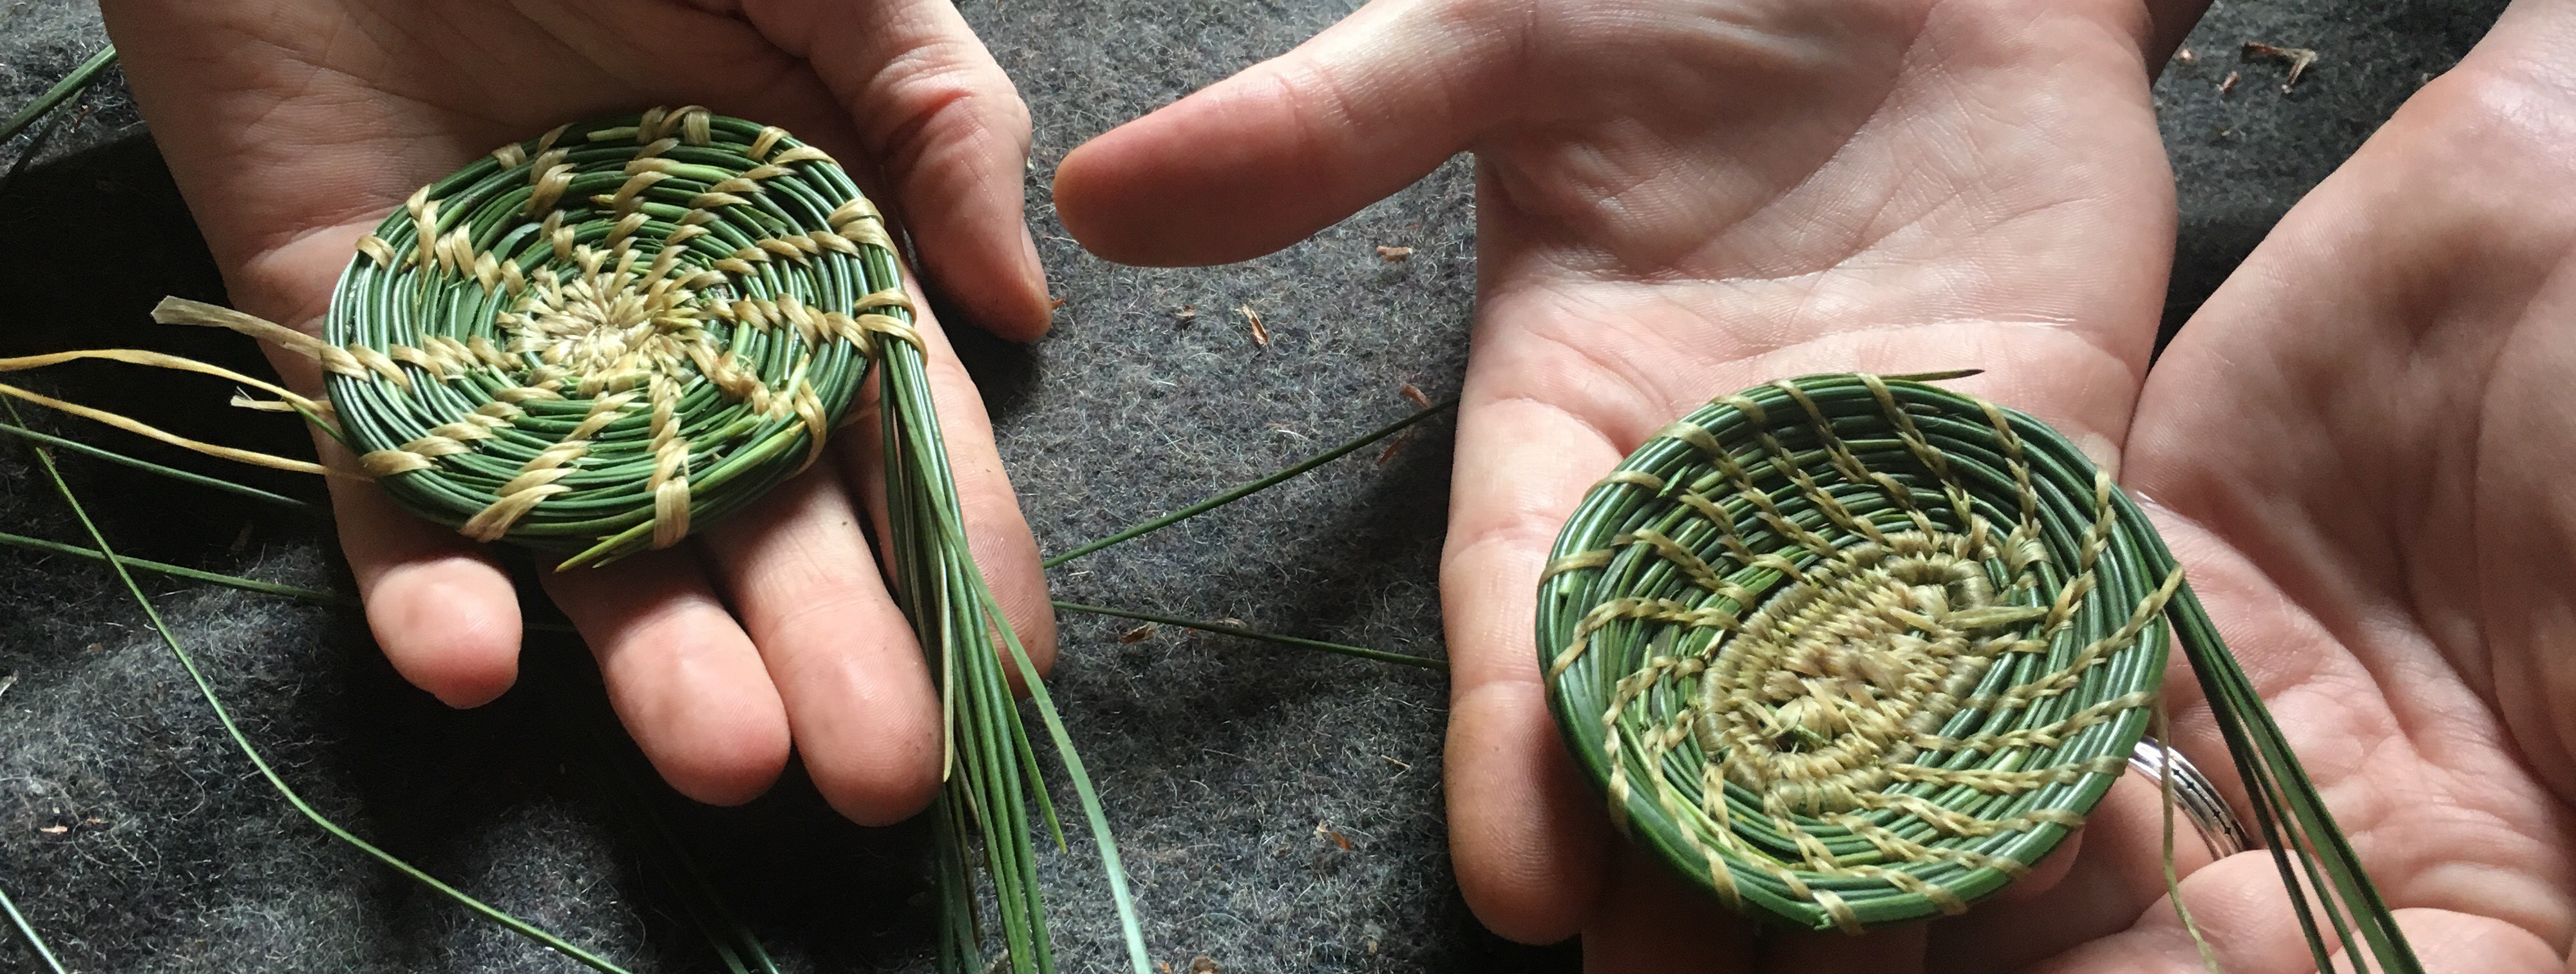
Creating the Base: Start by creating a small coil of pine needles, about 1/2 inch in diameter. Secure the coil tightly with your waxed linen thread, wrapping it around the needles several times. Then, attach the coil to your chosen base by stitching through the base and around the coil. Continue coiling and stitching, gradually increasing the size of the coil as you work your way around the base. Aim for a tight, even coil to create a strong and stable foundation.
Coiling and Stitching: Once your base is established, the main body of the basket can begin. Take a bundle of pine needles (about 5-10, depending on the size of your needles) and wrap the waxed linen thread tightly around them to create a new coil. Place this coil next to the existing coil on the base, and stitch through the existing coil and around the new coil to secure it in place. Continue this process, coiling and stitching, to build up the walls of the basket. It's crucial to maintain consistent tension on the thread to keep the coil tight and prevent gaps from forming.
Shaping the Basket: Shaping the basket is where your creativity can really shine. By varying the angle of the coil as you stitch, you can create different shapes. To make the basket wider, angle the coil slightly outwards. To make it narrower, angle it slightly inwards. Experiment with different angles to create bowls, vases, or other unique forms.
Troubleshooting: Don't be discouraged if you encounter challenges along the way! Uneven stitching can be corrected by carefully re-stitching the area. Loose coils can be tightened by adding more tension to the thread. If a needle breaks, simply trim the broken end and continue stitching.

Adding Your Personal Touch – Embellishments and Finishing Touches
Now that you've mastered the basic techniques, it's time to add your personal flair!
Natural Embellishments: This is where you can let your imagination run wild. Incorporate natural materials like beads, feathers, dried flowers, seeds, and shells into your basket to add visual interest and texture. Consider gathering these embellishments during your nature walks, adding another layer of connection to the natural world.
Color and Texture: Experiment with different color combinations by using naturally dyed pine needles or different types of thread. Varying the stitching pattern or adding different materials to the coil can also create unique textures. For example, you could incorporate strands of raffia or hemp twine into the coil to add a rustic touch.
Finishing the Rim: The rim of the basket is the final touch that can really elevate your creation. You can create a rolled edge by folding the top coil inwards and stitching it in place. Alternatively, you can create a decorative braid by weaving together strands of pine needles and stitching them around the rim.
Sealing and Protecting: While optional, sealing the basket can help protect it from moisture and insects, especially if you plan to use it to store food or other delicate items. A natural sealant like beeswax or a non-toxic varnish can be applied to the finished basket.
More than Just a Basket – Giving the Gift of Connection
A handmade pine needle basket is more than just an object; it's a tangible representation of your time, effort, and love.
The Symbolism of Handmade Gifts: In a world saturated with mass-produced items, handmade gifts stand out as something truly special. They convey a level of care and thoughtfulness that cannot be replicated by a store-bought present. When you give a handmade gift, you're giving a piece of yourself.
Gifting Ideas: Pine needle baskets can be used in countless ways. Fill them with homemade soaps, candles, or ornaments for a truly unique and personalized gift basket. Use them as decorative pieces to add a touch of natural beauty to any home. Or simply give them as a standalone gift, showcasing the beauty of slow, sustainable crafting.
Sharing the Tradition: Consider sharing the tradition of pine needle basket weaving with your family and friends. Host a crafting workshop or simply invite them over for an afternoon of weaving and conversation. Passing on this knowledge can help to foster connection and create lasting memories.
Holiday Charity Connection: Consider donating your handcrafted baskets to local charities, especially those that serve seniors or those experiencing hardship. Many organizations appreciate handmade gifts that bring warmth and joy during the holiday season.

Weaving a More Meaningful Holiday Season
This holiday season, let's choose connection over consumption, creativity over chaos, and sustainability over store-bought. Embrace the slow, seasonal traditions that nourish our souls and connect us to the natural world. Try your hand at pine needle basket weaving and experience the joy of creating something beautiful and meaningful with your own hands. Let's weave a holiday season that is rooted in simplicity, gratitude, and the enduring beauty of the earth.
:max_bytes(150000):strip_icc()/winter-solstice-celebration-58b9b3c23df78c353cd6b761.jpg)
Call to Action:
- Share your creations: We'd love to see your pine needle baskets! Share photos of your creations on social media using the hashtag #BetterHomesAndHarvestsBaskets
- Leave a comment: What are your favorite holiday traditions that connect you to nature and family? Share your thoughts in the comments below!
- Downloadable Resource: Get started today with our free printable guide featuring detailed instructions and tips for pine needle basket weaving. [Link to downloadable guide]
- Shop Similar: Ready to get started? Explore sustainable crafting supplies from trusted homesteading suppliers. [Affiliate links to sustainable crafting suppliers]