Naturally Dyed Days: A Foraged Yarn Advent Calendar for Fall
The air is crisp, carrying the scent of fallen leaves and woodsmoke. The vibrant greens of summer have mellowed into a breathtaking tapestry of golds, reds, and browns. There's a palpable shift as we transition from the bustling energy of harvest to the quiet anticipation of winter. It’s a time to slow down, to savor the last warm days, and to prepare our hearts and homes for the season ahead. And what better way to embrace this season of quiet beauty than by creating a naturally dyed yarn advent calendar? Forget the store-bought chocolates; this is about connecting with nature, crafting with intention, and creating a truly meaningful countdown to the holidays. This DIY advent calendar not only brightens your home with the warm hues of autumn, but it also becomes a cherished family tradition that connects you to the rhythms of nature.

Naturally dyed skeins of yarn hanging to dry, showcasing the beautiful, earthy tones achievable with natural dyes. This image embodies the natural simplicity of the DIY advent calendar project.
This project connects you to the colors, textures, and smells of the autumn season. It offers a slow and mindful way to anticipate the holidays. It uses natural, foraged materials, reducing waste and environmental impact. And finally, it is an adaptable project that can be personalized for your family and homestead, as well as the land you live on.
Gathering Your Palette – Foraging for Natural Dyes
Fall is the perfect time to gather the materials for natural dyeing. Before the first hard frost, nature offers a bounty of vibrant colors just waiting to be captured. Think of it as a treasure hunt, a chance to explore your surroundings and connect with the landscape in a new way.

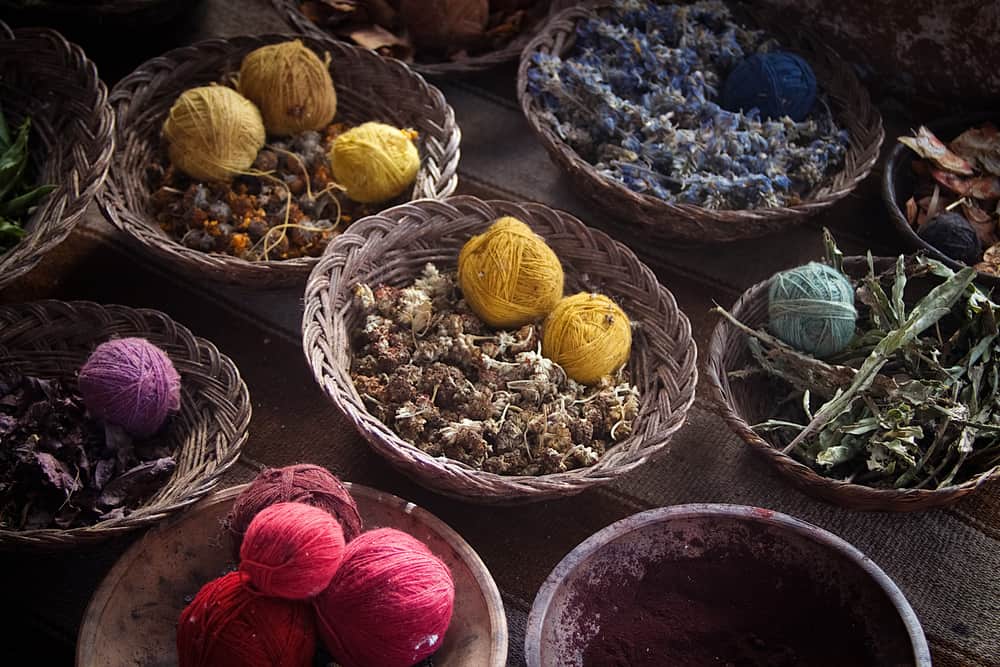
A basket overflowing with natural dyeing materials like marigolds, onion skins, and walnuts. This visually represents the bounty of fall and the variety of colors that can be achieved through foraging.
Consider these readily available dye sources:
- Onion Skins: These kitchen scraps offer a surprising range of yellows, oranges, and browns. Save your onion skins in a mesh bag as you cook throughout the season. The outer skins provide the most concentrated color.
- Marigolds: These cheerful flowers bloom well into fall and provide vibrant yellows and oranges. Harvest the flower heads when they are in full bloom, cutting them at the stem.
- Black Walnuts: The hulls of black walnuts yield rich browns and tans. Gather the hulls after they have fallen from the tree. Be careful, as they can stain your hands and clothing!
- Goldenrod: This wildflower provides bright, sunny yellows. Harvest the flowers before they go to seed.
- Sumac Berries: These berries can provide pinks to light reds. Use with caution, as some people can be sensitive to sumac.
- Acorns: The caps of acorns can create tans and browns. Gather fallen acorn caps from under oak trees.
- Fallen Leaves: Depending on the type of tree and the time of year, fallen leaves can offer a spectrum of browns, tans, and even subtle yellows and oranges.
Responsible Foraging Practices:
It's crucial to practice responsible foraging to protect the environment and ensure the sustainability of these resources. Here are a few key guidelines:
- Only Take What You Need: Avoid over-harvesting and leave plenty for wildlife.
- Leave No Trace: Respect the environment and minimize your impact on the landscape.
- Avoid Protected Areas: Refrain from foraging in parks, nature reserves, or other protected areas.
- Identify Dye Sources Correctly: Be certain of your identification before harvesting any plant material.
- Seek Permission: If foraging on private land, always ask for permission first.
Preparing Your Dye Materials:
Once you've gathered your dye materials, you'll need to prepare them for dyeing.
- Onion Skins: No preparation needed! Just use them as is.
- Marigolds: Chop the flower heads into smaller pieces to increase the surface area for dye extraction.
- Black Walnut Hulls: Crush the hulls into smaller pieces.
- Goldenrod: Use the flower heads whole, but make sure to remove any large stems.
- Sumac Berries: Lightly crush the berries to release their color.
- Acorn Caps: Boil the acorn caps for about an hour before using them to remove tannins, which can inhibit dye uptake. Discard this water before dyeing.
- Fallen Leaves: Chop the leaves into smaller pieces.
Mordanting (Optional):
Mordanting helps the dye bond to the yarn, resulting in more colorfast results. Alum (potassium aluminum sulfate) is a common and relatively safe mordant. If you want to skip this step to further simplify this project, keep in mind that the colors may fade more quickly.
The Magic of Natural Dyeing – Creating Your Autumn Hues
Now comes the fun part – extracting the colors from your foraged materials and imbuing your yarn with the essence of fall!

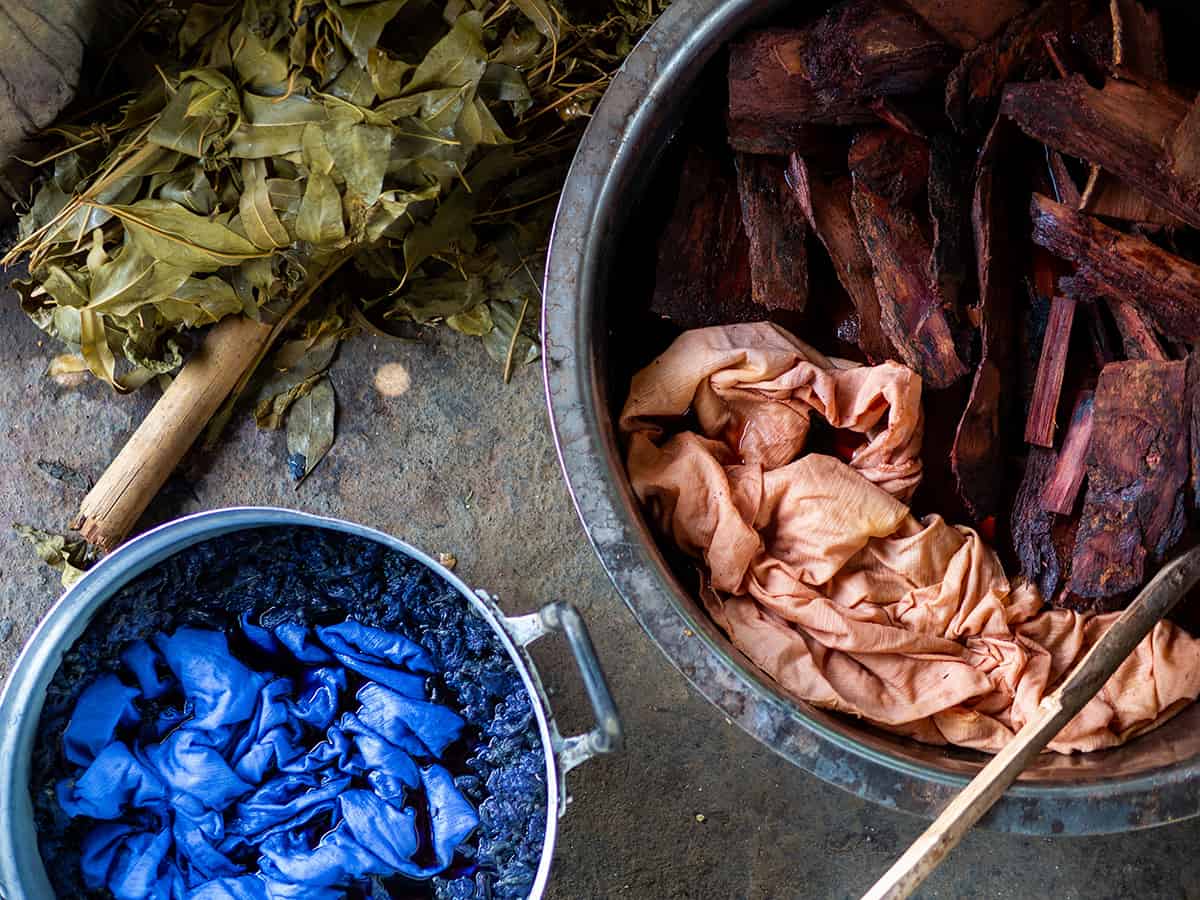
Yarn skeins being dyed in pots on a stove, visually showing the process of transforming natural materials into vibrant colors.
Safety First:
- Use separate pots and utensils for dyeing that are never used for food preparation.
- Work in a well-ventilated area.
- Wear gloves to protect your hands.
General Dyeing Process:
- Prepare Your Yarn: Soak your yarn in warm water for at least 30 minutes before dyeing. This helps the fibers absorb the dye more evenly.
- Create Your Dye Bath: Fill a pot with water and add your prepared dye material. The amount of dye material will depend on the desired intensity of color. A general guideline is to use roughly equal parts dye material and yarn by weight.
- Simmer the Dye Bath: Heat the dye bath over medium heat and simmer for at least an hour, or longer for more intense colors. Stir occasionally.
- Add the Yarn: Gently add the wet yarn to the dye bath, ensuring that it is fully submerged.
- Simmer and Stir: Continue to simmer the dye bath for another hour or more, stirring occasionally to ensure even dyeing.
- Cool and Rinse: Turn off the heat and allow the dye bath to cool completely. Remove the yarn and rinse it thoroughly with cool water until the water runs clear.
- Wash and Dry: Gently wash the yarn with a mild soap and hang it to dry away from direct sunlight.
Specific Dyeing Notes:
- Onion Skins: Use a generous amount of onion skins for a rich, golden yellow.
- Marigolds: Simmering marigolds gently will yield a brighter yellow. Boiling them can produce a more orange hue.
- Black Walnut Hulls: Start with a small amount of walnut hulls, as they can produce very dark browns.
- Goldenrod: Goldenrod can sometimes produce a greenish yellow. Adding a small amount of vinegar to the dye bath can help brighten the yellow.
- Sumac Berries: Be sure to simmer sumac berries gently, as boiling them can dull the color.
- Acorn Caps: Acorn caps will create more muted browns.
- Fallen Leaves: Experiment with different types of leaves to see what colors you can achieve.
Embrace the unique results of natural dyeing. Each batch will be slightly different, reflecting the variations in your dye materials and the dyeing process. This is part of the beauty of working with natural dyes!
Crafting Your Yarn Advent Calendar – A Simple and Sustainable Project
Once your yarn is dyed and dried, it's time to assemble your advent calendar. The beauty of this project is its simplicity – you don't need any fancy equipment or advanced crafting skills.

A finished yarn advent calendar hung on a wall or branch, with small gifts tied to each yarn strand. This showcases how the dyed yarn turns into a beautiful seasonal decoration.
Here are a few options for the structure of your advent calendar:
- Branch or Driftwood: Find a beautiful branch or piece of driftwood to use as the base for your advent calendar. This option brings a natural element into your home.
- Curtain Rod or Dowel: A simple curtain rod or dowel provides a clean and minimalist look.
- Hoop or Embroidery Frame: An embroidery hoop creates a circular advent calendar that can be hung on a wall.
Attaching the Yarn Strands:
Cut lengths of dyed yarn, allowing for some extra length to tie knots. The length you choose will depend on the length and width of your base. Attach each strand to your chosen structure, ensuring even spacing. You can tie simple knots or use other decorative knots.
Numbering the Days:
Add numbers to each yarn strand to mark the days of Advent. Here are a few creative ideas:
- Small Wooden Tags: Attach small wooden tags with handwritten or stamped numbers.
- Paper Flags: Create small paper flags with numbers and glue or tie them to the yarn strands.
- Handwritten Numbers: Use a fabric marker or paint to write the numbers directly onto the yarn strands.
Adding Personal Touches:
Customize your advent calendar with foraged elements:
- Weave in dried flowers or herbs.
- Attach small pinecones or acorns.
- Add foraged feathers.
Filling Your Advent Calendar – Meaningful Gifts and Activities
The contents of your advent calendar are what truly make it special. Move beyond material possessions and focus on experiences, activities, and small, sustainable gifts that promote connection and mindfulness.
Consider these ideas:
- Seed Packets: A promise of spring planting.
- Handwritten Notes: Include nature-themed quotes or poems.
- Small Beeswax Candles: To create a cozy atmosphere.
- Foraged Acorns or Pinecones: A reminder of nature's beauty.
- Homemade Herbal Tea Bags: A soothing treat for a cold day.
- Small Pieces of Natural Soap: A practical and eco-friendly gift.
- Promises of Activities: A nature walk, a cozy movie night, or baking cookies together.
- Small, Handwritten Blessings or Affirmations: To inspire and uplift.
The Rhythm of Fall, The Glow of Winter
Fall beckons us to prepare the land and our hearts for the coming winter. It is a time of reflection, of gratitude for the bounty of the harvest, and of slowing down to appreciate the simple joys of life. The act of crafting this advent calendar is a way to honor this rhythm, to connect with the natural world, and to create a beautiful and meaningful tradition for your family. Embrace the simplicity of seasonal living and savor the beauty of each passing day.
Embracing the Season with Intention
Creating a naturally dyed yarn advent calendar is more than just a craft project; it's a way to connect with nature, cultivate mindfulness, and create lasting memories with loved ones. By foraging for natural dye materials, engaging in the slow process of dyeing yarn, and filling your advent calendar with meaningful gifts and activities, you'll be embracing the season with intention and creating a truly unique and special tradition.
Now it's your turn! What natural dye materials are you most excited to forage for? What slow living traditions do you and your family do for the holidays? Share your ideas and experiences in the comments below!
Share your naturally dyed yarn advent calendars with us on social media using #BetterHomesAndHarvests #ForagedAdventCalendar.