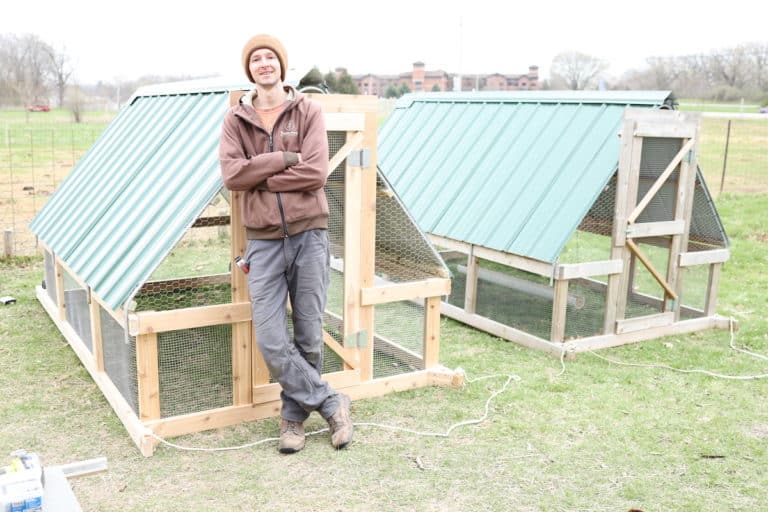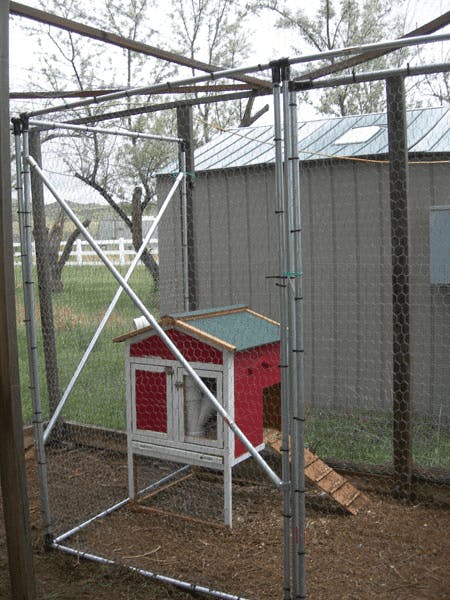
Mobile Homesteading: Build a DIY Chicken Tractor for Healthier Birds & Pastures
Keeping chickens can be one of the most rewarding aspects of homesteading. Fresh eggs, natural pest control, and a constant supply of nutrient-rich fertilizer are just a few of the perks. But anyone who has kept chickens in a fixed coop knows the challenges: overgrazed patches, a build-up of pests in the soil, and the constant need to haul away manure. What if there was a better way? Enter the chicken tractor – a mobile chicken coop that allows you to bring the benefits of free-ranging to your flock without the drawbacks of a stationary setup.
A chicken tractor is essentially a portable coop, designed to be moved regularly across your pasture or garden. This simple but ingenious design offers a multitude of benefits: healthier chickens with access to fresh forage daily, improved pasture health as chickens fertilize and aerate the soil, effective pest control in your garden after harvest, and natural fertilization that eliminates the need for synthetic fertilizers.
In this post, we’ll guide you through building your own simple, cost-effective chicken tractor. This project is adaptable for various flock sizes and homestead layouts, focusing on readily available and, ideally, repurposed materials. Let's ditch the stationary coop and embrace the freedom of mobile homesteading!

Planning & Design: Tailoring Your Tractor to Your Needs
Before you start cutting wood, take some time to plan and design your chicken tractor. Careful planning is crucial for building a functional and safe mobile coop.
First, consider your flock size. A general rule of thumb is to provide at least 4 square feet of space per chicken inside the tractor. Also, think about the available space in your pasture or garden. Your tractor should be easy to maneuver in your intended area.
Determine the optimal dimensions (length, width, height). A basic rectangular frame is easiest to construct. A good starting point is 4ft wide x 8ft long x 3ft high. This provides ample space for a small flock of 4-6 chickens. Remember to adjust these dimensions based on your specific needs.
Plan for ventilation, sunlight, shade, and protection from predators. Adequate ventilation is essential to prevent moisture build-up and respiratory problems. Position your roof to provide both sunlight and shade during different times of the day. Most importantly, design a secure, predator-proof structure. This means using sturdy materials like hardware cloth instead of chicken wire for the sides and bottom. Ensure all seams are tightly secured.
Sketch out your design, including a materials list and measurements. Think about adding wheels or skids to the bottom for easier movement. Two wheels on one end and handles on the other makes for easy mobility.
Key Takeaway: Careful planning is essential for a functional and safe chicken tractor.
Gathering Materials: Budget-Friendly & Repurposed Options
Building a chicken tractor doesn't have to break the bank. In fact, by repurposing materials, you can significantly reduce the cost and environmental impact of this project.
Here's a list of essential materials:
- Lumber: New or reclaimed 2x4s for the frame. Consider using treated lumber for ground contact.
- Hardware Cloth: ½ inch or ¼ inch mesh for the sides and bottom to keep out predators.
- Chicken Wire: For the top or areas where predators are less of a concern. Hardware cloth is always preferable for security.
- Roofing Material: A tarp, metal sheeting, or plywood for weather protection. Consider a salvaged metal roof for maximum durability.
- Hinges and Latches: For the door and nesting box access (if applicable).
- Wheels or Skids (Optional): Old bicycle wheels, casters, or repurposed skids for easier mobility.
- Screws, Nails, Staples: For assembling the frame and attaching the hardware cloth.

Get creative with repurposing materials! Old doors or windows can be used for the coop's walls or roof. Pallets can be disassembled and used for lumber. Look for free or inexpensive materials on online marketplaces, at construction sites (with permission, of course!), or at your local recycling center.
Here's a list of basic tools you'll need:
- Saw (circular saw or hand saw)
- Drill with various bits
- Hammer
- Measuring tape
- Staple gun
- Wire cutters
- Safety glasses and gloves
Key Takeaway: Building a chicken tractor doesn't have to break the bank. Repurposing materials saves money and reduces waste.
Step-by-Step Construction: Building Your Mobile Coop
Now, let's get to the construction! Here's a step-by-step guide to building your chicken tractor:
- Step 1: Building the Frame:
- Cut the lumber to the specified dimensions from your design. For a 4ft x 8ft tractor, you'll need two 8ft pieces and two 4ft pieces for the base frame. Then four 3ft pieces for the vertical supports. Cut additional pieces to create a frame for the roof.
- Assemble the base frame using screws or nails. Ensure it's sturdy and square. Use corner braces for added strength. Attach the vertical supports to the base frame. Connect the vertical supports with lumber to create the roof frame.
- [VISUAL: assembling wood frame with screws]
- Step 2: Attaching Hardware Cloth/Chicken Wire:
- Cover the sides and bottom of the frame with hardware cloth, ensuring it's securely fastened to prevent predators from digging underneath. Use a staple gun to attach the hardware cloth to the frame, overlapping the edges for added security. Overlap the hardware cloth along the bottom and secure it with ground staples, or burying it a few inches into the ground.
- [VISUAL: attaching hardware cloth to wood frame]
- Step 3: Creating the Roof:
- Construct a roof using your chosen material (tarp, metal, or plywood). Ensure it provides adequate shade and protection from rain. A slanted roof is ideal for water runoff. Attach the roofing material to the roof frame using screws or nails. Overlap the roofing material to prevent leaks.
- [VISUAL: attaching metal sheet chicken tractor roof]
- Step 4: Adding Wheels/Skids (Optional):
- Attach wheels or skids to the frame for easier movement. Consider using old bicycle wheels or repurposed skids. Attach the wheels or skids to one end of the tractor using bolts or screws.
- [VISUAL: attaching wheels chicken tractor frame]
- Step 5: Adding a Door/Access Point:
- Create a door or access point for chickens to enter and exit. Cut an opening in one of the sides of the tractor. Construct a door from lumber and hardware cloth. Attach the door to the opening using hinges. Secure the door with a latch to prevent escapes.
- [VISUAL: installing door chicken tractor]
- Step 6: Adding Nesting Boxes (Optional):
- Include a small nesting box inside the tractor if desired. Build a small box from lumber and attach it to the inside of the tractor.
- [VISUAL: nesting box inside chicken tractor]
Key Takeaway: Break the project down into manageable steps and double-check measurements for a successful build.
Introducing Your Chickens & Using Your Tractor Effectively
Once your chicken tractor is complete, it's time to introduce your chickens.
Introduce chickens to the tractor gradually. Start by placing them inside the tractor for short periods each day, gradually increasing the time as they become accustomed to their new surroundings.
Move the tractor daily or every few days, depending on the pasture conditions and flock size. Observe the grass and soil. You want the chickens to graze the area effectively without completely denuding it.
Provide fresh water and food inside the tractor. Use a chicken feeder and waterer designed to prevent spillage and waste.
Monitor chickens for signs of stress or overheating. Provide shade and plenty of water during hot weather.
Use the tractor to control pests in your garden after harvest. Introduce chickens after you've harvested your crops to clean up leftover plant material and insects.
Chicken manure fertilizes the soil. As the chickens move across your pasture or garden, they naturally fertilize the soil with their droppings.
Key Takeaway: Proper management ensures healthy chickens, improved pasture, and effective pest control.
Maintaining Your Chicken Tractor: Ensuring Longevity
Regular maintenance will extend the lifespan of your chicken tractor and keep your chickens safe.
Regularly inspect the frame, hardware cloth, and roofing for damage. Look for any signs of rot, rust, or wear and tear.
Repair any damage promptly to prevent escapes or predator intrusions. Replace damaged hardware cloth or repair broken boards.
Clean the tractor regularly to prevent the buildup of manure and bacteria. Use a shovel or rake to remove accumulated manure and bedding.
Treat wood with preservatives (if applicable) to prevent rot. Apply a non-toxic wood preservative to protect the wood from moisture and decay.

Key Takeaway: Regular maintenance extends the lifespan of your chicken tractor and keeps your chickens safe.
Embrace Sustainable Chicken Keeping
Building a chicken tractor is a rewarding project that offers numerous benefits for both you and your chickens. It provides a healthier environment for your flock, improves pasture health, controls pests, fertilizes the soil, and reduces your reliance on store-bought feed. By building your own chicken tractor, you're taking a step towards a more sustainable and self-sufficient homestead. So, gather your materials, grab your tools, and start building your mobile coop today! What are you waiting for? Let's take control of our food supply, one egg at a time!