Level Up Your Homestead: Building a Mobile Chicken Coop for Healthier Pastures and Happier Hens
Are you ready to take your homesteading game to the next level? As intermediate homesteaders, we're always looking for ways to increase our self-sufficiency, improve our land, and provide the best possible life for our animals. That's where a mobile chicken coop, sometimes affectionately called a chicken tractor, comes in. This fantastic DIY project not only provides your flock with fresh foraging opportunities but also helps revitalize your pasture by distributing valuable nutrients as they move. It's a win-win! Get ready to learn how to build your own mobile chicken coop, a project perfectly scaled for those with some DIY experience but eager to tackle something more ambitious. This project incorporates many DIY Homestead projects! Let's start the DIY food preservation process by providing quality care for our egg-laying friends!

Why Build a Mobile Chicken Coop? The Benefits are Abundant!
Before we dive into the how-to, let's explore the incredible benefits a mobile chicken coop offers:
- Pasture Improvement: Chickens naturally scratch and till the soil, aerating it and spreading their manure, which acts as a fantastic fertilizer. Moving the coop regularly prevents overgrazing and allows the pasture to recover, leading to healthier and more productive land.
- Fresh Forage: Access to fresh grass, bugs, and seeds supplements your chickens' diet, reducing your feed costs and resulting in healthier, happier hens. This is key for homestead resilience DIY.
- Pest Control: Chickens are voracious insect eaters, helping to control pests in your garden and pasture.
- Predator Protection: A well-built mobile coop provides a secure shelter from predators, especially when combined with good homestead management practices.
- Improved Egg Quality: Studies show that chickens with access to pasture lay eggs with higher nutritional value.
- Increased Self-Sufficiency: Reducing your reliance on external feed sources boosts your homestead's self-sufficiency and sustainability. This is the core goal for many involved in self-sufficient homesteading.
Materials List: Gathering Your Supplies
Here's a comprehensive list of materials you'll need for this project. Prices are approximate and may vary depending on your location and supplier. Don't forget to check for reclaimed or repurposed materials to save money and reduce waste, this will give you some cost-effective DIY homesteading for resilience.
- Framing Lumber:
- (8) 2x4x8 pressure-treated lumber: $60
- (4) 4x4x8 pressure-treated lumber: $80
- Roofing:
- Corrugated metal roofing sheets (quantity depends on coop size): $80 - $150
- Roofing screws: $20
- Hardware Cloth:
- 1/2-inch hardware cloth (50 ft roll): $100
- Staples for staple gun: $10
- Wheels:
- (2) Heavy-duty swivel casters with brakes: $50
- (2) Fixed casters: $30
- Fasteners:
- 3-inch exterior screws: $30
- 2-inch exterior screws: $20
- Door Hardware:
- Hinges: $10
- Latch: $5
- Nesting Boxes:
- Reclaimed wood or plywood for nesting boxes: $20 (or free if using reclaimed)
- Roosting Bar:
- 2x4 lumber or a sturdy branch: $5 (or free if foraging)
- Optional:
- Paint or stain (exterior grade): $30
- Chicken wire (for additional enclosure if desired): $50
Tools You'll Need:
- Safety glasses
- Gloves
- Measuring tape
- Pencil
- Circular saw or hand saw
- Drill/driver
- Staple gun
- Hammer
- Level
- Wrench (for caster installation)
Step-by-Step Guide: Building Your Mobile Chicken Coop
Let's start building! Remember to work in a well-ventilated area and wear safety glasses and gloves throughout the project.
Step 1: Build the Base Frame
- Cut the 4x4 lumber to create the rectangular base frame. A common size is 8 feet long by 4 feet wide, but adjust to suit your needs.
- Use exterior screws to assemble the frame, ensuring it's square and level.

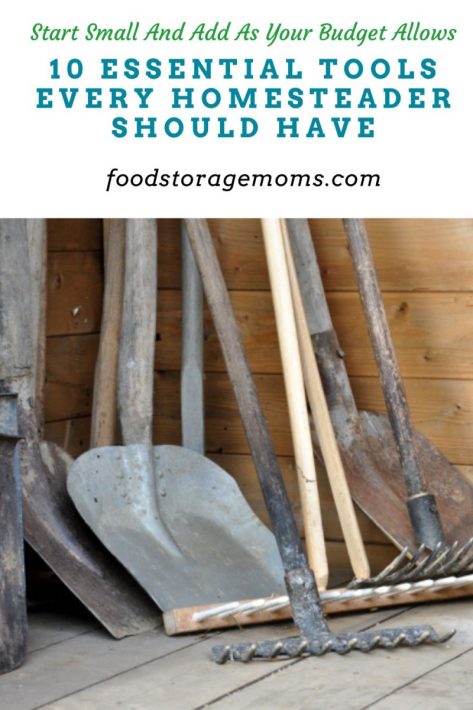
Caption: Essential tools for the homesteader. Make sure to have the appropriate tools on hand before you start!
Step 2: Attach the Wheels
- Attach the casters to the corners of the base frame. Place the swivel casters with brakes at one end for easy steering.
- Ensure the casters are securely fastened and can support the weight of the coop.
Step 3: Construct the Wall Frames
- Build four wall frames using 2x4 lumber. A height of 4-6 feet is generally sufficient.
- Include a doorway in one of the frames.
Step 4: Attach the Wall Frames to the Base
- Attach the wall frames to the base frame using exterior screws. Ensure they are plumb and square.

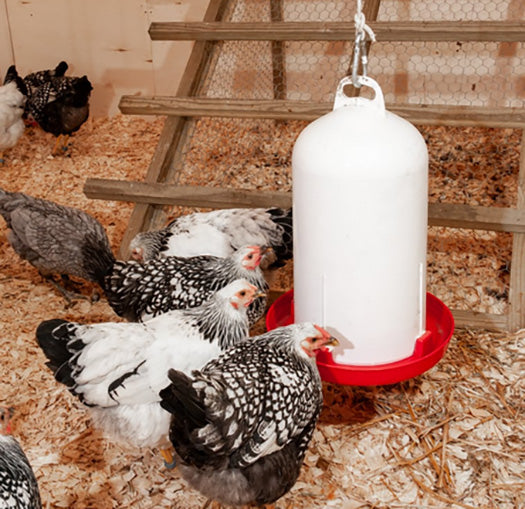
Caption: A proper watering system is key for happy hens. This image shows a watering system example.
Step 5: Cover the Walls with Hardware Cloth
- Wrap the wall frames with 1/2-inch hardware cloth, securing it with staples.
- Ensure the hardware cloth is taut and covers all openings to prevent predators from entering.
Step 6: Build and Install the Door
- Construct a door frame using 2x4 lumber and cover it with hardware cloth.
- Attach the door to the doorway using hinges and install a latch.
Step 7: Build and Attach the Roof Frame
- Construct a roof frame using 2x4 lumber, creating a slight slope for water runoff.
- Attach the roof frame to the wall frames using exterior screws.
Step 8: Install the Roofing
- Attach the corrugated metal roofing sheets to the roof frame using roofing screws.
- Overlap the sheets properly to prevent leaks.
Step 9: Build and Install Nesting Boxes
- Build nesting boxes using reclaimed wood or plywood. A common size is 12x12x12 inches.
- Attach the nesting boxes to one of the walls, ensuring they are easily accessible for your hens.

Caption: Nesting boxes are an important part of any mobile chicken coop, whether permanent or temporary.
Step 10: Install the Roosting Bar
- Install a roosting bar inside the coop, providing a comfortable place for your chickens to sleep.
Step 11: Add Finishing Touches
- Paint or stain the coop to protect it from the elements and enhance its appearance.
- Add any additional features you desire, such as a ramp for easier access or a small run attached to the coop.
Image of Building a Solar Food Dehydrator for the Home!:
Caption: Once your chickens are laying well, think about how to preserve your eggs! Solar dehydration is a wonderful option, just like your chickens and their mobile coop, it leverages nature!
Troubleshooting Tips: Common Challenges and Solutions
- Coop is too heavy to move: Consider using larger wheels or reducing the size of the coop.
- Predators are getting in: Ensure all openings are securely covered with hardware cloth. Consider adding a skirt of hardware cloth around the base of the coop to deter digging predators.
- Chickens are escaping: Make sure the hardware cloth is properly attached and there are no gaps. Clip their wings if necessary.
- Roof is leaking: Ensure the roofing sheets are properly overlapped and securely fastened.
Safety Precautions: Working Safely
- Always wear safety glasses and gloves when working with power tools and hardware cloth.
- Work in a well-ventilated area when painting or staining.
- Be careful when lifting heavy materials.
- Ensure the coop is stable and secure before allowing chickens inside.
Variations and Customization Options: Making it Your Own
- Size: Adjust the size of the coop to accommodate the number of chickens you have.
- Roof Style: Experiment with different roof styles, such as a gable roof or a hoop house roof.
- Materials: Use reclaimed materials to save money and reduce waste.
- Automatic Door: Install an automatic chicken coop door for added convenience.
- Attached Run: Build a small run attached to the coop for additional space.
Call to Action: Share Your Success!
Building a mobile chicken coop is a rewarding project that will benefit your homestead for years to come. Now it's your turn! Share your experiences and photos of your finished projects in the comments below. What customizations did you make? What challenges did you overcome? What are your biggest tips for building a durable mobile chicken coop? Let's learn from each other and build a thriving homesteading community!
Let's get started with your next DIY homestead projects!