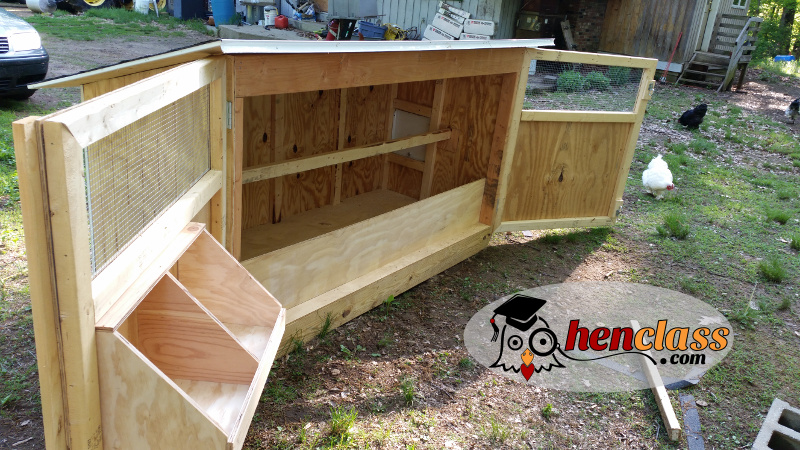
Level Up Your Homestead: Build a Chicken Tractor That Will Transform Your Pasturing for Happier Hens!
Are you dreaming of more vibrant pastures, healthier hens, and a garden free from unwanted pests? Look no further! At Better Homes and Harvests, we're passionate about empowering homesteaders to create self-sufficient and thriving ecosystems. This week, we're diving into a game-changing DIY project: building a mobile chicken tractor. This simple structure will revolutionize your approach to pasturing, resulting in happier, healthier chickens, better pest control, and significantly enriched soil for your garden. Imagine the satisfaction of watching your chickens thrive while simultaneously improving your land – it's all within reach!

What is a Chicken Tractor and Why Do You Need One?
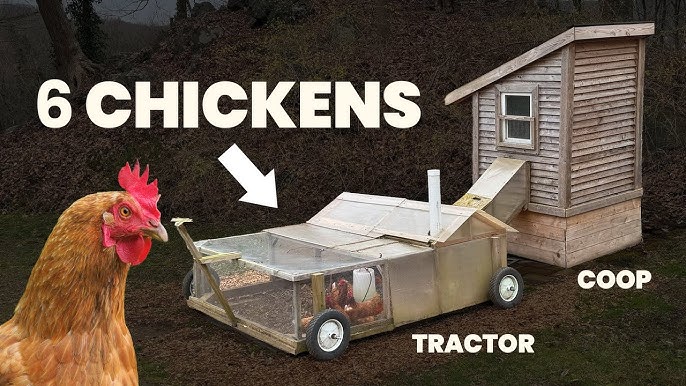
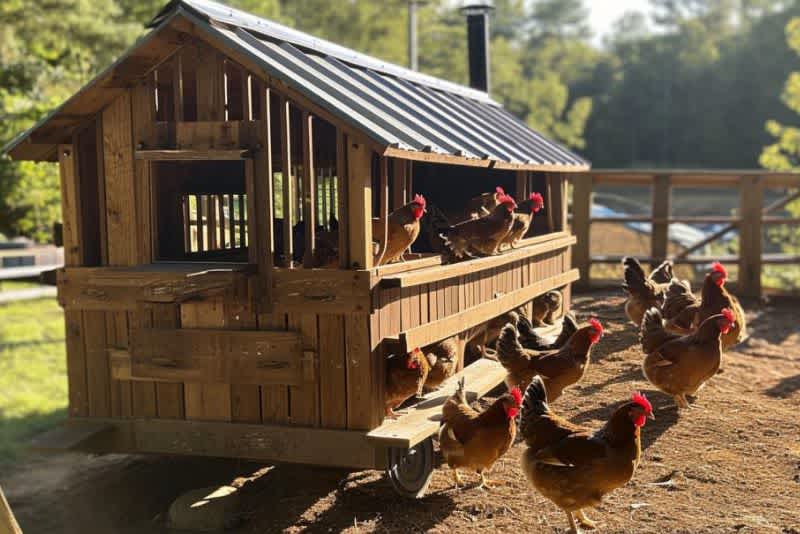
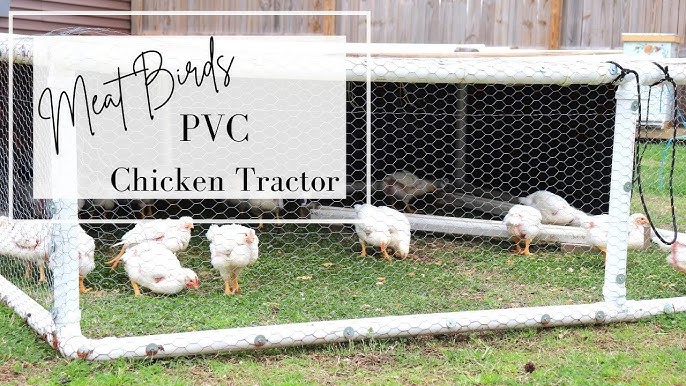
A chicken tractor, also known as a mobile chicken coop or ark, is essentially a floorless, portable enclosure for chickens. Unlike a stationary coop, it's designed to be moved regularly, allowing your chickens to graze on fresh pasture, fertilize the soil with their droppings, and control pests in a controlled environment.
The benefits are truly transformative:
Improved Pasture Health: Chickens naturally scratch and peck, aerating the soil and distributing their nutrient-rich manure evenly. This prevents overgrazing in one area and promotes healthy grass growth.
Happier, Healthier Hens: Access to fresh pasture provides chickens with a diverse diet of insects, seeds, and greens, leading to improved health, stronger immune systems, and more nutritious eggs.
Natural Pest Control: Chickens are voracious insectivores. Deploying your chicken tractor in your garden (after harvest, of course!) can drastically reduce pest populations, naturally.
Cost Savings: By foraging for a significant portion of their food, your chickens will require less purchased feed, resulting in significant cost savings.
Enriched Soil: Chicken manure is a fantastic fertilizer, rich in nitrogen, phosphorus, and potassium. Moving the chicken tractor regularly ensures even distribution, creating fertile soil for your garden.
Building Your Own Chicken Tractor: A Step-by-Step Guide
Ready to get your hands dirty? This comprehensive guide will walk you through the process of building a sturdy and functional chicken tractor. We’ll cover material selection, construction techniques, and essential safety precautions.
Step 1: Planning and Design
Before you start building, it's crucial to plan your design. Consider the following factors:
Number of Chickens: A general rule of thumb is to provide at least 4 square feet of space per chicken inside the coop and 8-10 square feet of run space. Adjust the size of your tractor accordingly.
Mobility: How easy will it be to move the tractor? Consider adding wheels or skids for easier maneuverability.
Predator Protection: Ensure the coop is securely enclosed with sturdy wire mesh to protect your chickens from predators.
Weather Protection: Provide adequate shelter from sun, rain, and wind. A solid roof and windbreaks are essential.
Basic Design Considerations:
- Shape: Rectangular or A-frame designs are popular and relatively easy to build.
- Size: A 4ft x 8ft tractor is a good starting point for 6-8 chickens.
- Height: Ensure the tractor is tall enough for you to comfortably access the inside for cleaning and maintenance.
Step 2: Gathering Materials and Tools
Here's a list of the materials and tools you'll need:
Materials:
- Lumber: Pressure-treated lumber is recommended for the frame to prevent rot. (e.g., 2x4s, 4x4s)
- Wire Mesh: Hardware cloth (1/2-inch or 1-inch) is ideal for the sides and bottom (if you choose to have one).
Recommended Supplier: A local hardware store or farm supply store will have hardware cloth. - Roofing Material: Corrugated metal, plywood, or shingles.
- Wheels (Optional): Two or four wheels for easier mobility.
Recommended Supplier: Harbor Freight or a similar discount tool store. - Fasteners: Screws, nails, staples.
- Hinges: For the door.
- Latch: To secure the door.
- Roosting Bars: Wooden dowels or branches for the chickens to perch on.
Tools:
- Safety Glasses
- Gloves
- Measuring Tape
- Pencil
- Saw (Circular saw or hand saw)
- Drill
- Screwdriver
- Staple Gun
- Hammer
- Wire Cutters
Safety First: Always wear safety glasses and gloves when working with power tools and sharp materials.
Step 3: Building the Frame
- Cut the lumber according to your chosen design.
- Assemble the frame using screws or nails. Ensure the corners are square and the frame is sturdy.
- If adding wheels, attach them to the frame now.
Troubleshooting Tip: If the frame is wobbly, add corner braces for extra support.
Step 4: Adding the Wire Mesh
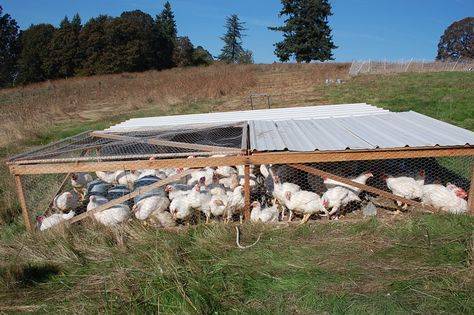
- Cut the wire mesh to fit the sides and any bottom you plan to add.
- Attach the mesh to the frame using staples. Ensure the mesh is taut and securely fastened to prevent chickens from escaping and predators from entering.
- Pay extra attention to the corners and edges, as these are the most vulnerable areas.
Step 5: Constructing the Door
- Cut a section of the wire mesh to create a door.
- Build a small frame around the mesh for added strength.
- Attach the door to the main frame using hinges.
- Install a latch to securely close the door.
Step 6: Installing the Roof
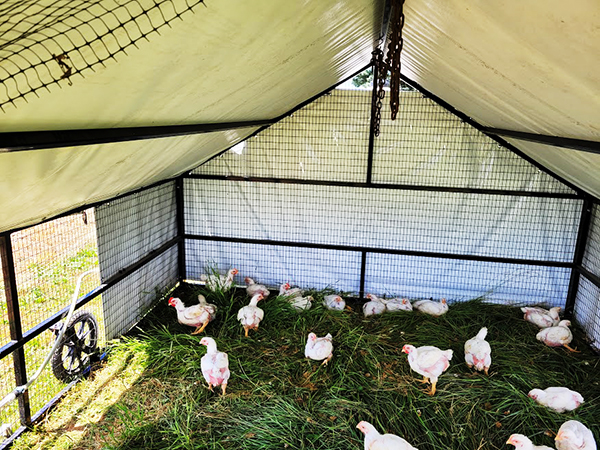
- Cut the roofing material to the appropriate size.
- Attach the roofing material to the frame using screws or nails.
- Ensure the roof is securely fastened and provides adequate protection from the elements.
Step 7: Adding Roosting Bars and Finishing Touches
- Install roosting bars inside the coop at a comfortable height for the chickens.
- Sand down any rough edges or splinters to prevent injury to the chickens.
- Add a waterer and feeder inside the coop.
Personal Touch: I like to add a small dust bathing area inside the coop with sand and diatomaceous earth to help control mites.
Safety Considerations
- Sharp Edges: Be mindful of sharp edges on the wire mesh and roofing material. Use gloves and take precautions to avoid cuts.
- Lifting: If the tractor is heavy, enlist help when moving it to avoid back injuries.
- Predators: Regularly inspect the tractor for any signs of damage or weakness that could allow predators to enter.
- Sun and Heat: Provide adequate shade and ventilation to prevent overheating, especially in hot weather.
Cost and Time Considerations
The cost of building a chicken tractor can vary depending on the materials you choose and the size of the tractor. However, you can expect to spend anywhere from $100 to $300 on materials. The time required to complete the project will also vary, but it typically takes a weekend to build a basic chicken tractor.
My Experience and Lessons Learned
I built my first chicken tractor about five years ago, and it was a game-changer for my homestead. Initially, I underestimated the importance of having a sturdy frame, and my first tractor ended up collapsing after a particularly strong windstorm. I learned the hard way that investing in quality materials and solid construction techniques is essential. Also, make sure you have a handle or a good place to grab, so you can move it easier.
Another challenge I faced was predator protection. I initially used chicken wire for the sides, but a determined raccoon was able to tear through it. Switching to hardware cloth solved that problem. Don't skimp on protection for your flock.
Moving Your Chicken Tractor
The key to success with a chicken tractor is moving it regularly. How often you move it will depend on the size of your tractor, the number of chickens, and the condition of the pasture. A good rule of thumb is to move it every day or two to prevent overgrazing in one area.
- Visual Cue: When the grass in an area is mostly gone move the tractor.
- Don't Wait: Moving it more often prevents bare spots.
Call to Action
Ready to transform your homestead? Building a chicken tractor is a rewarding and impactful project that will benefit both you and your chickens. Give it a try, and share your progress and variations in the comments below! We'd love to see your creations and hear about your experiences. Happy homesteading!
