Level Up Your Garden: DIY 3-Bin Compost System for Homesteaders
Have you ever felt a pang of guilt as you tossed coffee grounds, vegetable peelings, or autumn leaves into the trash? I certainly have. For years, I watched valuable resources leave my homestead, destined for the landfill, when they could be transforming my garden. Then, I discovered the magic of composting, and my guilt turned to "black gold" – nutrient-rich soil amendment that transformed my raised beds. Composting isn't just environmentally friendly; it's a cornerstone of self-sufficient living. It reduces our reliance on store-bought fertilizers, enriches our soil's health, and significantly minimizes our waste.
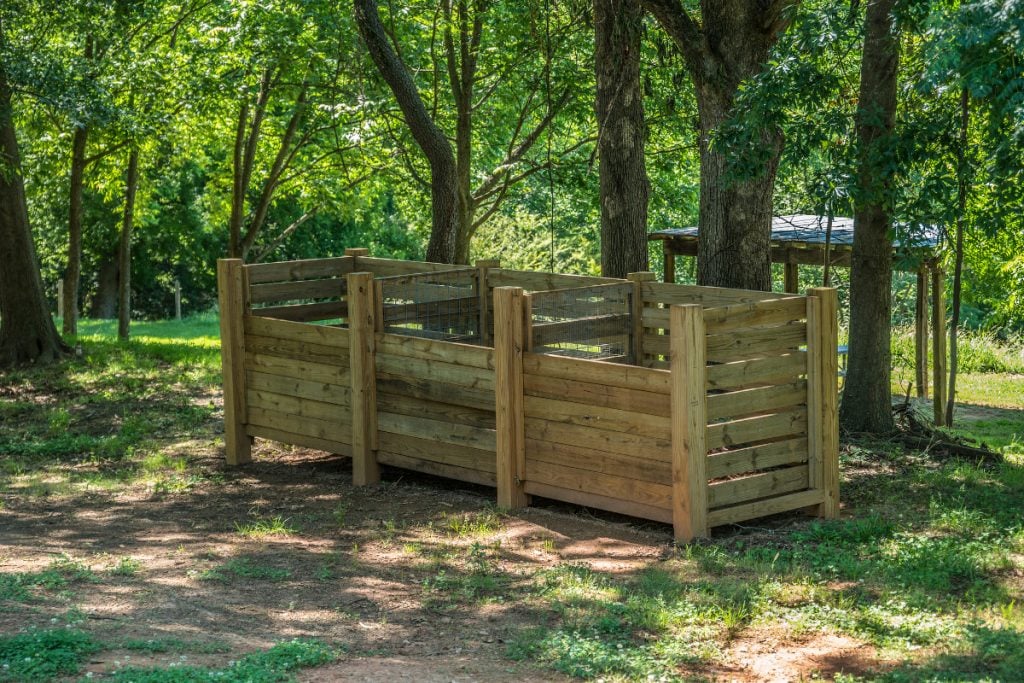
Today, I'm sharing a simple, effective, and manageable solution: building a 3-bin compost system. It's a fantastic project for the late summer and early fall, especially here in the Southeastern United States, giving you ample time to gather materials and prepare for amending your garden beds for the next growing season. Follow along, and you'll be amazed at how easy it is to turn kitchen waste into garden treasure!
Section 1: Understanding the 3-Bin Compost System
The 3-bin compost system is a powerhouse of decomposition, and it's surprisingly simple in its function. Each bin plays a critical role in the process:
Bin 1 (Active Composting): This is where the magic begins! Fresh "greens" (nitrogen-rich materials like kitchen scraps, grass clippings) and "browns" (carbon-rich materials like dried leaves, shredded cardboard) are layered and mixed together. This bin is your active work zone.
Bin 2 (Curing/Decomposition): Once Bin 1 is full, the partially decomposed materials are moved to Bin 2. Here, the compost "cures" and further breaks down. This allows for a more complete decomposition process, ensuring a richer, more stable end product.
Bin 3 (Storage/Ready-to-Use Compost): This is the finished product! The compost in Bin 3 is fully decomposed, nutrient-rich, and ready to be used in your garden. Having a dedicated storage bin ensures you always have a supply of compost ready when you need it.
Why choose a 3-bin system over other composting methods? It offers several advantages:
Improved Aeration: The ability to turn the compost from one bin to another provides excellent aeration, which is crucial for efficient decomposition.
Efficient Decomposition: The distinct stages of decomposition in each bin create an optimized environment for breaking down organic matter.
Continuous Composting: You can continually add materials to Bin 1 while Bin 2 is curing and Bin 3 is storing the finished compost. This creates a continuous cycle.
"Hot" Composting Potential: With proper management (maintaining the right moisture levels and C:N ratio), you can easily achieve "hot" composting in Bin 1, which breaks down materials much faster and kills weed seeds and pathogens.
Let's dispel some common misconceptions about composting. It doesn't have to be smelly. Foul odors usually indicate an imbalance – either too much moisture or a lack of aeration. And while compost piles can attract some insects, a well-maintained system shouldn't attract rodents if you avoid composting meat or dairy products. Chicken wire around the base can deter even the most determined critters.

Key Takeaways: The 3-bin system provides a structured and efficient way to manage the composting process, maximizing nutrient production and minimizing effort.
Section 2: Gathering Your Materials & Tools
Before we get started building, let's gather our materials and tools. Here’s what you’ll need:
Materials:
- Untreated Lumber: Cedar or redwood are excellent choices due to their natural resistance to rot and insects. Pine is a cheaper option, but it will degrade much faster. You will need roughly (adjust according to your desired bin size):
- Sixteen 2"x4"x8' boards for the frame
- Twelve 1"x6"x8' boards for the sides and lids
- Hardware:
- 3" Exterior wood screws
- 3" Hinges (6 total, 2 for each lid)
- Latch hardware to secure lids (optional)
- Wire Mesh (Optional): 1/2" hardware cloth for ventilation.
- Chicken Wire (Optional): To line the bottom and sides to deter rodents.
Estimated Costs: (These are rough estimates and will vary depending on lumber prices in your area)
- Lumber: $150 - $300
- Hardware: $30 - $50
- Wire Mesh/Chicken Wire: $20 - $40
Tools:
- Circular saw or hand saw
- Drill with various drill bits
- Measuring tape
- Level
- Safety glasses
- Gloves
Whenever possible, consider using reclaimed or repurposed materials. Old pallets (check for chemical treatments!), scrap wood from previous projects, or even old fence posts can be incorporated to reduce costs and minimize your environmental impact.

Key Takeaways: Gathering the right materials and tools before starting the project streamlines the process and ensures a successful build. Encourage reusing old resources where possible.
Section 3: Step-by-Step Construction Guide
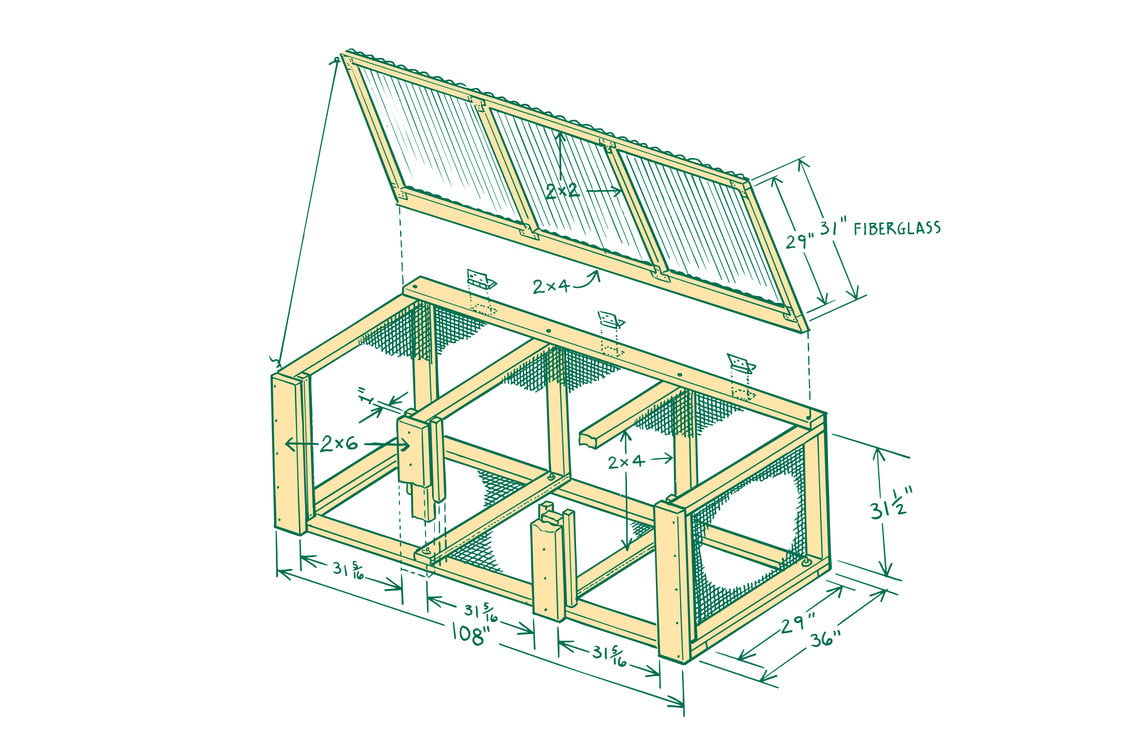
Alright, let's get building! This guide assumes you are building three separate bins, side-by-side. Feel free to adapt the dimensions to fit your space. I'm creating bins that are approximately 3'x3'x3'.
Step 1: Preparing the Site: Choose a level location with good drainage. You'll want easy access to your garden and a water source nearby. Avoid placing the compost bin directly on concrete, as it can inhibit drainage. A grassy or bare earth area is ideal.
Step 2: Building the Frames: Cut the 2"x4" lumber to the following lengths (adjust according to your desired bin size):
- 12 pieces at 3' (for the front and back)
- 12 pieces at 3' (for the sides)
Assemble the frames for each bin by screwing the lumber together to create a 3'x3' square. You should have 12 squares in total. These are the top and bottom frames.
Step 3: Assembling the Bins: Cut the remaining 2"x4" boards to 3' lengths to make the vertical supports. Screw them onto the inside of the wooden frames creating a box-like structure. Each bin should have four vertical supports. Now use the 1"x6" lumber to fill in the sides of each bin. Leave space for ventilation.
Step 4: Adding Ventilation (Optional): Cut pieces of wire mesh to fit the gaps in the sides of the bins. Secure them to the inside of the frames using staples or screws. This will provide additional ventilation and prevent materials from spilling out.
Step 5: Constructing the Lids: Cut the 1"x6" lumber to create lids for each bin. Ensure the lids are slightly larger than the opening to prevent rain from entering directly. Attach the lids to the back of each bin using hinges.
Step 6: Reinforcing the Structure: Add additional supports as needed for stability and longevity. This could involve adding diagonal braces to the frames or reinforcing the corners with metal brackets.

Key Takeaways: Follow the step-by-step instructions carefully to ensure a structurally sound and functional compost system.
Section 4: Maintaining Your Compost System
Building the bins is just the first step. Maintaining them is key to producing high-quality compost.
"Browns" vs "Greens": Maintaining the proper ratio of carbon-rich materials (browns) to nitrogen-rich materials (greens) is crucial. Aim for a ratio of approximately 2:1 or 3:1 (browns:greens).
- Browns: Dried leaves, shredded cardboard, paper, straw, sawdust.
- Greens: Kitchen scraps, grass clippings, coffee grounds, vegetable waste.
Turning the Pile: Turn the compost pile regularly (every 1-2 weeks) to aerate it and promote decomposition. Use a pitchfork or shovel to move the materials from one bin to another.
Moisture Levels: The compost should be moist but not soggy. It should feel like a wrung-out sponge. If it's too dry, add water. If it's too wet, add more browns.
Troubleshooting Common Problems:
- Slow Decomposition: Add more nitrogen-rich materials (greens) or turn the pile more frequently.
- Foul Odors: Turn the pile to improve aeration and add more carbon-rich materials (browns). Ensure there is no meat, dairy, or oily food scraps present.
- Pest Infestations: Add chicken wire around the base of the bin to deter rodents. Avoid composting meat and dairy products.
Key Takeaways: Regular maintenance is essential for efficient composting and a healthy, productive compost system.
Section 5: Harvesting and Using Your Compost
After several months of decomposition, your compost should be ready to use. Here's how to tell:
Signs of Readiness:
- Dark, crumbly texture
- Earthy smell
- No identifiable materials
How to Harvest: Use a shovel or pitchfork to remove the finished compost from Bin 3.
Different Ways to Use the Compost:
- Soil Amendment: Mix compost into garden beds to improve soil structure, drainage, and fertility.
- Top Dressing: Sprinkle compost around the base of plants to provide a slow-release source of nutrients.
- Potting Mix: Combine compost with other ingredients like peat moss and perlite to create a nutrient-rich potting mix for containers.
Using compost in the garden improves soil structure, increases nutrient availability, and enhances plant growth. You'll notice healthier, more vigorous plants and a more bountiful harvest!
Key Takeaways: Harvesting and using your compost is the final step in the process, rewarding your efforts with nutrient-rich soil for a thriving garden.
Section 6: Closing the Loop: Compost and Self-Sufficiency
Building a DIY 3-bin compost system is a simple yet powerful way to enhance your homestead's self-sufficiency. By transforming kitchen waste and yard debris into valuable soil amendment, you're reducing your reliance on external fertilizers, improving your soil health, and minimizing your environmental impact. It's a win-win-win!
The benefits extend far beyond just saving money on fertilizer. You're creating a closed-loop system, where waste becomes a resource, and the health of your soil directly contributes to the abundance of your garden. This is at the heart of the homesteading ethos – working in harmony with nature to create a more sustainable and self-reliant lifestyle.
So, what are you waiting for? Start building your own compost system today and experience the rewards of transforming waste into garden treasure!
Call to Action:
Now it's your turn! Share your own composting tips and experiences in the comments section below. Have you built a compost system? What challenges have you faced, and what successes have you celebrated?
We'd also love to see photos of your DIY compost bin systems! Share them on social media using the hashtag #HomesteadCompost.
For more information on soil health, organic gardening, and permaculture, check out these related articles on the Better Homes and Harvests website: [Insert relevant links here - replace with actual links from the Better Homes and Harvests website].


