
Late Summer Bounty: Heirloom Tomato Pie, Solar Dehydration, and Bokashi Magic
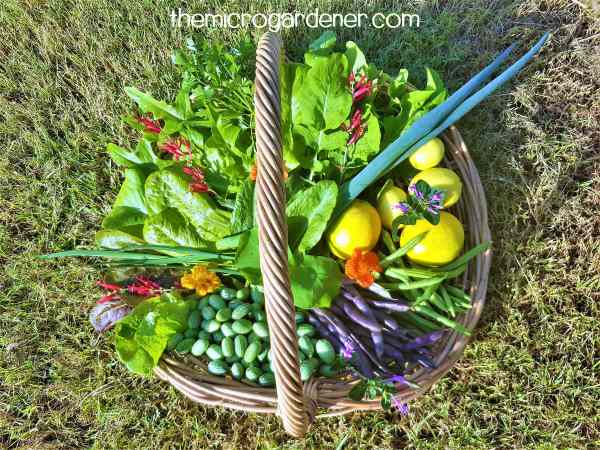
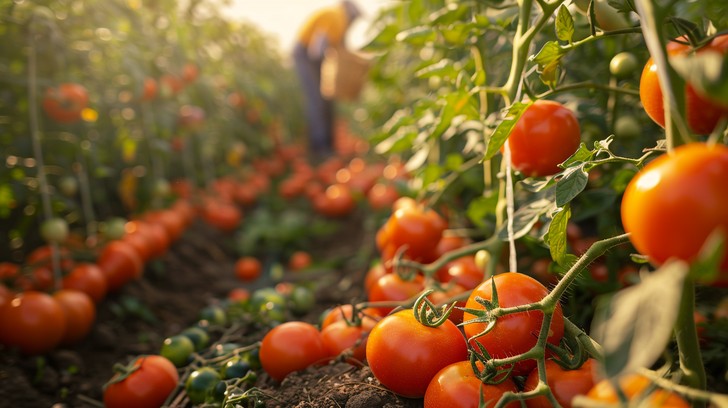
As the late summer sun bathes the homestead in its golden light, the garden overflows with a riot of colors and flavors. Heirloom tomatoes, like the deep purple Cherokee Purple and the vibrant yellow pear, bursting with juicy sweetness, hang heavy on the vines, while the air is thick with the intoxicating scent of basil. Our days are filled with the joyful task of preserving this abundance, transforming sun-ripened tomatoes into sun-dried delicacies and enriching our soil with the magic of Bokashi composting. This Heirloom Tomato Pie, a symphony of summer flavors nestled in a fragrant basil crust, is our tribute to this bountiful season. But our commitment to sustainability extends beyond the kitchen. This week, we are harnessing the sun's energy with our DIY solar dehydrator and unlocking the secrets of Bokashi composting to create nutrient-rich soil. Welcome to the harvest!

Heirloom Tomatoes: A Rainbow of Flavors
Heirloom tomatoes are so much more than just red, round orbs! These living antiques boast a breathtaking diversity in color, shape, size, and, most importantly, flavor. From the dusky, earthy sweetness of a Cherokee Purple to the bright, tangy bite of a Yellow Pear, each variety offers a unique culinary experience. These are the tomatoes our grandparents grew, passed down through generations, carefully preserved for their exceptional qualities. Seed saving and propagation are vital aspects of heirloom tomato preservation, ensuring these unique varieties continue to thrive for future generations.
Growing heirloom tomatoes can be incredibly rewarding. Here are a few tips to help your plants flourish:
- Support: Provide adequate support with sturdy stakes or cages. Heirloom varieties tend to be sprawling and heavy with fruit.
- Watering: Water deeply and consistently, especially during dry spells. Aim for consistent soil moisture but avoid overwatering, which can lead to disease.
- Pest and Disease Control: Employ organic methods to protect your plants. Companion planting with basil and marigolds can deter pests. Neem oil is effective against many common tomato pests. Proper air circulation helps prevent fungal diseases.
Consider adding these heirloom tomato varieties to your garden:
- Cherokee Purple: Known for its smoky, complex flavor.
- Brandywine: A large, beefsteak tomato with a rich, creamy texture and exceptional taste.
- San Marzano: Prized for its meaty flesh, low acidity, and intense flavor, ideal for sauces and canning.
- Yellow Pear: A small, teardrop-shaped tomato with a mild, sweet flavor, perfect for salads and snacking.

Heirloom Tomato Pie with Basil-Infused Crust: A Taste of Summer
This Heirloom Tomato Pie is a celebration of summer's finest flavors. The basil-infused crust adds a fragrant and herbaceous note, while the colorful heirloom tomatoes create a beautiful and delicious filling.
Ingredients:
- Crust:
- 1 1/2 cups all-purpose flour
- 1/2 tsp salt
- 1/2 cup (1 stick) cold unsalted butter, cut into cubes
- 1/4 cup ice water
- 1/4 cup chopped fresh basil
- Filling:
- 2 lbs assorted heirloom tomatoes, sliced 1/4 inch thick
- 1/2 tsp salt
- 1/4 tsp black pepper
- 1/2 cup mayonnaise (homemade or high-quality store-bought)
- 1/4 cup grated Parmesan cheese
- 1/4 cup chopped fresh basil
- 2 cloves garlic, minced
Instructions:
- Make the Crust: In a large bowl, whisk together flour and salt. Cut in butter using a pastry blender or your fingers until the mixture resembles coarse breadcrumbs. Stir in basil. Gradually add ice water, mixing until dough comes together. Form a disc, wrap, and chill for 30 minutes.
- Preheat oven to 375°F (190°C). Roll out dough on a lightly floured surface and transfer to a 9-inch pie plate. Trim and crimp edges.
- Prepare Filling: In a colander, toss sliced tomatoes with salt and pepper. Let drain for 30 minutes to remove excess moisture. This step is crucial to prevent a soggy pie.
- Combine the Binder: In a bowl, combine mayonnaise, Parmesan cheese, basil, and garlic.
- Assemble the Pie: Spread mixture evenly over the bottom of the crust. Arrange tomato slices on top in a single layer, artfully displaying their different colors and textures.
- Bake: Bake for 45-50 minutes, or until crust is golden brown and filling is set. Let cool slightly before slicing and serving. Consider serving with a side of balsamic glaze for added flavor complexity.
Variations:
- Cheese: Substitute fresh mozzarella or goat cheese for Parmesan for a different flavor profile.
- Herbs: Add thyme or oregano to the filling for additional herbal notes.
DIY Solar Food Dehydrator: Harnessing the Sun's Power
Preserve your late-summer tomato harvest for months to come with a DIY solar food dehydrator! This project is a fantastic way to utilize the sun's energy and reduce food waste.

Materials List:
- Repurposed corrugated metal sheets
- Reclaimed cedar wood planks
- Glass or plexiglass panels
- Black non-toxic paint
- Hardware cloth or mesh drying racks
- Hinges
- Latches
- Thermometer (analog or digital)
- Drill
- Saw
- Screws
- Measuring tape
Instructions:
- Build the Frame: Construct a wooden frame box to the desired dimensions using reclaimed cedar wood planks for durability and weather resistance. The size will depend on the amount of food you want to dry. Ensure the box is sturdy and well-insulated. Paint the interior of the box with black non-toxic paint to absorb heat from the sun.
- Add Corrugated Metal: Attach repurposed corrugated metal sheets to the exterior of the frame to create a reflective surface that directs sunlight into the dehydrator. Angle the corrugated metal slightly to maximize sunlight absorption.
- Install Glass Panel: Cut a piece of glass or plexiglass to fit the top of the frame and create a solar panel. Attach the glass panel securely to the frame using hinges. This will allow you to open and close the dehydrator to regulate temperature and ventilation.
- Create Drying Racks: Cut hardware cloth or mesh to fit inside the frame and create drying racks. Space the racks evenly throughout the dehydrator to allow for adequate airflow. Ensure the racks are removable for easy cleaning.
- Add Ventilation: Drill ventilation holes at the top and bottom of the dehydrator to allow for airflow and prevent moisture buildup. Cover the ventilation holes with screen to keep out insects.
- Add Thermometer: Install a thermometer inside the dehydrator to monitor the temperature. The optimal drying temperature for most foods is between 120°F and 140°F (49°C and 60°C).
Dehydrate tomatoes until leathery but not brittle, usually 6-12 hours, depending on the sun intensity and tomato slice thickness. Store your dehydrated tomatoes in Ball canning jars for long-term preservation.
Food Safety Note: Ensure your dehydrator reaches adequate temperatures to prevent bacterial growth. Monitor the temperature regularly and adjust ventilation as needed.
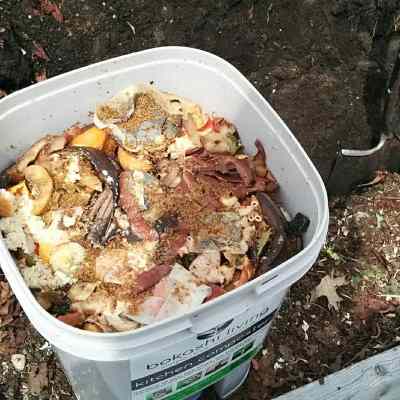
Bokashi Composting: Fermenting Your Way to Rich Soil
Bokashi composting offers a unique approach to waste reduction and soil enrichment. Unlike traditional composting, Bokashi uses an anaerobic fermentation process, allowing you to compost a wider range of food waste, including meat and dairy.
Instructions:
- Obtain Bokashi bran, a substrate inoculated with beneficial microorganisms that drives the fermentation process.
- Procure a Bokashi bucket (comes with a spigot).
- Start by layering the bottom of the Bokashi bucket with a handful of Bokashi bran.
- Add food scraps (vegetable scraps, fruit peels, coffee grounds, meat, dairy, etc.) to the bucket, chopping them into smaller pieces for faster fermentation.
- Sprinkle a layer of Bokashi bran over the food scraps to inoculate them with beneficial microorganisms.
- Compress the food scraps using a plate or a masher to remove air pockets and create an anaerobic environment.
- Repeat steps 3-5 until the bucket is full.
- Drain the Bokashi tea (liquid) from the spigot every few days and dilute it with water (1:100 ratio) to use as a fertilizer for your plants.
- Bury the fermented food waste in your garden or compost pile after 2-4 weeks, where it will quickly break down and enrich the soil. A simple trench can be dug in the garden to bury the Bokashi compost in.
Important Notes:
- Bokashi tea is highly concentrated and must be diluted properly to avoid burning plants.
- The buried waste will continue to break down in the soil, enriching it with valuable nutrients.
Closing Reflection
As the days grow shorter, we find ourselves filled with gratitude for the abundance of the late summer harvest. By embracing sustainable practices like solar dehydration and Bokashi composting, we can extend the life of our harvest, reduce waste, and enrich our soil. These are the gifts that keep on giving, and they are all interwoven with the beautiful taste of this Heirloom Tomato Pie.

What are your favorite ways to celebrate the late summer harvest? What are your top tips for solar dehydration and Bokashi composting? Please share your thoughts and experiences in the comments below!
Keywords: organic gardening, seasonal harvest, homegrown, compost, sustainable home, cozy living, backyard projects, farmhouse life, Heirloom Tomato Pie, Solar Food Dehydrator, Bokashi Composting, heirloom tomatoes (Cherokee Purple, Brandywine, San Marzano, Yellow Pear), food preservation, solar dehydration, Bokashi bran, sustainable gardening, composting, late summer harvest, tomato recipes, homemade pie, dehydration tips, composting tips, Ball canning jars, seed saving, companion planting, neem oil.