Insulate to Elevate: A Step-by-Step Guide to Warmth and Savings in Your Old Farmhouse
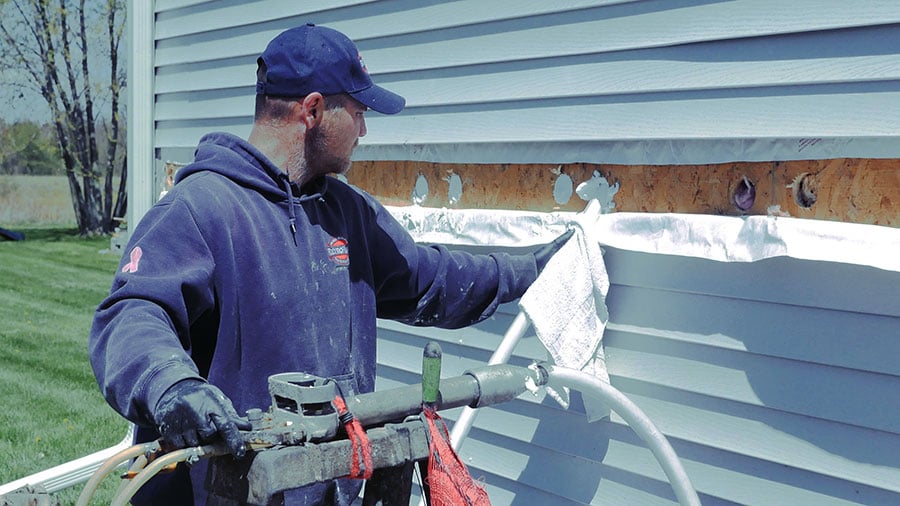
Is your old farmhouse feeling more like an icebox in winter and an oven in summer? Are you watching your hard-earned money disappear with each energy bill? You're not alone! Many homesteaders struggle with the challenges of keeping these beautiful, historic homes comfortable and energy-efficient. But don't despair! With a little DIY elbow grease and the right materials, you can significantly reduce your energy bills and enhance your home's comfort. This guide will walk you through insulating your existing wall cavities from the inside using blown-in cellulose insulation. It's a project that's manageable for intermediate DIY enthusiasts with some basic carpentry skills and delivers impressive results. So, grab your tools, and let's get started on a journey to a warmer, more sustainable homestead!
Why Insulate Your Old Farmhouse?
Before we dive into the how-to, let's talk about the why. Old farmhouses, while charming, often lack adequate insulation. This means heat escapes in the winter, and unwanted heat pours in during the summer. Properly insulating your home offers a multitude of benefits:
- Lower Energy Bills: This is the most obvious benefit. Less heat loss/gain translates directly into lower heating and cooling costs, leading to significant homestead energy savings.
- Increased Comfort: Consistent temperatures throughout your home mean no more drafty rooms or sweltering attics.
- Reduced Environmental Impact: By using less energy, you're reducing your carbon footprint and contributing to a more sustainable lifestyle.
- Increased Home Value: A well-insulated home is more attractive to potential buyers.
- Sound Dampening: Cellulose insulation excels at reducing noise transmission between rooms and from outside.
Why Choose Blown-In Cellulose Insulation?
When it comes to insulating old farmhouses, several options exist, including fiberglass batts, spray foam, and rigid foam boards. However, blown-in cellulose insulation offers several advantages, especially for existing wall cavities:
- Excellent R-Value: Cellulose boasts a high R-value per inch, providing effective thermal resistance. R-value measures an insulation material's resistance to heat flow; the higher the R-value, the better the insulation.
- Eco-Friendly: Made from recycled paper, cellulose is a sustainable and environmentally friendly choice. This aligns perfectly with the ethos of many homesteaders.
- Fills Irregular Cavities: Blown-in cellulose can easily fill irregular wall cavities and hard-to-reach areas, ensuring complete coverage and minimizing air gaps.
- Sound Dampening: As mentioned earlier, cellulose provides excellent sound insulation, creating a quieter and more peaceful living environment. This is particularly beneficial in a farmhouse that might be exposed to farm equipment noise.
- Fire Resistance: Cellulose is treated with fire retardants, making it a safer option compared to some other insulation materials.
- Affordable: Cellulose insulation is generally more affordable than spray foam, making it a budget-friendly option for homesteaders.
Before You Begin: Assess and Prepare
Before you start drilling holes and blowing in insulation, there are a few crucial steps to take:
- Identify Potential Hazards: Old farmhouses may contain asbestos or lead paint. If you suspect the presence of these materials, have them professionally tested and removed before proceeding. Disturbance of these materials can release harmful fibers or particles into the air.
- Check for Existing Insulation: Determine if there's already insulation in your walls. If so, assess its condition and type. Adding more insulation on top of existing, degraded insulation may not be effective. In some cases, you may need to remove the old insulation first.
- Find and Seal Air Leaks FIRST! This is critical. Caulking around windows and door frames, sealing cracks in the foundation, and weatherstripping are vital. Insulation only works effectively if air movement is minimized. It's like wearing a winter coat with the zipper open – you'll still be cold!
- Diagnose Heat Loss with an Infrared Thermometer (Bonus Tip): An infrared thermometer can help you identify areas of significant heat loss. Scan your walls, ceilings, and floors on a cold day to pinpoint cold spots. This will help you prioritize your insulation efforts. This step can truly pinpoint where the insulation is missing or weak.
Materials and Tools List
Here's a comprehensive list of what you'll need for this project. Prices are approximate and may vary depending on your location and supplier. Be sure to shop around for the best deals.
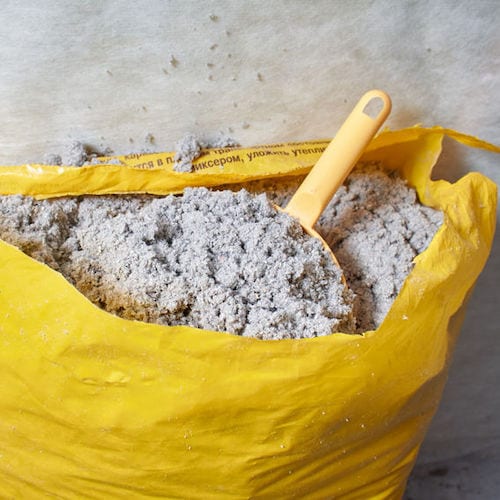
- Blown-In Cellulose Insulation: Calculate the amount needed based on your wall cavity size and desired R-value. Expect to pay around $0.50-$1.00 per pound. Find a local supplier here.
- Insulation Blower: You can rent one from most home improvement stores for around $50-$100 per day. Many suppliers will offer a free blower rental with a minimum cellulose purchase.
- Drill: With a 2-3 inch hole saw attachment.
- Hole Saw: Choose a size appropriate for the insulation hose.
- Caulk Gun and Caulk: To seal the access holes.
- Wood Plugs or Patches: To cover the access holes (optional, depending on your wall finish).
- Drywall Knife or Utility Knife: For cutting wood patches or removing excess caulk.
- Safety Glasses: Protect your eyes from dust and debris.
- Dust Mask or Respirator: Essential for protecting your lungs from cellulose dust. A properly fitted N95 or P100 respirator is recommended.
- Gloves: Protect your hands from irritation.
- Tyvek Suit (Optional): Provides full body protection from dust and insulation.
- Ladder or Step Stool: To reach higher areas.
- Measuring Tape: For accurate measurements.
- Stud Finder: To locate studs and avoid drilling into them.
Estimated Cost: $300 - $800 (depending on the size of your farmhouse and the amount of insulation required).
Step-by-Step Insulation Guide
Follow these steps to insulate your old farmhouse walls from the inside:
Step 1: Prepare the Walls
- Remove any wall hangings, pictures, or decorations from the walls you'll be insulating.
- Locate the studs using a stud finder. Mark the location of each stud with a pencil. You'll need to drill holes between the studs.
Step 2: Drill Access Holes
- Using your drill and hole saw attachment, drill two holes between each set of studs. One hole should be near the top of the wall cavity, and the other near the bottom. Staggering the holes ensures complete coverage.
- Important: Drill carefully to avoid hitting electrical wiring or plumbing. If you're unsure about what's behind the wall, consult a professional.
Step 3: Set Up the Insulation Blower
- Follow the manufacturer's instructions for setting up the insulation blower.
- Place the blower outside or in a well-ventilated area.
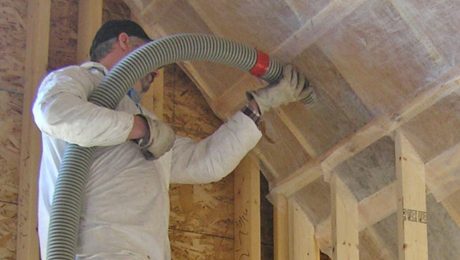
- Connect the insulation hose to the blower and the other end to the wall cavity.
Step 4: Blow in the Insulation
- Wearing your safety glasses, dust mask, and gloves, insert the insulation hose into the bottom access hole.
- Begin blowing in the cellulose insulation, filling the cavity from the bottom up.
- Monitor the insulation level by observing the top access hole. Once the insulation starts to spill out of the top hole, the cavity is full.
- Repeat this process for each wall cavity.
Step 5: Seal the Access Holes
- Once all the cavities are filled, remove the insulation hose and seal the access holes with caulk.
- If desired, you can cover the holes with wood plugs or patches for a more finished look. Sand and paint the patches to match your existing wall finish.
Step 6: Clean Up
- Clean up any spilled insulation with a vacuum cleaner.
- Dispose of the used insulation bags properly.
Safety First!
- Ventilation is Key: Ensure proper ventilation throughout the work area to minimize dust exposure. Open windows and use fans to circulate air.
- Wear Proper PPE: Always wear safety glasses, a dust mask or respirator, and gloves when working with cellulose insulation.
- Avoid Electrical Hazards: Be extremely careful when drilling near electrical wiring. Turn off the power to the circuit you're working on.
- Know Your Limits: If you're uncomfortable with any part of this project, hire a professional.
My Homesteading Experience
I remember the first winter after insulating our old farmhouse with blown-in cellulose. The difference was remarkable! We used to rely heavily on our wood stove to keep the living room warm, but now, the heat was evenly distributed throughout the house. Our energy bills plummeted, and we no longer had to huddle around the stove to stay warm. It was truly a game-changer for our homestead! And, the noise reduction was an unexpected bonus! The sounds of tractors and other farm equipment became much less intrusive, making our home a more peaceful sanctuary.
Bonus Tip: Sealing Air Leaks Before Insulating (Seriously, Do This!)
Before you even think about insulation, address those sneaky air leaks. Caulk around windows and door frames, seal any cracks in the foundation, and use weather stripping on doors. These measures dramatically improve the effectiveness of your insulation. It's like plugging the holes in a bucket before filling it with water.

Take Action Today!
Insulating your old farmhouse with blown-in cellulose is a rewarding project that will save you money, improve your comfort, and reduce your environmental impact. So, what are you waiting for? Take the first step towards a warmer, more sustainable homestead today!
We want to hear from you! Share your insulation experiences in the comments below. Do you have any questions about the process? What challenges did you face? Let's learn from each other and build a community of knowledgeable homesteaders.
Subscribe to the Better Homes and Harvests newsletter for more practical homesteading advice, DIY projects, and sustainable living tips!
Happy insulating!
