
Honoring the Harvest: Three Sisters Stew, Hugelkultur Beds, and Vermicomposting Magic
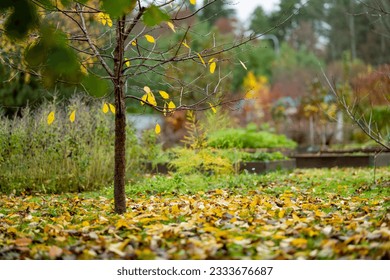
As the last crimson maple leaves flutter to the earth and a crisp chill settles in, carried on the scent of woodsmoke, we turn inward, appreciating the bounty of the harvest and preparing for the quiet embrace of winter under blankets of fresh snow. Few dishes resonate with history and heartiness like Three Sisters Stew, a vibrant celebration of 'Blue Clarage' corn, 'Scarlet Runner' beans, and 'Lakota' squash—a testament to the agricultural genius of the Iroquois Confederacy. Today, we honor this timeless tradition by crafting this nourishing feast, building a thriving soil ecosystem, and celebrating the quiet power of self-sufficiency through the long winter months.

Three Sisters Stew Recipe:
The Stew: A Legacy of Flavor
The Three Sisters planting method—'Blue Clarage' corn, 'Scarlet Runner' beans, and 'Lakota' squash grown together—is a sustainable agricultural practice perfected by the Iroquois Confederacy. The corn provides a sturdy stalk for the beans to climb, the beans fix vital nitrogen in the soil, and the sprawling squash shades the ground, suppressing weeds and conserving precious moisture. The beauty of this method extends to the kitchen, where these three ingredients create a wholesome and deeply flavorful stew.
Ingredients from the Land
- 1 cup dried 'Blue Clarage' Corn Kernels (soaked in spring water overnight)
- 1 cup dried 'Scarlet Runner' Beans (soaked in spring water overnight)
- 2 cups cubed 'Lakota' Squash
- 1 large Yellow Onion, diced finely
- 2 cloves Garlic, minced with a granite mortar and pestle
- 4 cups Homemade Vegetable Broth (from garden scraps)
- 1 tbsp Cold-Pressed Olive Oil
- Sea Salt and Freshly Ground Black Pepper to taste
- Optional: 1/2 cup Smoked Turkey or Venison (sourced sustainably from local hunters, for added flavor)
Steps to a Hearty Stew
Sauté Aromatics: In a heavy-bottomed cast iron pot, heat cold-pressed olive oil over medium heat. Add finely diced yellow onion and minced garlic, and sauté until translucent and fragrant, about 5 minutes.

Add the beans and corn: Add the soaked and drained 'Blue Clarage' corn and 'Scarlet Runner' beans to the pot. Pour in homemade vegetable broth and bring to a gentle simmer.
Simmer Slowly: Reduce heat to low, cover, and simmer for 1-1.5 hours, or until the 'Scarlet Runner' beans are tender, stirring occasionally to prevent sticking.

Add the Squash: Add the cubed 'Lakota' squash to the pot and continue simmering for another 30 minutes, or until the squash is fork-tender and infused with the flavors of the stew.
Season and Serve: Season generously with sea salt and freshly ground black pepper to taste. Serve hot, garnished with chopped fresh parsley from the garden, if available.

Personal Anecdote: My grandfather, who learned gardening from his Seneca neighbors, always emphasized that the Three Sisters, when planted and cooked together, possessed a flavor and spiritual connection you couldn’t replicate. He said it was more than just a meal; it was a prayer.
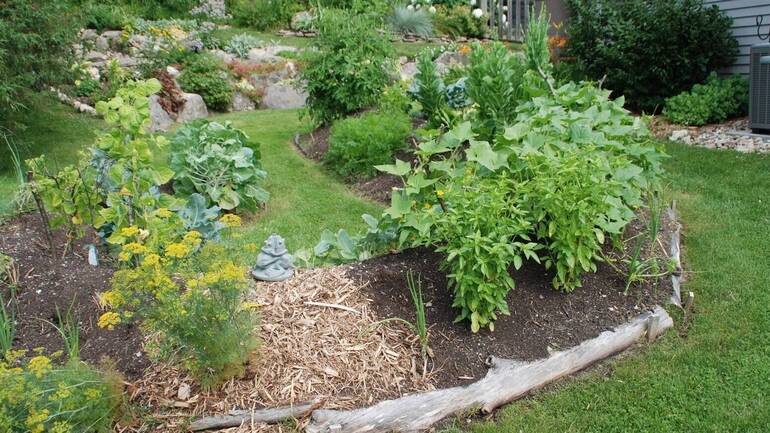
Building a Hugelkultur Bed:
Hugelkultur: Building Soil, Naturally
Hugelkultur, meaning "mound culture" in German, is a sustainable gardening technique that utilizes decaying hardwood to create fertile, moisture-retentive raised beds, emulating the natural decomposition processes of the forest floor. It’s a form of composting in place, creating a long-lasting, self-fertilizing garden bed! It also provides a habitat for beneficial insects and microorganisms, creating a vibrant soil ecosystem.
Materials and Design
Gather decaying oak and birch logs (at least 6 inches in diameter), branches, fallen maple leaves, grass clippings, kitchen compost, aged horse manure, and topsoil from the garden. The size depends on available space, but a good start is 4 feet high and 8 feet wide at the base.
Steps for Building Your Bed
Dig a shallow trench: Excavate a shallow trench, approximately 1 foot deep, where the bed will be located. This helps retain moisture and encourages root growth.
Layer Logs and Branches: Place the largest, most decayed oak logs at the bottom of the trench, followed by smaller birch branches and twigs, creating air pockets for decomposition.
Add Organic Matter: Cover the wood with generous layers of fallen maple leaves, grass clippings, kitchen compost (avoiding meat and dairy), and aged horse manure, ensuring each layer is thoroughly dampened.
Top with Soil: Top the mound with a thick layer of topsoil or finished compost, creating a planting surface rich in nutrients.
Let it Settle: Allow the bed to settle for at least a few weeks before planting, allowing the decomposition process to begin and the soil structure to improve.
Practical Example: We built our Hugelkultur bed last fall, and this spring, the soil was incredibly rich, dark, and loamy. The vegetables, especially the squash and pumpkins, thrived like never before, requiring minimal watering even during the driest summer months!
Vermicomposting for Soil Enrichment:
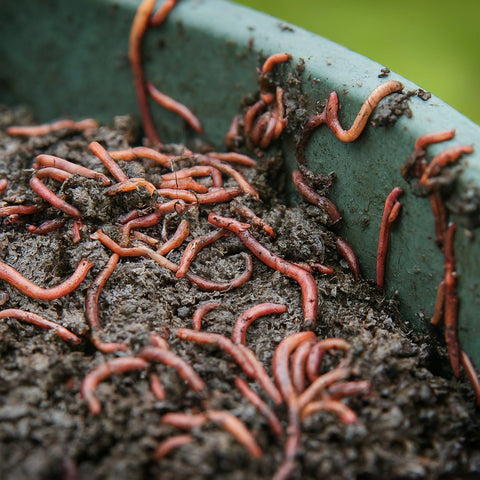
Vermicomposting: Worms to the Rescue
Vermicomposting uses red wiggler worms (Eisenia fetida) to break down organic waste, transforming kitchen scraps and garden debris into nutrient-rich castings (worm poop) that are an exceptional natural fertilizer for enriching soil and feeding plants. This sustainable method significantly reduces household waste and creates a valuable resource for your garden.
Building Your Vermicomposting Bin
Select a Container: Use a sturdy plastic bin (opaque, with a lid), a repurposed wooden box, or construct a bin from reclaimed pallet wood, ensuring it is food-safe and well-ventilated.
Drill Drainage Holes: Drill several small holes in the bottom of the container for drainage and aeration, preventing waterlogging.
Add Bedding: Layer shredded unbleached newspaper, corrugated cardboard (soaked and torn), or coconut coir as bedding for the worms, providing them with a comfortable habitat and a food source.
Introduce Worms: Add approximately 1 pound of red wiggler worms (Eisenia fetida) to the bin, gently placing them on top of the bedding.

Feed the Worms: Feed the worms kitchen scraps, such as fruit and vegetable peels (avoiding citrus), coffee grounds, crushed eggshells, and tea bags (remove staples). Bury the food scraps under the bedding to prevent fruit flies.
Harvest Castings: After 3-6 months, when the bin is filled with dark, crumbly castings, harvest the worm castings. There are several methods for harvesting, including the "dump and sort" method or the "migration" method. The castings can then be used as a soil amendment in your Hugelkultur bed or added directly to your garden.
Sustainability Reminder: Vermicomposting drastically reduces household waste and creates a valuable, sustainable resource for your garden, enriching your soil and promoting healthy plant growth—a true win-win for both you and the environment! Using castings in your Hugelkultur bed boosts the soil fertility for years to come!
Fall Activities: Crafts and Seed Saving
Fall is the perfect time to engage in traditional crafts and prepare for the next growing season. Two simple but meaningful activities are crafting corn husk dolls and saving seeds from your garden. These activities connect us to nature, encourage creativity, and promote self-sufficiency.
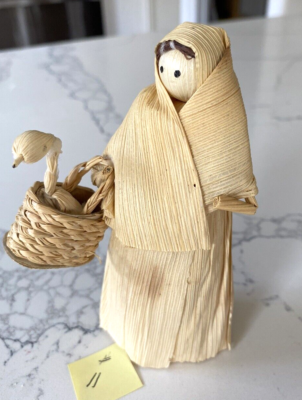
Craft Instructions: Corn Husk Dolls
- Soak the naturally dried Corn Husks in warm water for at least thirty minutes, to prevent them from cracking and allow them to be easily manipulated
- Bundle five to seven soaked corn husks together, and tie securely at the top with twine to create the doll's head
- Tie another segment below the head, about an inch down, to create the doll's shoulders
- Split the remaining bundles of husks in half, pulling each bundle to opposite sides to create two legs
- Tie the bottom of the legs with twine to create feet. Cut off the excess twine.
- Dry the dolls in the sun, or near a heater before storing. They can be decorated with paints, and natural dyes.
Seed Packet Preparation
- Gather seeds from your favorite plants and vegetables in late autumn. Focus on heirloom varieties for better results
- Dry the seeds completely on trays, ensuring all moisture is removed. Store them in a cool dark space in an airtight jar or bag
- Make small seed packets with wax paper, parchment paper, or Kraft paper. Fold paper to size and glue, or sew the seams.
- Label each packet with the plant type and the date the seeds were harvested. Write clear instructions with ink or a dark pen to prevent smudging.
- Include planting instructions and other relevant information on the packets. Keep packets in a cool, dry, dark location, such as a basement drawer.
As winter approaches, take time to reflect on the abundance of the past year and appreciate the simple, profound gifts of nature. The cycles of the seasons continue, offering new opportunities for growth, resilience, and renewal. Each flake of snow is a unique reminder.
What are your favorite ways to honor the harvest, prepare for winter's chill, and connect with the traditions of the land? Share your experiences, recipes, and tips in the comments below! We'd love to hear from you! Embrace the ancient wisdom of sustainable practices, build a thriving ecosystem in your backyard, and create a home that is both nourishing and deeply connected to the rhythms of the earth. Every seed you save, every worm casting you add to the soil, brings you closer to a more fulfilling, harmonious, and self-sufficient way of life.