
Homestead Renewal: A Natural Cleaning & Organization Blitz for Spring's Arrival
Are you tired of the lingering musty smell of winter clinging to every corner of your homestead? Does your pantry resemble a chaotic avalanche of half-used ingredients, threatening to spill forth every time you open the door? Are your grandmother's treasured linens, stored away for generations, looking more yellowed than the antique lace you painstakingly restored last summer?
Spring is just around the corner, and that means it’s time for more than just planting seeds! It’s a chance to breathe new life into your home and prepare for the abundance of the coming year with a pre-spring renewal. This isn't just cleaning; it's a conscious effort to use natural, sustainable methods to refresh our living spaces, declutter our belongings, and set the stage for a vibrant season ahead. Let's dive in!

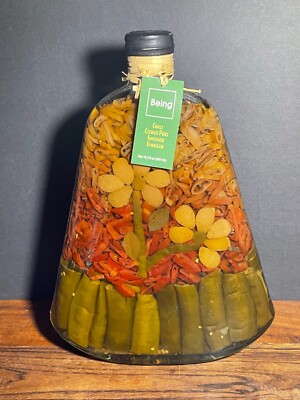
A clear glass jar filled with brightly colored citrus peels submerged in vinegar, infusing a natural cleaner.
Part 1: Zesty Clean: Crafting Citrus Vinegar All-Purpose Cleaner
One of the easiest and most rewarding ways to embrace a natural cleaning routine is by crafting your own all-purpose citrus vinegar cleaner. Citrus peels are fantastic for degreasing and deodorizing, and by repurposing them, we reduce waste and embrace a more eco-friendly approach. This DIY cleaner is not only effective but also leaves a refreshing, natural scent throughout your home.
Ingredients:
- Citrus peels from 5-6 oranges (Valencias for their sweet fragrance)
- 3-4 lemons (Meyer lemons preferred for their less acidic scent)
- Peels from a single grapefruit (Ruby Red for visual appeal) – enough to fill a quart-sized mason jar.
- Plain white vinegar (5% acidity)
- Large, wide-mouth mason jar (32 oz)
- Two amber glass spray bottles (16 oz)
Step-by-Step Instructions:
As you consume citrus fruits throughout the week, diligently save the peels. Remove any stickers meticulously, using a citrus sticker removing sponge if needed, and avoid including large amounts of the white pith (it can make the cleaner bitter, altering the scent profile).
Place the citrus peels in a clean, large mason jar. Pack them in tightly, layering them aesthetically with oranges at the bottom, then lemons, finished with the ruby grapefruit peel curls.
Pour white vinegar over the peels, ensuring they are completely submerged. If needed, weigh them down with a small glass weight, such as a thoroughly cleaned river stone.
Seal the jar tightly with an airtight lid and store it in a cool, dark place – ideally a pantry shelf away from direct sunlight – for 2-4 weeks. The longer it sits, the stronger the citrus infusion will be. Gently shake the jar every few days to aid extraction, noticing the subtle color changes in the vinegar.
After the infusion period, strain the vinegar through a fine-mesh sieve lined with a double layer of cheesecloth to remove even the smallest particles of peel. Compost the spent peels in your compost tumbler.
Dilute the citrus-infused vinegar with distilled water in a 1:1 ratio (or stronger for tough cleaning jobs, such as soap scum in the bathroom) and pour it into the amber glass spray bottles using a small stainless steel funnel.
Usage Tips: Use on countertops (test marble first!), sinks, stovetops, and floors (test on a small, inconspicuous area first). For extra scent, add 5 drops of lavender essential oil and 3 drops of tea tree oil per 16 oz bottle.
Part 2: Pantry Perfection: Implementing the F.I.F.O. System
A well-organized pantry is a cornerstone of a sustainable homestead. Implementing the First-In, First-Out (FIFO) system reduces food waste, ensures freshness, simplifies meal planning, and ultimately cuts down on grocery spending. It’s a simple yet powerful method that can transform your pantry from a source of stress into a source of culinary inspiration.
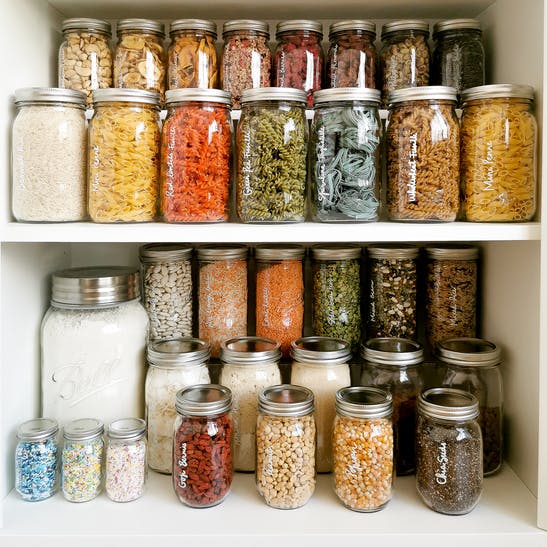
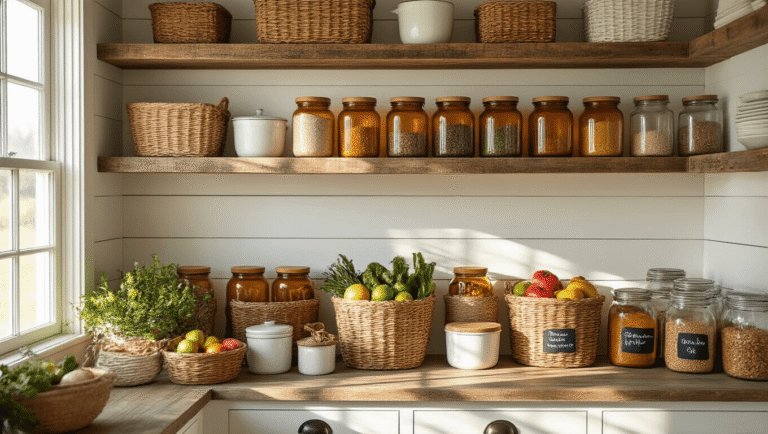
A neatly arranged pantry shelf featuring quilted mason jars filled with grains, beans, and dried goods, each labeled with chalkboard labels and elegant handwriting.
Materials:
- Twelve quilted mason jars (pint and quart sizes)
- Chalkboard labels with decorative borders
- Fine-tipped white chalk marker
- Clean, open pantry shelves made of reclaimed wood
Step-by-Step Instructions:
Take everything out of your pantry, spreading the contents onto a large, clean tablecloth on your kitchen table. Discard expired items (check the dates carefully!) and consolidate partially used packages into new, properly labelled jars.
Wash and thoroughly dry your mason jars. Affix a chalkboard label to each jar, writing the name of the food item (e.g., "Organic Rolled Oats," "Dried Black Beans," "Unbleached All-Purpose Flour") and the purchase date with the white chalk marker.
Pour dry goods (grains, beans, flour, sugar, etc.) into the labeled mason jars. When adding new food, always place the oldest supply in front of the newest supply – this may mean temporarily removing the current jar to place the new one behind.
Arrange the jars on your pantry shelves, grouping similar items together. Place frequently used items, like your favorite granola and quick oats, at eye level and less-used items, such as specialty flours for baking, higher or lower down.
Consistently check the dates on the labels during your weekly meal planning and be sure to use the oldest items first, incorporating them into your recipes.
Troubleshooting: Address potential issues (pests, moisture) with natural solutions. Tuck bay leaves into the pantry corners and place small, reusable silica gel packets amongst the jars to absorb excess humidity.
Part 3: Linen Revival: Naturally Whitening Antique Linens
Preserving family heirlooms like antique linens requires a gentle touch. Harsh chemicals can damage delicate fibers, so opting for natural whitening methods is essential. This process utilizes the power of lemon juice, baking soda, and sunlight to restore your linens to their former glory, naturally and safely.

Antique linen fabric laid out in brilliant sunlight on a weathered wooden deck, showcasing a subtle contrast between the original yellowing and the cleaned areas.
Ingredients:
- A large, enamel-coated basin or porcelain tub filled with ice-cold, filtered water
- The juice of two freshly squeezed lemons (Meyer lemons for their gentleness)
- A quarter cup of baking soda
Step-by-Step Instructions:
Fill a large basin or tub with ice-cold, filtered water. Ensure the water is scrupulously clean and free of any detergent residue.
Submerge the yellowed antique linens completely in the water. Gently pour in the fresh lemon juice and sprinkle the baking soda evenly over the fabric.
Soak the linens for several hours, or preferably overnight, allowing the natural ingredients to work their magic. Gently agitate them every few hours to help loosen the discoloration without damaging the delicate fibers.
After soaking, carefully drain the water and gently squeeze out the excess moisture. Do not wring the antique linens, as this can permanently damage the fabric. Instead, roll them gently in a clean, white towel to absorb the excess water.
Lay the linens flat on a clean, white cotton sheet spread out on a sun-drenched patio or balcony in direct sunlight. The sun's UV rays will naturally bleach the fabric, drawing out the yellow stains. Ensure the linens are fully exposed to the sun, avoiding shadows.
Turn the linens periodically, every few hours, to ensure even whitening. Continue sunning until the desired whiteness is achieved – this may take several days, depending on the severity of the yellowing.
Gentle Handling: If stubborn stains persist, create a paste of baking soda and a few drops of water and gently apply it to the affected area. Let it sit for 30 minutes before rinsing thoroughly.
Part 4: Pre-Spring Purge: Decluttering & Repurposing
Before the hustle and bustle of spring planting season truly begins, take the time to declutter your homestead. Inspired by the KonMari method, focus on keeping only those items that "spark joy" or serve a truly useful purpose in your life. Remember to express gratitude for each item's service before letting it go.

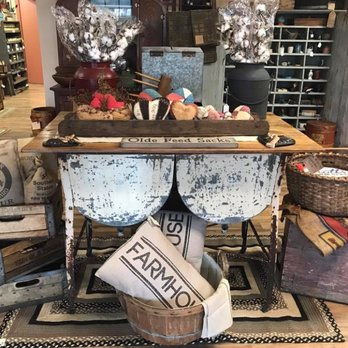
A visually appealing pile of neatly folded clothing, mismatched teacups, and reclaimed wood scraps arranged artfully on a vintage wooden bench, ready for donation, repurposing, or recycling.
Action Steps:
Go through each room in your homestead, one at a time, dedicating an entire afternoon to each space. Hold each item in your hands and ask yourself: "Does this item bring me joy, or does it serve a truly useful purpose in my life?" If not, it's time to gratefully let it go.
Sort discarded items into well-labeled categories: donate to your local women's shelter, sell at a community flea market, repurpose into new household items, recycle according to local guidelines, or compost organic materials responsibly.
Brainstorm creative ways to repurpose unwanted items with a homesteading twist. Old t-shirts can become soft cleaning rags, chipped enamelware dishes can become charming plant containers for succulents, and scrap wood from past projects can become miniature birdhouses or rustic picture frames.
A collection of repurposed glass jars used for storage, emphasizing sustainability and creativity in homesteading.
- Donate usable items to local charities or sell them at a garage sale or online marketplace like Facebook Marketplace, giving them a second life and supporting your community.
Handmade cleaning rags made from old t-shirts on a white table, showcasing a simple and sustainable method for repurposing old clothing.

Succulents planted in repurposed chipped enamelware pots, highlighting the charm of using old household items for gardening.
A charming birdhouse made from repurposed wood scraps, showcasing a creative way to reuse leftover materials in a homestead.
By decluttering and repurposing, you create a more efficient and joyful living space.
Conclusion
Embracing a natural cleaning and organization routine offers more than just a tidy home; it cultivates a deeper connection to the earth and the changing seasons. By using sustainable methods, reducing waste, and repurposing items, you're creating a more joyful and fulfilling homesteading experience.
Ready to refresh your homestead and welcome spring with open arms? Share your favorite natural cleaning hacks and stunning before-and-after photos with #BetterHomesHarvestClean #NaturalHomestead #SpringRenewal! Let's inspire each other to create healthier, happier homes and celebrate the beauty of simple, sustainable living!