Heirloom Tomato and Basil Tart with Cornmeal Crust: A Taste of Summer's Bounty
Picture this: The sun hangs low in the late-summer sky, casting a golden glow on your garden. The air, thick with the scent of ripening tomatoes and fragrant basil, carries a gentle breeze. Bees lazily buzz around the last of the blossoms. It’s the perfect time to savor the fruits (and vegetables!) of your labor with an Heirloom Tomato and Basil Tart with a Cornmeal Crust, baked to perfection in your own hand-built cob oven. More than just a recipe, this is a celebration of the season and a testament to the joys of homesteading and self-sufficiency.

Heirloom Tomato and Basil Tart with Cornmeal Crust: A Taste of Summer's Bounty
This recipe embodies the spirit of Better Homes and Harvests. It's about creating something delicious and beautiful from the simple ingredients that nature provides, celebrating the flavors of the season, and fostering a deeper connection to our food. This isn’t just cooking; it’s an experience.
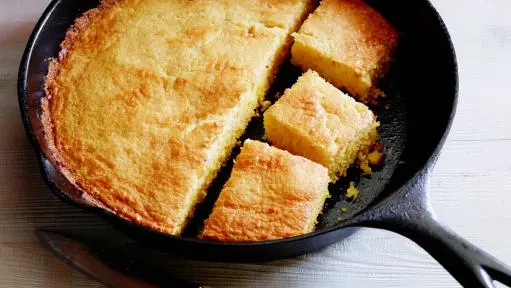
Why a Cornmeal Crust?
Forget that bland, white flour crust. The coarse texture and subtle sweetness of cornmeal complement the acidity of the tomatoes and the herbal notes of the basil perfectly. Plus, it adds a rustic touch that fits right in with our homesteading lifestyle. We believe in using good quality flours that enhance flavors, not hide them. Beyond the flavor, cornmeal offers some nutritional benefits as well. It often contains more fiber and nutrients compared to refined white flour, making this tart a slightly healthier indulgence.
Ingredients You'll Need:
- For the Cornmeal Crust:
- 1 1/4 cups unbleached all-purpose flour
- 3/4 cup finely ground yellow cornmeal (stone-ground preferred)
- 1 teaspoon sea salt
- 1/2 cup (1 stick) very cold unsalted butter, cut into 1/2-inch cubes
- 1/4 cup ice water, plus more if needed
- For the Filling:
- 2 pounds assorted heirloom tomatoes (Cherokee Purple, Brandywine, Green Zebra), sliced 1/4-inch thick
- 1 packed cup fresh basil leaves, coarsely chopped
- 4 cloves garlic, minced very fine
- 1/4 cup extra virgin olive oil
- 2 tablespoons balsamic vinegar
- 1 teaspoon sea salt
- 1/2 teaspoon freshly ground black pepper
- Optional: 1/4 cup grated Parmesan cheese (aged 24 months preferred)
Equipment:
- 9-inch tart pan with removable bottom (preferably fluted)
- Baking sheet
- Parchment paper
- Rolling pin
- Food Processor
Step-by-Step Baking Process:
- Make the Crust: In a food processor, combine the flour, cornmeal, and salt. Pulse 5-7 times to combine. Add the cold butter and pulse until the mixture resembles coarse crumbs the size of peas (about 10-12 pulses). Gradually add the ice water, 1 tablespoon at a time, pulsing after each addition, until the dough just comes together. Be careful not to overmix.
- Chill the Dough: Gently flatten the dough into a disk, wrap tightly in plastic wrap, and chill in the refrigerator for at least 30 minutes, or up to 2 hours.
- Roll Out the Crust: On a lightly floured surface, roll out the dough to a 12-inch circle, about 1/8-inch thick. Transfer to the tart pan and gently press into the bottom and up the sides. Trim any excess dough, leaving a slight overhang. Crimp the edges of the crust for a decorative finish.
- Par-Bake the Crust: Line the crust with parchment paper and fill with pie weights or dried beans. Bake in a preheated oven at 375°F (190°C) for 15 minutes. Remove the parchment paper and pie weights and bake for another 5-7 minutes, or until the crust is lightly golden brown and set. Let cool slightly.
- Prepare the Filling: In a large bowl, gently combine the sliced tomatoes, basil, garlic, olive oil, balsamic vinegar, salt, and pepper. Gently toss to combine, being careful not to bruise the tomatoes.
- Assemble and Bake: Arrange the tomato mixture in the par-baked crust in an even layer. Sprinkle with Parmesan cheese, if using. Bake for 25-30 minutes, or until the tomatoes are tender and the crust is a deep golden brown. Let cool slightly before slicing and serving.
Last summer, I grew over 20 different varieties of heirloom tomatoes! My favorites for this tart are Cherokee Purple for their rich, earthy flavor and Green Zebra for their tangy bite. Mixing them together not only tastes amazing but also creates a visually stunning tart.
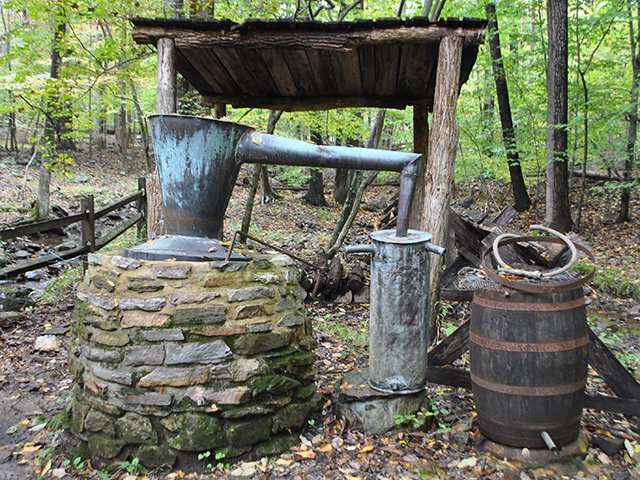
Building a Cob Oven: An Ancient Art for Modern Homesteads
While a conventional oven will do in a pinch, nothing compares to the smoky, earthy flavor that a cob oven imparts to your baking. This ancient building technique uses a mixture of clay, sand, and straw to create a durable, efficient, and beautiful oven that retains heat for hours, perfect for baking bread, roasting vegetables, and of course, our heirloom tomato tart. Plus, it's a fun and rewarding DIY project that will add a unique feature to your homestead.
Materials:
- Clay-rich subsoil (avoid topsoil)
- Coarse sand (builder's sand)
- Dry straw (wheat or rye is ideal)
- Bricks or stones for the base
- Wooden forms or cardboard for shaping the arch
- Glass bottles or wood ash for insulation
- Shovels, buckets, tarps
- Water
Instructions:
- Find and Test Clay-Rich Soil: The most critical step! Dig below the topsoil to access the clay subsoil. Perform the "sausage" test: Roll a handful of wet soil into a sausage shape. If it bends without cracking, it has enough clay. If it cracks significantly, you'll need to add more clay.
- Mix the Cob: Combine 3 parts clay soil, 2 parts sand, and 1 part straw in a large tub or on a tarp. Gradually add water and mix with your feet, using the "cob stomp" method, until the mixture is well combined and has a dough-like consistency. The perfect cob mixture should hold its shape when squeezed and feel slightly sticky.
- Build the Base: Create a sturdy, insulated base for the oven using bricks or stones, raising it off the ground to protect it from moisture and improve heat retention. This base should be larger than the oven itself, providing a working space around it.
- Form the Oven: Use wooden forms or cardboard to create the shape of the oven arch and dome. Pack the cob mixture firmly around the forms, building up the walls and dome in layers. Let each layer dry slightly before adding the next, to prevent cracking. Incorporate glass bottles into the cob mixture for added insulation.
- Insulate the Oven: Cover the oven with a thick layer of insulation material such as wood ash or a mixture of clay and straw. This layer will help to retain heat and improve the oven's efficiency.
- Add a Door: Cut an opening for the door and build a simple, well-fitting door from wood or metal. A tight-fitting door is crucial for retaining heat.
- Cure the Oven: Once the cob is completely dry (which can take several weeks, depending on the climate), slowly cure the oven by building small fires inside, gradually increasing the heat over several days. This process helps to harden the cob and prevent cracking.

Seed Saving from Heirloom Varieties: Preserving Our Garden Heritage
To truly embrace self-sufficiency and preserve our gardening heritage, learn to save seeds from your heirloom vegetables. This ensures that you have a supply of seeds for future generations, adapts the seeds to your local climate and growing conditions, and helps to protect the unique characteristics of these valuable, open-pollinated varieties.
Tomato Seed Saving: The Fermentation Method
- Choose Ripe Tomatoes: Select fully ripe, unblemished tomatoes from healthy plants that exhibit the desired traits (size, shape, color, flavor).
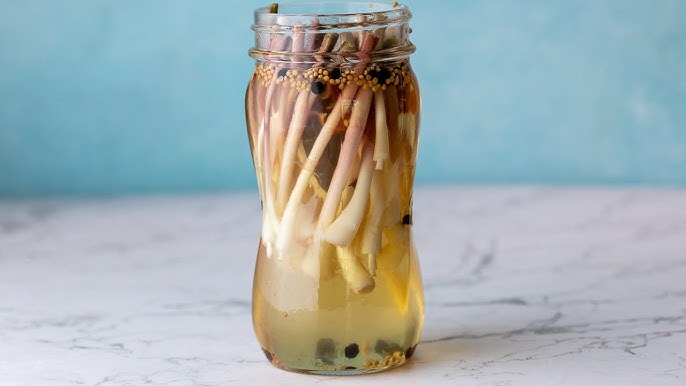
- Scoop and Ferment: Scoop out the seeds and pulp into a clean glass jar. Add a small amount of water to cover the seeds. Let the mixture ferment for 3-4 days, stirring occasionally, until a layer of white mold forms on top. This fermentation process helps to break down the gelatinous coating around the seeds, which inhibits germination.
- Rinse and Dry: After fermentation, add more water to the jar and stir vigorously. The viable seeds will sink to the bottom, while the non-viable seeds and pulp will float. Carefully pour off the floating debris and rinse the seeds several times with clean water.
- Dry Thoroughly: Spread the clean seeds out in a single layer on a screen or paper towel (avoid using cloth towels, as the seeds can stick). Allow the seeds to dry completely in a cool, dry place for at least 1-2 weeks.
- Store Properly: Once the seeds are completely dry, store them in an airtight container (such as a glass jar or paper envelope) in a cool, dark, and dry place. Label the container with the tomato variety and the date of harvest.
Saving seeds from your own tomatoes and other plants preserves genetic diversity and protects heirloom varieties from extinction. It also adapts seeds to your local climate and growing conditions, resulting in plants that are better suited to your specific environment, reduces reliance on commercial seed companies and promotes self-sufficiency, and allows you to select and breed plants with desirable traits, improving the quality of your harvest over time.
Making Goat Cheese
What better to serve with your tomato tart than fresh, homemade goat cheese? It's a surprisingly simple process that yields delicious results!
Ingredients:
1 gallon fresh goat's milk (pasteurized or raw)
1/4 teaspoon mesophilic cheese culture
1/4 teaspoon liquid rennet, diluted in 1/4 cup cool water
1 teaspoon kosher salt
Equipment:
Large pot
Thermometer
Long knife
Cheesecloth
Colander
Instructions:
- Heat the milk in the pot to 72 degrees Farenheight, stirring to avoid scorching.
- Remove from heat and add cheese culture. Stir gently for 2 minutes.
- Add diluted rennet, stir 1 minute. Cover and let sit at room temperature for 12-18 hours. The milk should form a soft curd.
- Line a colander with cheesecloth and gently pour the curd into it.
- Let the curd drain for 3-4 hours, or until it reaches desired consistency.
- Stir in salt and enjoy with your tomato tart!

As summer gently fades into autumn, embrace the final moments of abundance by creating dishes that celebrate the season's bounty. From the simple pleasure of an Heirloom Tomato and Basil Tart, baked in your very own cob oven, to the satisfaction of saving seeds for future harvests and making your own goat cheese, homesteading offers a rewarding path to self-sufficiency and a deeper connection to the land. What are your favorite late-summer activities on the homestead? Share your tips, tricks, and recipes in the comments below! We'd love to hear from you and learn from your experiences.
Keywords: organic gardening, seasonal harvest, homegrown, sustainable home, cozy living, backyard projects, farmhouse life, heirloom tomato tart, cornmeal crust, cob oven, seed saving, heirloom varieties, country living, goat cheese, cheese making