Headline Options:
- From Trash to Treasure: Building a Budget-Friendly Chicken Coop from Pallets
- Cluck Yeah! A DIY Chicken Coop Under $300 Using Repurposed Materials
- Sustainable Homesteading: Build a Predator-Proof Chicken Coop with Recycled Wood
- Backyard Chickens on a Budget: Pallet Coop Plans for the Savvy Homesteader
- Egg-cellent DIY: A Step-by-Step Guide to Building Your Own Repurposed Chicken Coop
Cluck Yeah! A DIY Chicken Coop Under $300 Using Repurposed Materials
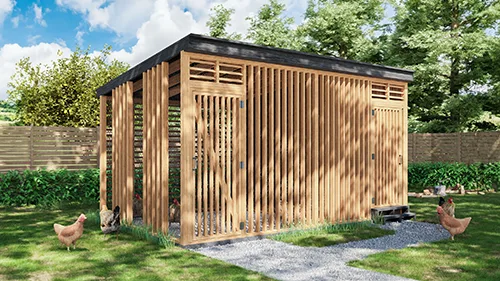
Are you dreaming of fresh eggs, a closer connection to nature, and a more self-sufficient lifestyle? Then backyard chickens might be the perfect addition to your homestead! But before you bring home those fluffy little chicks, you'll need a safe and comfortable home for them. Building a chicken coop can seem daunting, but it doesn't have to break the bank. With a little creativity and some elbow grease, you can build a sturdy, predator-proof coop using repurposed materials for under $300. Let's dive in!
Why Build a Chicken Coop From Repurposed Materials?
Aside from saving money (a huge plus!), building with repurposed materials aligns perfectly with the values of homesteading and sustainable living. It reduces waste, minimizes your carbon footprint, and gives you a sense of accomplishment knowing you’ve created something useful from what others might discard. Plus, a coop built with reclaimed materials often has a unique, rustic charm that adds character to your backyard.
Planning Your Pallet Chicken Palace
Before you start swinging a hammer, careful planning is essential. Consider these factors:
- Number of Chickens: A general rule of thumb is 4 square feet of coop space per chicken and 8-10 square feet of run space per chicken. So, for a flock of 6 chickens, you'll need at least 24 square feet of coop space and 48 square feet of run space.
- Location: Choose a well-drained area with partial shade, especially during the hottest months. Ensure the coop is easily accessible for cleaning and egg collection.
- Predator Protection: This is crucial! Raccoons, foxes, hawks, and even neighborhood dogs can pose a threat to your flock. Your coop needs to be secure.
- Climate: Consider your local climate. If you live in a cold region, you'll need to insulate the coop and provide adequate ventilation to prevent frostbite. In hot climates, ensure plenty of ventilation to keep your chickens cool.
- Budget: Sticking to a budget of under $300 is achievable with repurposed materials, but it requires careful sourcing and planning.
Gathering Your Materials (and Keeping Costs Down)
The key to a budget-friendly coop is sourcing free or inexpensive materials. Here's a breakdown of what you'll need and where to find it:
- Pallets: A readily available and often free resource. Check with local businesses, construction sites, and online classifieds. Estimated Cost: FREE

- Reclaimed Wood: Look for old fencing, siding, or decking. Salvage yards and online marketplaces are great resources. Estimated Cost: $50 - $100 (depending on availability)
- Hardware Cloth: Essential for predator-proofing the coop and run. Choose a small mesh size (1/2 inch or smaller). Estimated Cost: $50 - $75
- Roofing Material: Repurposed metal roofing, asphalt shingles, or even heavy-duty tarps can work. Estimated Cost: $30 - $50
- Hardware: Screws, nails, hinges, latches. Check your existing stash or purchase in bulk to save money. Estimated Cost: $20 - $30
- Nesting Boxes: You can build these from scrap wood or repurpose old drawers or plastic bins. Estimated Cost: FREE - $20
- Roosting Bars: Use sturdy branches or 2x4 lumber. Estimated Cost: FREE - $10
- Chicken Wire (Optional): For the run, but hardware cloth is preferred for better predator protection. Estimated Cost: $20 - $30
Tools You'll Need:
- Hammer
- Saw (circular saw or hand saw)
- Drill
- Screwdriver
- Staple gun (for attaching hardware cloth)
- Measuring tape
- Level
- Safety glasses
- Gloves
Budget-Friendly Tool Alternatives:
- Borrow tools from friends or family.
- Rent tools from a local hardware store.
- Look for used tools at pawn shops or online marketplaces.
Step-by-Step Chicken Coop Construction Guide
Here's a simplified guide to building your pallet chicken coop. Remember to adapt these instructions to your specific materials and design.
Step 1: Prepare the Pallets:
- Carefully inspect the pallets for any loose nails, staples, or splinters. Remove them using a hammer and pliers.
- Disassemble some pallets to create individual boards for framing and siding.
- Sand down any rough edges to prevent injuries.
Step 2: Build the Frame:
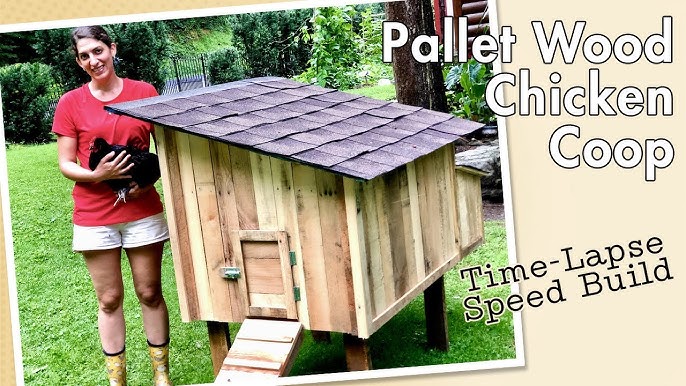
- Create a rectangular base frame using pallet wood or reclaimed lumber. Aim for dimensions that suit your flock size (e.g., 6ft x 4ft for 6 chickens).
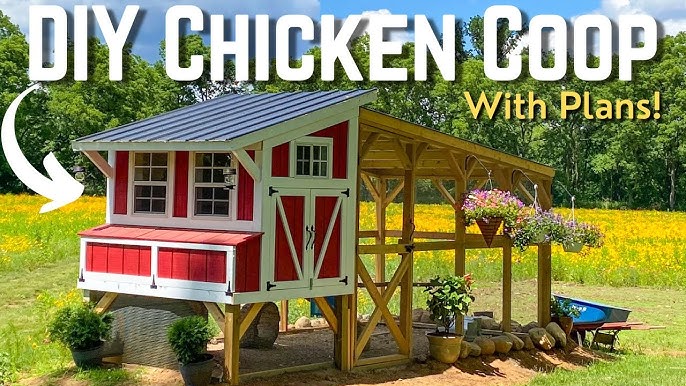
- Erect corner posts and intermediate supports to create a sturdy frame. Ensure the frame is level and square.
- Consider adding a floor to the coop for added protection from predators and the elements. You can use plywood or pallet wood.
Step 3: Enclose the Walls:
- Attach pallet boards or reclaimed wood to the frame to create the walls of the coop. Leave gaps for ventilation and a door.
- Use hardware cloth to cover any openings and prevent predators from entering.
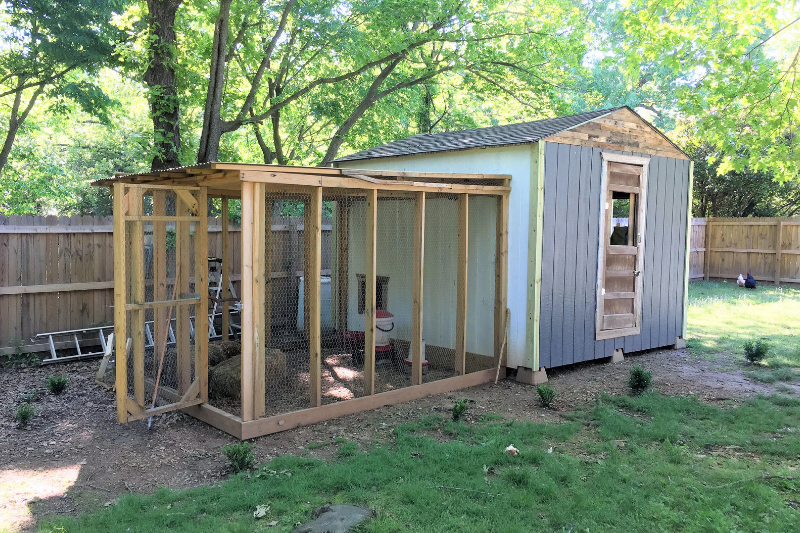
- Ensure the walls are securely attached to the frame and there are no gaps or weak points.
Step 4: Build the Roof:
- Construct a simple sloping roof frame using pallet wood or reclaimed lumber.
- Attach your chosen roofing material (metal roofing, shingles, or tarp) to the frame.
- Ensure the roof is waterproof and provides adequate protection from the elements. A slight overhang will help keep rain away from the coop walls.
Step 5: Add the Door and Nesting Boxes:
- Build a sturdy door for easy access to the coop. Install a secure latch to keep predators out.
- Construct nesting boxes inside the coop, placing them in a dark and quiet corner. One nesting box per 3-4 chickens is sufficient.
Step 6: Install Roosting Bars:
- Place roosting bars inside the coop, providing a comfortable place for your chickens to sleep. Position them at different heights to accommodate chickens of different sizes.
Step 7: Build the Run (Optional):
- If you're providing a separate run, build a frame using pallet wood or lumber.
- Enclose the run with hardware cloth or chicken wire, ensuring it is securely attached to the frame and buried a few inches into the ground to prevent digging predators.
Step 8: Finishing Touches and Safety Checks:
- Inspect the entire coop for any sharp edges, loose nails, or potential hazards.
- Add bedding to the coop floor (straw, wood shavings, or shredded paper).
- Provide fresh water and food for your chickens.
Safety First!
- Always wear safety glasses and gloves when working with wood and tools.
- Be careful when disassembling pallets to avoid injury from nails and staples.
- Ensure the coop is stable and secure to prevent it from collapsing.
- Supervise children and pets when they are near the construction site.
The Joys of Fresh Eggs and Self-Sufficiency
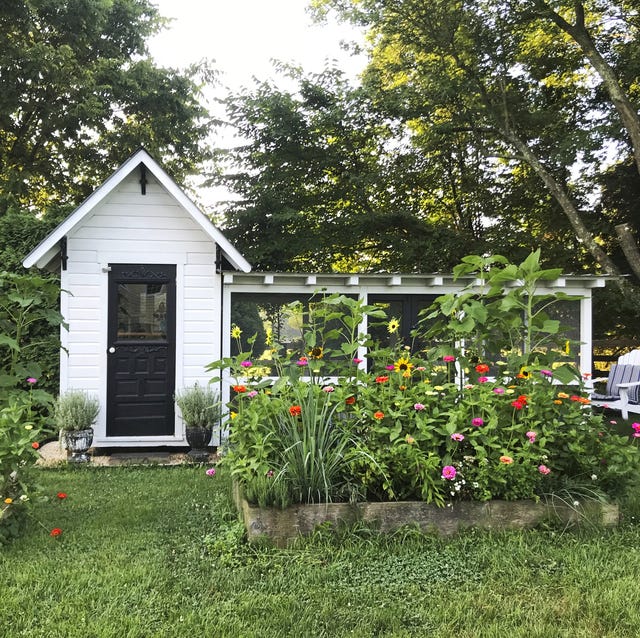
Building your own chicken coop is more than just a DIY project; it's an investment in self-sufficiency and a connection to nature. There's nothing quite like collecting fresh eggs from your own backyard, knowing that you're providing your family with healthy, delicious food. Plus, raising chickens is a great way to reduce your carbon footprint and contribute to a more sustainable lifestyle. Remember those keywords like "DIY chicken coop," "backyard chickens," "homesteading," and "sustainable living"? They're not just for SEO; they represent a real commitment to a better way of life.
I remember when I first started homesteading, the thought of building a chicken coop was incredibly intimidating. But with some research, planning, and a lot of help from my neighbor, I built a coop that not only housed my chickens but also became a focal point of my backyard. The satisfaction of seeing those first eggs in the nesting box was an unforgettable moment.
From Pallets to Paradise
Turning discarded pallets into a functional and beautiful chicken coop is a rewarding experience. It's a testament to the resourcefulness and ingenuity of homesteaders. So, gather your materials, grab your tools, and get ready to build your own repurposed chicken coop. Your flock (and your breakfast table) will thank you for it!
What are your favorite tips for building a chicken coop on a budget? Share your experiences in the comments below! And don't forget to share this post with your fellow homesteading enthusiasts!