
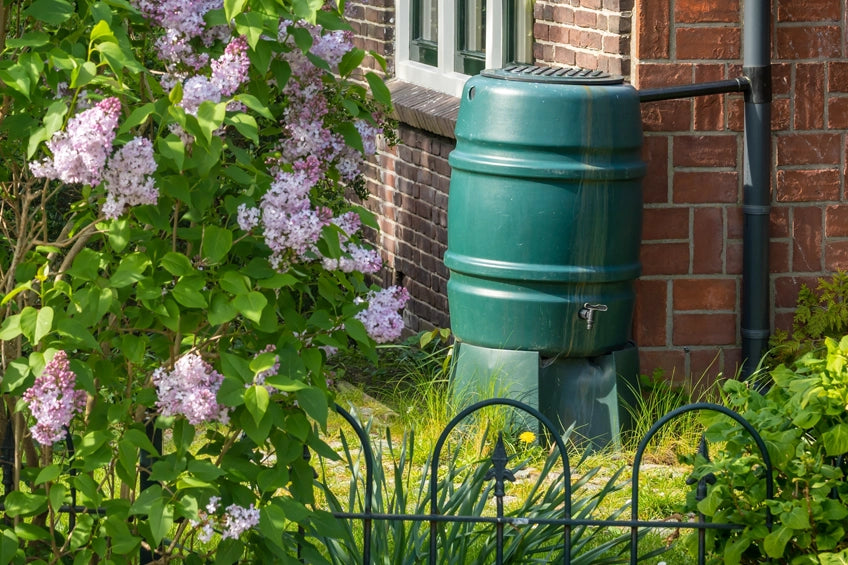
Harvesting Rain: Building a DIY Rain Barrel System for Your Homestead Garden
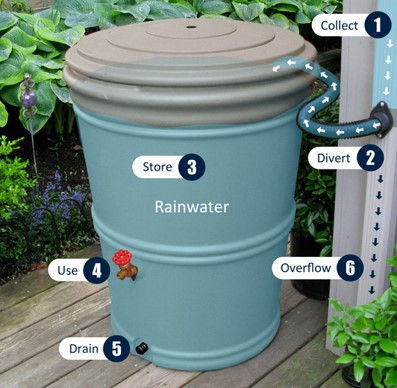
Water is the lifeblood of any homestead, especially when it comes to nurturing a thriving garden. But relying solely on municipal water can be costly and unsustainable, especially during dry spells. That's where rainwater harvesting comes in! Collecting rainwater in a DIY rain barrel system is a fantastic way to conserve water, reduce your water bill, and promote self-sufficiency on your homestead. With readily available materials and a little elbow grease, you can create a system that not only provides ample water for your garden but also helps prevent mosquito breeding and ensures the water is clean enough for your precious plants. This guide will walk you through the process, step-by-step, making rainwater harvesting accessible to every homesteader.
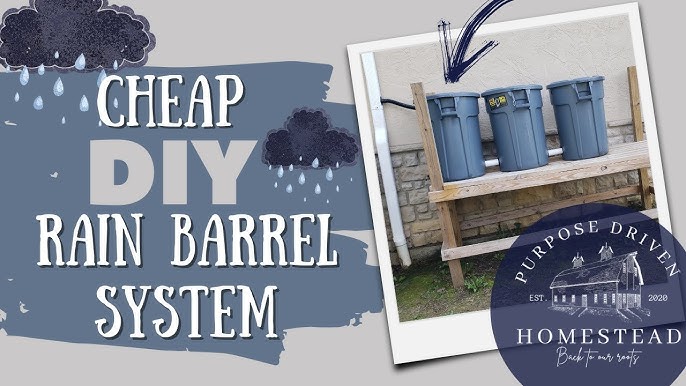
Here's how to build your own DIY rain barrel system and start reaping the benefits of free, natural irrigation:
Materials List:
- Food-grade plastic barrels (e.g., used olive barrels) - 2 x 55-gallon capacity, heavy-duty plastic barrels that once contained olive oil.
- PVC pipes:
- 3-inch PVC pipe, Schedule 40, length of 12 inches, for connecting downspout diverter.
- 1-inch PVC pipe, Schedule 40, length of 36 inches, for connecting barrels.
- PVC fittings:
- Two 3-inch PVC 45-degree elbows.
- Two 1-inch PVC T-connectors.
- Four 1-inch PVC couplings.
- Two 1-inch threaded PVC adapters.
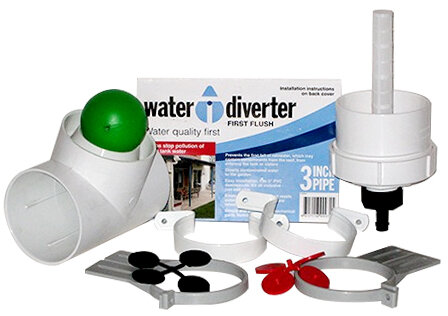
- Downspout diverter with a 1/16-inch mesh screen (GutterMate Downspout Diverter recommended or similar).
- Spigot (hose bib) for each barrel (3/4-inch brass, frost-proof).
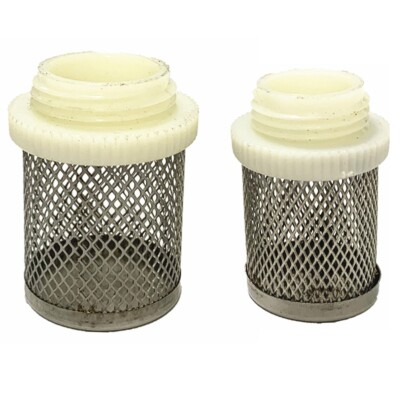
- Stainless steel mesh screen (1/32-inch mesh for mosquito prevention, minimum 12x12 inches).
- First flush diverter: 4-inch diameter PVC pipe, 24 inches long, with a ball valve at the bottom. Include a removable end cap for cleaning.
- Activated carbon filter (with a 5-micron rating, such as a Pentek 158642).
- Flexible tubing (1-inch diameter, reinforced vinyl tubing, 5 feet long).
- Gravel for leveling base (approximately 1 cubic foot of pea gravel).
- Concrete blocks (4 standard 8x8x16-inch concrete blocks).
- Sealant (plumber's tape – Teflon tape, silicone caulk – GE Silicone II).
- Overflow hose (1.5-inch diameter corrugated black drainage pipe, 10 feet long).
Tools Required:
- Drill with hole saw bits (1-inch, 3/4-inch, and 4-inch hole saw bits by Irwin).
- PVC cutter or saw (Ridgid PC-1375 cutter or fine-tooth hacksaw).
- Measuring tape (Stanley 25-foot PowerLock).
- Level (24-inch Johnson Level & Tool magnetic level).
- Wrench or pliers (adjustable wrench, channel-lock pliers).
- Safety glasses and gloves (ANSI-approved safety glasses and work gloves).
Step-by-Step Construction Guide:
Site Preparation (1 hour):
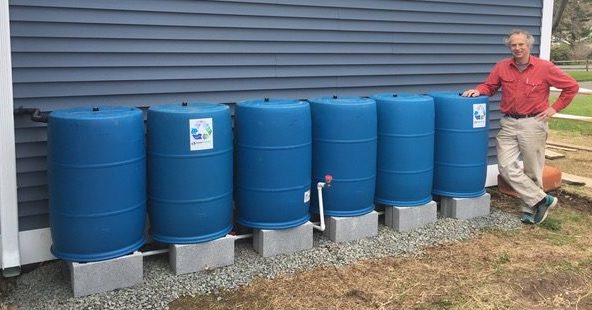
Choose a location near a downspout on the north side of the house, shaded from direct afternoon sun. Shading prevents algae growth. Level the ground using a shovel and compact the soil. Place the concrete blocks, ensuring they are evenly spaced and level, to raise the barrels approximately 18 inches above ground. This height allows for easier access to the spigot and creates gravity flow. Use a level to ensure that the blocks are even with each other.

Barrel Preparation (2 hours):
Clean the barrels thoroughly with soap and water. Rinse until no residue remains. Drill holes for the spigot (3/4-inch hole) approximately 6 inches from the bottom of each barrel and holes for the connecting pipes (1-inch hole) 4 inches from the top of each barrel (on the same side). Install the spigot and connecting fittings with plumber’s tape and silicone caulk to ensure a watertight seal. Allow the sealant to cure for 24 hours.
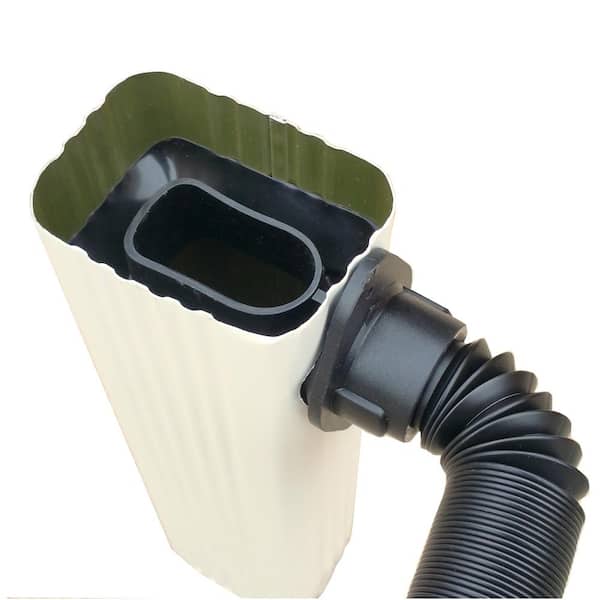
Downspout Diverter Installation (2 hours):
Cut the downspout 12 inches above the highest point of the barrel. Install the diverter according to the manufacturer's instructions, using the 3-inch PVC pipe and elbows to direct water into the first barrel. Secure all connections with PVC cement, being careful to avoid drips.
First Flush Diverter Construction and Installation (3 hours):
Construct the first flush diverter using the 4-inch PVC pipe, end cap, and ball valve. Glue the end cap securely to one end. Attach the ball valve to the opposite end with PVC cement. Place the diverter vertically in line with the downspout and before the barrel connection. Use PVC straps to secure the diverter to the house. Mark a line on the diverter at 12 inches to indicate the water level for the first flush. This initial water contains the most contaminants and will be diverted away.
Connecting Barrels (1 hour):
Connect the barrels using the flexible tubing and PVC fittings. Ensure the barrels are level by rechecking with a level. Tighten all clamps securely to prevent leaks. Position the barrels no more than 12 inches apart for easier connection.

Mesh Screen Installation (30 minutes):
Cut the stainless steel mesh screen to fit over all openings, including the downspout diverter and overflow outlet. Secure the mesh screen with zip ties or stainless steel clamps to prevent sagging.
Overflow System (1 hour):
Install the overflow hose (corrugated drainage pipe) to the top of the second barrel. Direct the hose away from the foundation, ensuring it slopes downward. Bury the end of the hose at least 6 inches deep and cover with gravel to prevent erosion.
Filter Installation: Place the activated carbon filter after the first flush diverter but before the water enters the barrels. Install a small sediment trap made from a short section of clear PVC pipe before the filter to catch larger particles.
Water Filtration and Mosquito Control:
The key to a successful rain barrel system isn't just about collecting water; it's about ensuring the water is clean and safe for your garden and preventing pesky mosquitoes from turning your barrels into breeding grounds. The first flush diverter plays a crucial role in this process. It captures the initial runoff from your roof, which often contains pollutants like bird droppings, roof grit, dust, and other debris. By diverting this initial flow, you prevent these contaminants from entering your barrels and contaminating the water.
Next up, mosquito control. The 1/32-inch mesh screen is your first line of defense. Mosquitoes need standing water to lay their eggs, which hatch into larvae and eventually become adult mosquitoes. By covering all openings of your rain barrel system with this fine mesh, you prevent adult mosquitoes from accessing the water and laying their eggs inside. Remember, mosquitoes have a short life cycle, so preventing egg-laying is crucial for effective control.
Finally, the activated carbon filter with a 5-micron rating is the polishing touch. This filter removes fine particles like silt and clay, further improving the water clarity for irrigation. While rainwater is generally free of many contaminants found in municipal water, it can still pick up fine sediment from your roof. The activated carbon filter removes these particles, ensuring your plants receive clean, clear water. Keep in mind that the filter will need to be replaced every 3-6 months, depending on the water quality in your area.
It's important to remember that the collected rainwater is not potable. Even with filtration, there's still a risk of contamination from roofing materials and environmental pollutants. Therefore, only use the collected water for watering ornamental plants, vegetables, and herbs.
Maintenance and Troubleshooting:
Maintaining your rain barrel system is essential for its longevity and effectiveness.
- Regularly clean the mesh screens every two weeks to remove debris like leaves and twigs that can obstruct water flow. Use a brush and water to clean the screens.
- Inspect the system for leaks at all connection points every month. Tighten fittings or reapply sealant as needed. Replace any cracked or damaged PVC pipes.
- Periodically drain and clean the barrels every six months to remove sediment buildup. Use a garden hose to flush out accumulated debris.
- Address common issues like algae growth by adding a small amount of copper sulfate (follow manufacturer's instructions carefully) to the water to inhibit algae growth. Prevent mosquito larvae by adding mosquito dunks (Bacillus thuringiensis israelensis or Bti) to the barrels. Bti is a naturally occurring bacterium that is toxic to mosquito larvae but harmless to humans, pets, and other wildlife.
Overflow Management:
An effective overflow system is critical to prevent water damage to your home's foundation during heavy rainfall. Design the overflow system by ensuring that the overflow pipe is at least 1.5 inches in diameter and slopes downward away from the house. This allows excess water to flow freely and efficiently.
Consider directing excess water to a small rain garden planted with native water-loving plants. This creates a beautiful and functional solution that helps absorb excess water and prevent erosion. Alternatively, direct the water to a designated drainage area with proper erosion control measures, such as gravel or mulch.
Prevent water from pooling near the foundation by ensuring the overflow outlet is at least 10 feet away from the house and that the ground slopes away from the foundation. This will help protect your home from water damage and prevent potential foundation problems.
Safety Precautions:
Safety should always be a top priority when building and maintaining your rain barrel system.
- Use caution when lifting heavy barrels. Ask for assistance or use a dolly to move the barrels.
- Wear safety glasses and gloves during construction to protect your eyes and hands.
- Ensure the system is stable and secure to prevent tipping, especially during heavy rainfall. Use straps or anchors to secure the barrels to the concrete blocks.
Conclusion:
Building a DIY rain barrel system is a rewarding project that offers numerous benefits for homesteaders. From water conservation and reduced water bills to promoting self-sufficiency and protecting your garden, the advantages are clear. Adapt this design to your specific needs and resources, and you'll be well on your way to harvesting rain and enjoying a greener, more sustainable homestead. Now it's your turn! Share your own experiences with rainwater harvesting in the comments below – we'd love to hear from you!