Harvest to Hearth: Preserving Summer's Bounty with Farmhouse-Inspired Jam-Making
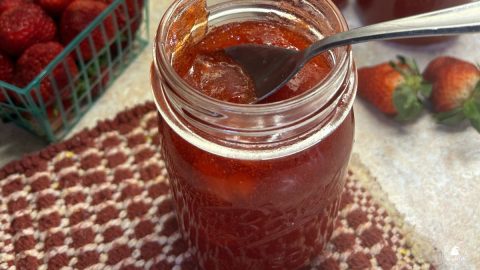
The late summer sun casts a golden glow across the berry bushes, laden with plump, juicy fruit. The air is thick with the sweet aroma of ripening peaches, a promise of deliciousness just waiting to be captured. There’s a universal desire within us to hold onto these fleeting flavors of summer, to savor the bounty long after the last harvest. And what better way to do that than with farmhouse jam-making? It's a rewarding and surprisingly accessible way to transform your garden's goodness into jars of sunshine, perfect for brightening chilly winter mornings. Get ready for a simple, step-by-step guide to creating your own homemade jam, connecting you more deeply to your garden, the seasons, and the art of creating a cozy, sustainable home.
Gathering Your Garden's Goodness
The heart of any great jam lies in the quality of the fruit. Summer and early fall offer a dazzling array of choices, from the classic sweetness of strawberries and raspberries to the tangy depth of blackberries and the sun-kissed perfection of peaches and plums. If you’re fortunate enough to have an organic gardening, be sure to choose the ripest, most flavorful fruits you can find. There’s nothing quite like homegrown berries, bursting with natural sweetness and free from harmful pesticides. And remember to compost any fruit scraps afterwards – minimizing waste is part of sustainable home practices!

If you don’t have a garden, don’t despair! Local farmer's markets and U-pick farms are treasure troves of seasonal harvest delights. When selecting your fruit, look for vibrant colors, a firm but yielding texture, and an intoxicating aroma. Avoid fruits that are bruised, damaged, or overly soft, as these will compromise the flavor and texture of your finished jam. The perfect fruit for jam-making is perfectly ripe, not overripe. This will ensure the best possible flavor and the right amount of natural pectin (more on that later!).
Farmhouse-Inspired Peach Jam: A Step-by-Step Guide
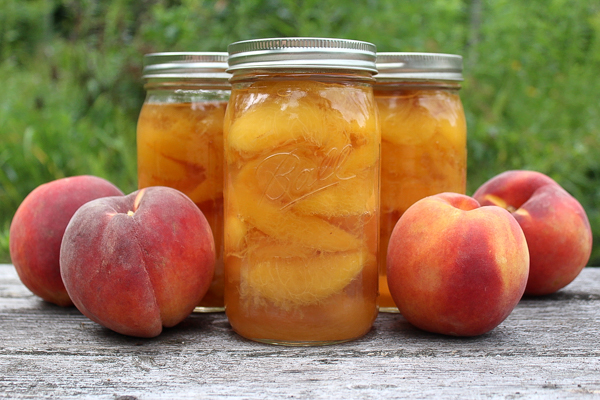
Here’s a simple yet sublime recipe for Peach Jam with Vanilla, perfect for capturing the essence of summer in a jar. This farmhouse jam recipe embraces the spirit of simple, rustic goodness.
Ingredients:
- 4 pounds ripe peaches, peeled, pitted, and chopped
- 4 cups granulated sugar
- 1/4 cup lemon juice (freshly squeezed is best!)
- 1 vanilla bean, split lengthwise and seeds scraped (or 1 teaspoon vanilla extract)
- 1 package (1.75 ounces) powdered pectin
Equipment Needed:
- Large, heavy-bottomed pot or Dutch oven
- Canning jars (pint or half-pint), washed and sterilized
- Canning lids and rings, new
- Jar lifter
- Ladle
- Clean damp cloths
- Candy thermometer (optional, but helpful)
Instructions:
Prepare the Peaches: Wash, peel, pit, and chop your peaches. Peeling is easiest if you blanch them for 30-60 seconds in boiling water, then plunge them into ice water. The skins will slip right off.
Combine Ingredients: In your large pot, combine the chopped peaches, sugar, lemon juice, and vanilla bean (both pod and seeds). Stir well to combine and let the mixture sit for 30 minutes to an hour, allowing the sugar to draw out the natural juices from the peaches. This maceration process helps to prevent the jam from scorching later on.
Cook the Jam: Place the pot over medium-high heat and bring the mixture to a full rolling boil that cannot be stirred down. Stir constantly to prevent sticking.
Add Pectin: Stir in the powdered pectin all at once. Continue stirring vigorously to dissolve it completely.
Boil Again: Return the mixture to a full rolling boil, stirring constantly. Boil hard for 1 minute. If using a candy thermometer, the temperature should reach 220°F (104°C).
Check for Setting Point: Remove the pot from the heat. To test if the jam is ready, place a small spoonful of jam on a chilled plate. Let it sit for a minute, then gently push it with your finger. If it wrinkles, it’s ready. This is the classic "wrinkle test," a skill passed down through generations of farmhouse cooks. If it doesn’t wrinkle, return the pot to the heat and boil for another minute, then test again.
Remove Vanilla Bean: Fish out the vanilla bean pod. You can rinse and reuse it for flavoring other desserts.
Jarring the Jam: Ladle the hot jam into the sterilized jars, leaving 1/4 inch headspace. Wipe the jar rims clean with a damp cloth. Place the lids on the jars, then screw on the rings finger-tight.
Canning (Water Bath Method): Place the filled jars in a boiling water bath canner. The water should cover the jars by at least 1 inch. Bring the water to a rolling boil and process for 10 minutes for half-pint jars or 15 minutes for pint jars (adjust for altitude if necessary, consult your local extension office for guidelines).
Cool and Check Seals: Carefully remove the jars from the canner using a jar lifter and place them on a towel-lined surface to cool. Let them cool completely, undisturbed, for 12-24 hours. As the jars cool, you should hear a "pop" sound, indicating that the lids have sealed properly. After 24 hours, check the seals by pressing down on the center of each lid. If the lid doesn't flex, it's sealed. If a lid flexes, it’s not sealed, and the jar should be refrigerated and used within a few weeks, or reprocessed with a new lid.

A Note on Canning Safety: Safe canning practices are paramount when preserving food for long-term storage. Always use sterilized jars and new lids, and follow recommended processing times. While some old-time methods might seem charming, modern safety guidelines ensure that your jam is free from harmful bacteria. Reputable sources like the USDA Complete Guide to Home Canning are invaluable resources.
Beyond the Jar: Cozy Living & Culinary Creations
Your homemade Peach Jam is more than just a spread for toast! Think beyond the ordinary and embrace the versatility of this delicious preserve. Spread it on warm scones for a delightful afternoon treat. Use it as a glaze for grilled chicken or pork, adding a touch of sweetness and depth of flavor. Swirl it into yogurt or oatmeal for a comforting breakfast. Bake it into thumbprint cookies for a festive dessert. And, of course, a beautifully decorated jar of homemade jam makes a thoughtful and heartfelt gift for friends and neighbors.

This act of preserving, of extending the season's bounty, is at the heart of cozy living and a sustainable home. It’s about slowing down, appreciating the simple pleasures, and creating something truly special with your own two hands. It's a celebration of the earth's gifts and a way to share the abundance with those you love.
Closing Reflection
There's an undeniable joy in opening a jar of homemade jam on a cold winter day, a tangible reminder of summer's warmth and abundance. It’s a connection to your garden, to the seasons, and to a slower, more intentional way of life. So, gather your fruits, embrace the process, and experience the satisfaction of preserving summer's flavors for yourself.
We'd love to hear about your jam-making adventures! Share your favorite recipes, tips, and stories in the comments below. And for more seasonal recipes, homesteading tips, and inspiration for creating a life filled with beauty and abundance, be sure to subscribe to the Better Homes and Harvests newsletter. Happy jam-making!