Harness the Sun: DIY Passive Solar Greenhouse from Recycled Resources
[Your Name/Homestead Name] here! Imagine fresh tomatoes in January, vibrant greens all winter long, grown right in your own backyard, powered by the sun. This dream is closer than you think. I'm thrilled to share a detailed, step-by-step guide to building your own passive solar greenhouse using mostly reclaimed materials, right here for the Better Homes and Harvests community.
Passive solar greenhouses are designed to capture and store solar energy for heating, reducing the need for external energy sources. They are a fantastic way to extend your growing season, reduce your reliance on grocery stores, and increase your homestead's self-sufficiency. Plus, by using reclaimed materials, you're contributing to a more sustainable and eco-friendly approach to gardening.
This blog post will walk you through the entire process, from planning and design to construction and maintenance. We'll focus on using reclaimed materials to keep costs down and minimize our environmental impact. So, grab your tools and let's get started on creating your own sustainable oasis!

1. Why Build a Passive Solar Greenhouse?
The benefits of a passive solar greenhouse extend far beyond just fresh produce in the winter. Here are some key advantages:
- Extended Growing Season: Grow vegetables, herbs, and flowers year-round, regardless of the outdoor climate.
- Increased Self-Sufficiency: Reduce your dependence on grocery stores and grow more of your own food.
- Cost Savings: Lower heating bills and reduce the need to purchase produce from stores.
- Environmental Benefits: Utilize renewable energy, reduce your carbon footprint, and repurpose reclaimed materials.
- Improved Plant Health: Provide a controlled environment that promotes healthy plant growth and reduces the risk of pests and diseases.
2. Planning and Design: Setting the Stage for Success
Before you start hammering and sawing, careful planning is essential for a successful passive solar greenhouse.
2.1. Site Selection: Catching the Sun's Rays
The most crucial factor is a south-facing orientation. This ensures maximum sunlight exposure throughout the day, especially during the winter months when the sun is lower in the sky. Other considerations include:
- Prevailing Winds: Choose a location sheltered from strong winds to reduce heat loss.
- Water Access: Ensure easy access to water for irrigation.
- Proximity to the House: Conveniently located near your home for easy access and monitoring.
2.2. Size and Scale: Tailoring to Your Needs
Determine the size of your greenhouse based on your gardening needs, available space, and budget. Start small and expand later if needed. A smaller greenhouse is easier to heat and manage.
2.3. Design Considerations: Maximizing Efficiency
Several design elements contribute to the effectiveness of a passive solar greenhouse:
- Glazing Angle: The angle of the south-facing wall (glazing) should be optimized to capture the most sunlight during the winter. A general rule is to set the angle equal to your latitude plus 15 degrees.
- Insulation: Insulate the north-facing wall, east and west walls, and foundation to retain heat.
- Thermal Mass: Incorporate materials that absorb and store heat during the day and release it at night, such as water barrels, stone walls, or concrete.
- Ventilation: Provide adequate ventilation to prevent overheating and humidity buildup.
2.4. Material Sourcing: Reclaimed Treasures
The beauty of this project is using reclaimed materials. Look for:
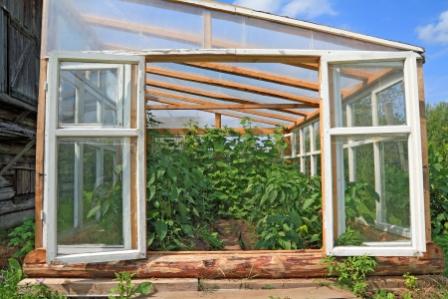
- Old Windows and Doors: The primary glazing material.
- Lumber: For framing and structural support.
- Bricks and Stones: For the foundation or thermal mass walls.
- Pallets: For building raised beds or composting.
- Gravel: For drainage and leveling the foundation.
- Insulation: Straw bales, recycled denim, or rigid foam insulation.
Where to find these materials:
- Reclamation Centers: Salvage yards specializing in used building materials.
- Demolition Sites: With permission, you may be able to salvage materials.
- Online Marketplaces: Craigslist, Facebook Marketplace, and other online platforms.
- Free Listings: Check online classifieds for free materials being given away.
Prioritize durability and safety when selecting reclaimed materials. Inspect lumber for rot or insect damage and ensure that windows are structurally sound.
2.5. Budget: Keeping Costs Down
Estimate the costs of essential materials that you may need to purchase, such as fasteners, sealants, and tools. Prioritize essential materials and phases.
2.6. Permitting: Playing by the Rules
Check your local building codes and permitting requirements before starting construction.

3. Foundation and Framing: Building a Solid Structure
3.1. Foundation Options: A Stable Base
Choose a foundation option that is suitable for the size and weight of your greenhouse. Simple options include:
- Gravel Pad: A layer of compacted gravel provides drainage and a level surface.
- Concrete Blocks: Stacked concrete blocks provide a stable and durable foundation.
- Treated Lumber Frame: A frame built from treated lumber can be used to create a raised foundation.
Emphasize proper drainage to prevent water damage.
3.2. Building the Frame: Step-by-Step Instructions
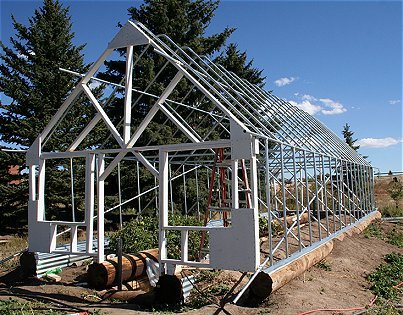
- Gather Materials: Collect all necessary lumber, fasteners, and tools.
- Cut Lumber: Cut the lumber to the required dimensions according to your design.
- Assemble the Frame: Assemble the frame using screws, nails, or bolts.
- Ensure Squareness: Use a square to ensure that the frame is square and level.
- Reinforce Corners: Reinforce the corners with metal brackets or gussets.
Safety Tip: Always wear safety glasses and gloves when working with power tools.
3.3. Material Adaptations: Making it Work
Learn to adapt reclaimed materials to fit your design by cutting, shaping, and reinforcing them as needed.

4. Glazing and Insulation: Trapping the Sun's Warmth
4.1. Glazing Options: Letting the Light In
Consider these glazing materials:
- Reclaimed Windows: A cost-effective and environmentally friendly option.
- Polycarbonate Panels: Durable and lightweight, with good light transmission.
- Plastic Sheeting: An inexpensive option, but less durable and with lower insulation value.
4.2. Installation Techniques: Creating a Weatherproof Seal
- Prepare the Frame: Ensure that the frame is clean and smooth.
- Apply Sealant: Apply a bead of sealant to the frame where the glazing will be installed.
- Install Glazing: Carefully place the glazing material onto the frame.
- Secure Glazing: Secure the glazing with screws, nails, or clips.
- Caulk Seams: Caulk all seams and gaps to create a weatherproof seal.
Safety Tip: Wear gloves when handling glass to prevent cuts.
4.3. Insulation: Keeping the Heat In
Insulate the north-facing wall and other areas to retain heat using reclaimed insulation materials such as straw bales, recycled denim, or rigid foam.
4.4. Caulking and Sealing: Preventing Heat Loss
Seal all gaps and cracks with caulk to prevent heat loss.
![installing window greenhouse caulking seal]
5. Thermal Mass and Ventilation: Regulating Temperature
5.1. Thermal Mass: Storing the Sun's Energy
Incorporate thermal mass into your greenhouse to store heat during the day and release it at night.
5.2. Water Barrels: A Simple Solution
Use reclaimed water barrels as thermal mass. Place them along the north-facing wall to absorb heat during the day and release it at night. Calculate how much you will need based on the size.
5.3. Ventilation: Preventing Overheating
Provide adequate ventilation to prevent overheating and humidity buildup.
5.4. Ventilation Options:
- Manual Vents: Windows or doors that can be opened and closed manually.
- Automatic Vent Openers: Thermostatically controlled vent openers that automatically adjust ventilation based on temperature.
Place vents high and low for optimal air circulation.
![water barrels greenhouse stone floor vent]
6. Finishing Touches and Ongoing Maintenance
6.1. Creating Growing Beds: Preparing for Planting
Build raised beds or other growing areas inside the greenhouse. Consider using reclaimed pallets or lumber.
6.2. Irrigation Systems: Keeping Plants Hydrated
Install a simple irrigation system, such as drip irrigation or soaker hoses, to provide consistent moisture to your plants.
6.3. Monitoring Temperature: Keeping an Eye on Things
Use a thermometer or data logger to monitor temperature and humidity inside the greenhouse.
6.4. Pest and Disease Management: Protecting Your Crops
Implement organic pest and disease control strategies to keep your plants healthy.
6.5. Ongoing Maintenance: Keeping it Running Smoothly
Check for leaks, clean the glazing, and adjust ventilation as needed to keep your greenhouse running smoothly.
![inside greenhouse seedlings growing rows]
7. Tools
- Saw: For cutting lumber.
- Drill: For screwing material together.
- Hammer: For hammering in nails, and demo.
- Tape Measure: For accurate measurements of your frame.
- Safety Glasses: For safety during the build.
- Gloves: For safety during the build.
8. Cost Breakdown
- Reclaimed Lumber: $0 - $50 (depending on availability)
- Reclaimed Windows: $0 - $100 (depending on availability)
- Fasteners (screws, nails, bolts): $20 - $50
- Sealant and Caulk: $10 - $20
- Insulation: $0 - $50 (depending on reclaimed options)
- Total Estimated Cost: $30 - $270
A professionally built greenhouse of similar size could easily cost several thousand dollars.
9. Maintenance
Maintenance of your new passive solar greenhouse should be done every quarter to ensure success in your harvests. Check and seal any cracks that may have appeared, remove any debris that has gathered, and make sure the ventilation is still working correctly.
Conclusion: A Year-Round Harvest Awaits
Building a passive solar greenhouse from reclaimed materials is a rewarding and sustainable project that can significantly enhance your homestead's self-sufficiency. By following these steps, you can create a thriving growing space that provides fresh produce year-round while reducing your environmental impact.
![hands holding vegetables greenhouse background]
Now it’s your turn to experience the benefits of a passive solar greenhouse! What are your favorite DIY projects on the homestead? Share them in the comments below!