Harness the Rain: Building a DIY Rain Barrel System for a Thriving Homestead
Meta Description: Learn how to build a DIY rain barrel system to conserve water, save money, and create a more resilient homestead. Step-by-step instructions, cost-effective tips, and practical advice for sustainable gardening.
For years, I’ve dreamed of a self-sufficient homestead, a place where we work with nature, not against it. We've slowly been chipping away at that dream, from planting our first vegetable garden to raising chickens. But one thing always bothered me: the amount of perfectly good rainwater rushing off our roof and down the drain. It felt wasteful, especially during those dry summer months when the garden was begging for a drink. That’s when I decided to tackle a DIY rain barrel system. It's a simple project that makes a BIG impact on water conservation, saves money on our water bill, and gives our garden the natural hydration it craves. Follow along as I share my real-world experience and practical wisdom to help you get started with rainwater harvesting.
Why Build a Rain Barrel System? The "Why" Behind the Water
Before we dive into the "how," let's talk about the "why." Building a DIY rain barrel system isn't just about saving a few bucks (although that's a nice perk!). It's about embracing a more resourceful and sustainable lifestyle. Here's why I believe every homesteader should consider rainwater harvesting:
- Water Conservation: Rainwater is a precious resource, and collecting it reduces our reliance on municipal water supplies.
- Cost Savings: Less water usage equals a lower water bill. Over time, the savings can be significant. This fits into our broader mission of cost-effective homesteading.
- Healthier Plants: Rainwater is naturally soft and free of chemicals like chlorine, which can be harmful to plants.
- Environmental Responsibility: Reducing our water consumption is a simple way to lessen our environmental impact and promote sustainable living.
- Self-Sufficiency: Taking control of our water supply is a step towards greater self-sufficiency and resilience.
Getting Started: Planning Your Rain Barrel System
Before you start buying materials, it's important to plan your system. Consider these factors:
- Roof Size and Rainfall: The larger your roof, the more rainwater you can collect. Research average rainfall in your area to estimate potential yield.
- Garden Size and Watering Needs: How much water does your garden require? This will help determine the number and size of rain barrels you need.
- Location: Choose a location that is easily accessible to your downspout and garden. A level surface is essential.
Materials You'll Need (Our Budget-Friendly Approach):
We built our system using mostly recycled and repurposed materials. Here's what we used:
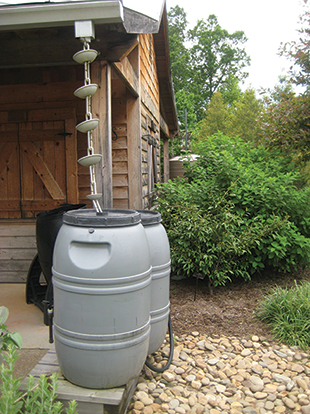
- Food-Grade Plastic Barrels (2): We sourced these from a local food manufacturer for a steal! Check Craigslist, Facebook Marketplace, or local businesses for used barrels.
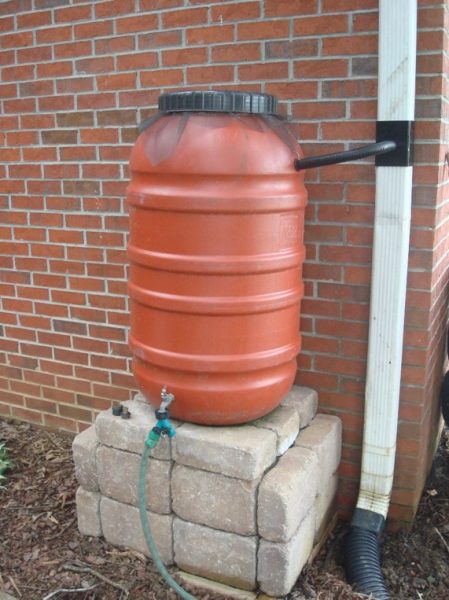
- Downspout Diverter: This diverts rainwater from your downspout into the barrel.
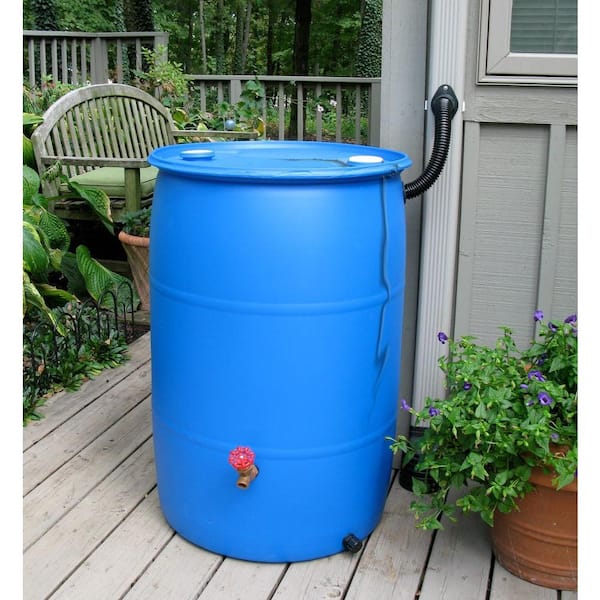
- Spigot: For easy access to the collected water.
- Hose Connector: To attach a garden hose.
- Screen Mesh: To keep out debris and mosquitoes.
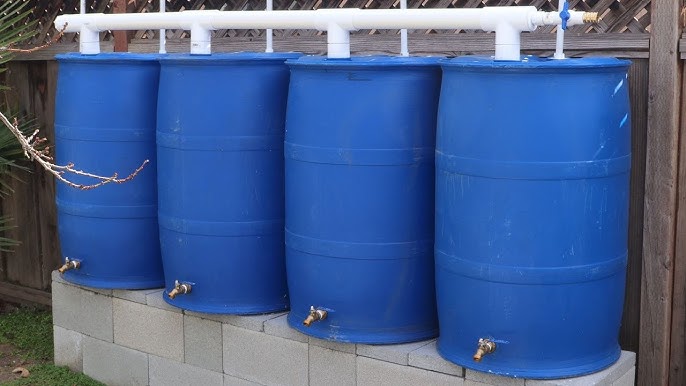
- PVC Pipe and Fittings: For connecting multiple barrels and creating overflow drains.
- Drill with Hole Saw: For creating openings in the barrel.
- Silicone Sealant: To prevent leaks.
- Cinder Blocks or Pallets: To elevate the barrels.
Important Note: Always use food-grade barrels to ensure the water is safe for your plants. Never use barrels that have contained chemicals or toxic substances.
Step-by-Step: Building Your Rain Barrel System
Alright, let's get our hands dirty! Here’s how we built our rain barrel system:
Step 1: Prepare the Barrels:
Thoroughly clean the barrels with soap and water to remove any residue. Rinse well.
Step 2: Create the Inlet:
Using a hole saw attachment on your drill, carefully cut a hole in the top of the barrel to accommodate the downspout diverter. The hole should be slightly smaller than the diverter to ensure a snug fit.
Step 3: Install the Downspout Diverter:
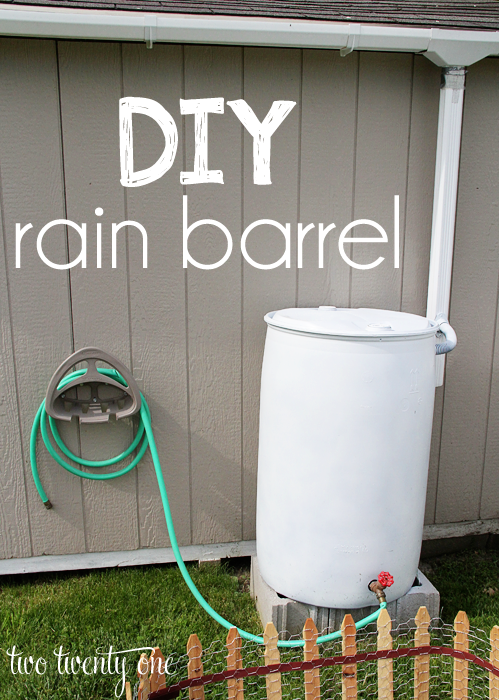
Insert the downspout diverter into the hole and secure it with silicone sealant to prevent leaks. Follow the manufacturer's instructions for installation.
Step 4: Create the Outlet:
Drill a hole near the bottom of the barrel for the spigot. Again, the hole should be slightly smaller than the spigot.
Step 5: Install the Spigot:
Insert the spigot into the hole and secure it with silicone sealant.
Step 6: Create the Overflow Drain (if connecting multiple barrels):
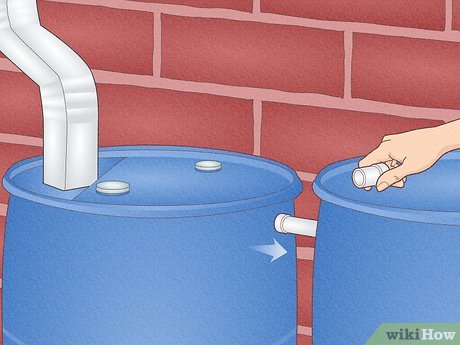
If you're connecting multiple barrels, drill a hole near the top of the first barrel and another on the second barrel to connect them. The barrels will equalize water level and prevent overflow.
Step 7: Install the Hose Connector:
Attach a hose connector to the spigot to easily connect a garden hose.
Step 8: Install the Screen Mesh:
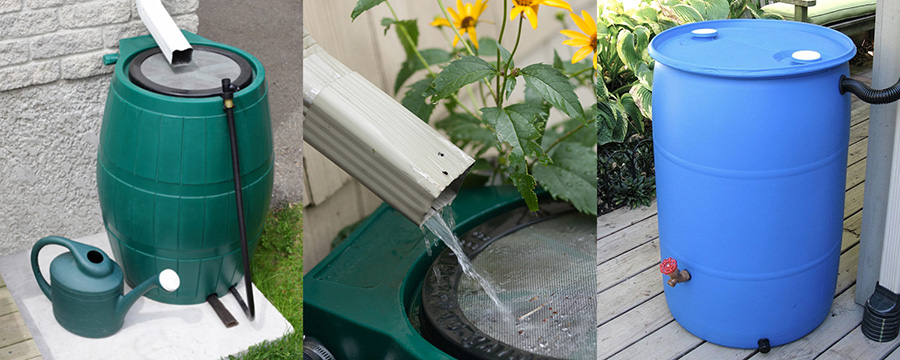
Cover the opening in the top of the barrel with screen mesh to prevent debris and mosquitoes from entering. Secure the mesh with a rubber band or zip ties.
Step 9: Elevate the Barrels:
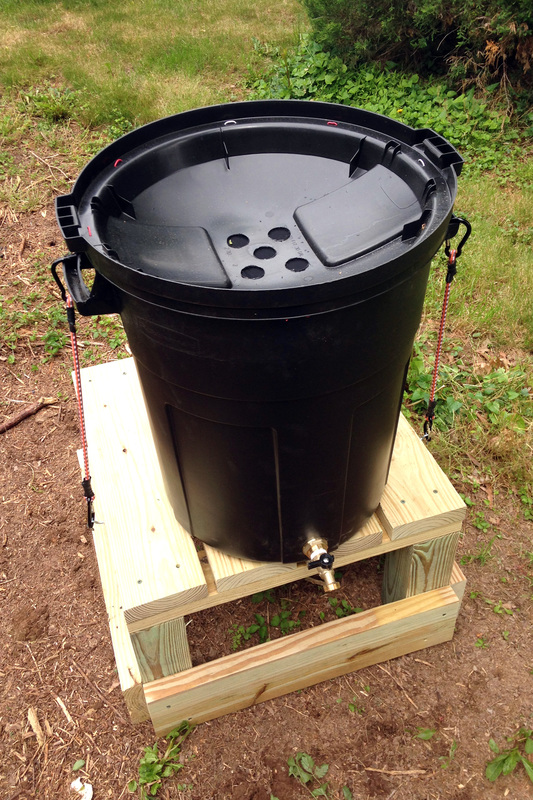
Place the barrels on cinder blocks or pallets to elevate them. This will provide gravity-fed water pressure and make it easier to access the water.
Step 10: Connect the Barrels (Optional):
If you're using multiple barrels, connect them together using PVC pipe and fittings.
Step 11: Test the System:
Wait for the next rain and test the system for leaks. Make any necessary adjustments to ensure everything is working properly.
Safety First: Gray Water Considerations for Rainwater
While rainwater is generally safe for watering plants, it's important to take precautions. Rainwater collected from roofs can contain contaminants like bird droppings, leaves, and pollution. Here are a few tips:
- Filter the Water: Use a screen mesh to filter out debris.
- Don't Drink It: Rainwater collected from roofs is not safe for drinking unless it's properly filtered and disinfected.
- Water the Soil, Not the Leaves: To minimize the risk of spreading pathogens, water the soil around the plants rather than the leaves.
- Check Local Regulations: Some areas have regulations regarding rainwater harvesting. Check with your local authorities to ensure you're in compliance.
It's important to note that this system is for rainwater harvesting, not a gray water system. A gray water system involves reusing water from showers or washing machines, which requires additional filtration and safety measures. This guide is specifically focused on rainwater collection, which is a simpler and safer option for beginner homesteaders. We will leave gray water system projects for another time.
Troubleshooting Common Rain Barrel Problems
Even the best-laid plans can sometimes go awry. Here are a few common problems and how to fix them:
- Leaks: If you notice leaks, apply more silicone sealant to the affected area.
- Clogged Diverter: Clean the downspout diverter regularly to prevent clogs.
- Mosquitoes: Ensure the screen mesh is securely in place to prevent mosquitoes from breeding in the barrel.
- Overflow: If the barrel overflows frequently, consider adding more barrels or installing an overflow drain.
The Rewards: A Greener Garden and a Lighter Footprint
Building a DIY rain barrel system has been incredibly rewarding. Not only are we saving money on our water bill, but we're also reducing our environmental impact and providing our garden with the natural hydration it needs. The plants are thriving, and we feel good knowing that we're doing our part to conserve water.
This simple project has taught us valuable lessons about self-sufficiency and resilience. It's a reminder that even small changes can make a big difference in creating a more sustainable homestead.
Your Turn: Embrace the Rain!
Now it's your turn to embrace the rain and build your own DIY rain barrel system. Don't be intimidated – it's a project that anyone can tackle with a little planning and effort. Share your experiences, ask questions, and let's learn from each other.
What's next? Consider building a compost bin to further enrich your garden soil or explore other water conservation techniques like mulching. The possibilities are endless!
Remember, every step towards self-sufficiency is a step towards a more resilient and fulfilling life. Happy harvesting!
