Grow Your Groceries, Not Your To-Do List: Easy Edible Container Gardens
Dreaming of garden-fresh salads and sun-ripened tomatoes, but feeling overwhelmed by the thought of a sprawling garden? You're not alone! Many homesteaders, backyard gardeners, and even apartment dwellers crave the taste of homegrown, but struggle to find the time or space. But what if I told you that you could harvest delicious, organic produce without sacrificing your precious free time?
Edible container gardening is the perfect solution, offering a manageable way to enjoy the bounty of homegrown harvests, even with limited time and space. This blog post will guide you through creating productive, low-maintenance edible container gardens that provide fresh produce without requiring hours of daily upkeep. Get ready to ditch the overwhelm and embrace the joy of growing your own food!

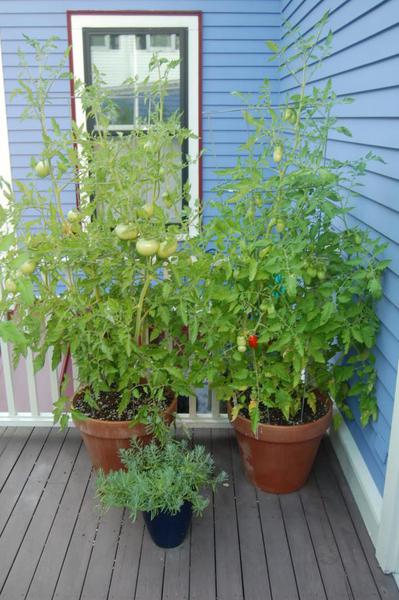
A thriving container garden with herbs, tomatoes, and peppers, showcasing the potential of edible container gardening.
Section 1: Choosing the Right Containers and Location for Success
The foundation of a successful edible container garden lies in selecting the right containers and finding the perfect location. This simple step can drastically impact your yield and how much time you will spend maintaining your garden.
Container Size Matters:
Think of your container as a tiny plot of land. Just like in a regular garden, the size of that plot determines what you can grow. Larger containers offer more room for root development, hold moisture longer, and are generally more forgiving for beginner gardeners. Five-gallon buckets, for example, are great for dwarf tomatoes, peppers, and even some bush bean varieties. Smaller pots (6-8 inches) are ideal for herbs like thyme, oregano, and chives.
Material Considerations:
The material of your container also plays a role. Terracotta pots are beautiful and allow for good airflow, but they can dry out quickly, requiring more frequent watering. Plastic containers are more affordable and retain moisture better, but they can overheat in direct sunlight. Metal containers can add a rustic touch but can also get very hot. Fabric pots are a fantastic option for their excellent drainage and airflow, and they allow roots to "air prune," promoting healthier growth. Consider upcycling containers like old buckets or tubs. It's a great way to save money and reduce waste! Be sure to drill drainage holes if they aren't already present.

An assortment of container sizes and materials, demonstrating various options for edible container gardens.
Sunlight is Crucial:
Most edible plants need at least 6-8 hours of sunlight per day to thrive. Observe your space throughout the day to identify the sunniest spots. If you have limited sunlight, consider growing shade-tolerant crops like lettuce, spinach, kale, and mint.
Drainage, Drainage, Drainage!
I can't stress this enough. Poor drainage is a death sentence for container plants. Make sure your containers have adequate drainage holes to prevent waterlogging. If you're using a container without drainage holes, you can add a layer of gravel or rocks at the bottom, but this is not as effective as drainage holes.
I once tried to grow rosemary in a beautiful ceramic pot that I found at a yard sale. It was so cute! I didn't notice there were no drainage holes. My rosemary drowned after a week of rain. Now, I check meticulously for drainage holes before planting anything!
Selecting the right container size, material, and location is crucial for minimizing maintenance and maximizing harvest. A little planning upfront saves a lot of trouble later!
Section 2: Top Low-Maintenance Edible Plants for Container Gardens
Choosing the right plants is just as important as choosing the right container. Some plants are simply more resilient and require less attention than others. Here are some of my favorites for low-maintenance edible container gardens:
Herbs (The Workhorses):
Herbs are my go-to for container gardens. Thyme, rosemary, sage, oregano, and mint are all incredibly drought-tolerant and pest-resistant. They also offer a constant supply of fresh flavors for your cooking. Be mindful when planting mint, as it can be invasive. Planting it in a container will keep it contained!
Leafy Greens (Cut-and-Come-Again):
Lettuce, spinach, and kale are easy to grow and provide a continuous harvest through the "cut-and-come-again" method. Simply snip off the outer leaves as needed, and the plant will continue to produce new growth. This is a super efficient way to grow salads!
Compact Peppers (Colorful and Productive):
Peppers, especially dwarf varieties, are well-suited for containers. They add a splash of color and provide a spicy kick to your meals. Consider growing jalapeños, bell peppers, or poblano peppers in containers. They're surprisingly low-maintenance.
Bush Beans (Easy Bean There, Done That):
Forget the sprawling vines of pole beans; bush beans are compact and productive. They don't require staking and produce a generous harvest of delicious beans.
Strawberries (Delicious and Decorative):
Everbearing strawberry varieties are perfect for containers and hanging baskets. They produce fruit throughout the season and add a touch of sweetness to your garden.

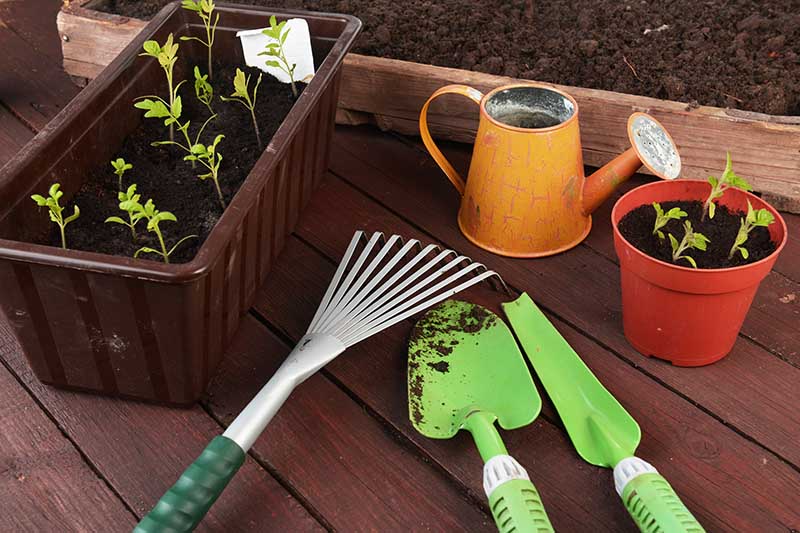
A close-up of a gardening starter kit with herbs, lettuces, and soil, perfect for planting an easy to maintain container garden.
Here’s a quick planting chart to get you started:
| Plant | Container Size | Spacing | Companion Plants |
|---|---|---|---|
| Thyme | 6-inch pot | 4 inches apart | Rosemary, Sage |
| Lettuce | 12-inch pot | 6 inches apart | Carrots, Radishes |
| Jalapeños | 5-gallon bucket | 1 plant per pot | Basil, Onions |
| Bush Beans | 5-gallon bucket | 4 inches apart | Carrots, Marigolds |
| Everbearing Strawberries | Hanging Basket | 6 inches apart | Basil, Thyme |
Choosing the right plants is half the battle! Focus on varieties that are naturally resilient, productive, and require minimal intervention.
Section 3: Watering, Feeding, and Weeding (Simplified!)
Watering, fertilizing, and weeding are essential for any garden, but they don't have to be a chore. With the right techniques and tools, you can simplify these tasks and keep your container garden thriving with minimal effort.
Watering Wisely:
The key to watering container gardens is consistency. Avoid overwatering, which can lead to root rot, and underwatering, which can stress plants. The "finger test" is your best friend – stick your finger an inch or two into the soil. If it feels dry, it's time to water. If it feels moist, wait a day or two.
Self-Watering Containers:
Self-watering containers are a game-changer for busy gardeners. These containers have a reservoir at the bottom that slowly releases water to the plants, reducing the frequency of watering. You can buy self-watering containers or even make your own using plastic buckets and recycled materials.
Mulching Magic:
Mulch is your secret weapon for weed control and moisture retention. Apply a layer of organic mulch (straw, wood chips, or compost) around your plants to suppress weeds, retain moisture, and regulate soil temperature.
Natural Fertilizers:
Instead of using synthetic fertilizers, opt for slow-release organic fertilizers like compost tea or worm castings. These fertilizers provide sustained nutrients without the risk of burning your plants.
To make compost tea, simply steep a handful of compost in a bucket of water for 24-48 hours. Then, strain the mixture and use it to water your plants.
Weed Prevention:
Consistent mulching can make a huge difference for week prevention. Otherwise, hand-pulling is the way to go to make sure that you are avoiding harmful chemicals.
Simple watering, feeding, and weeding strategies can keep your container garden thriving with minimal effort.
Section 4: Pest and Disease Management (Naturally)
Nobody wants to deal with pests and diseases in their garden, but they're a reality of growing your own food. The good news is that you can manage these problems naturally without resorting to harmful chemicals.
Prevention is Key:
Healthy plants are less susceptible to pests and diseases. Ensure your plants have adequate sunlight, good air circulation, and well-draining soil.
Companion Planting:
Companion planting is a natural way to deter pests. Marigolds, for example, repel nematodes and other pests. Basil can deter aphids and other insects.
Handpicking and Horticultural Oil:
If you spot pests on your plants, handpick them off and dispose of them. Horticultural oil is a safe and effective way to control aphids, spider mites, and other pests.
DIY Pest Sprays:
You can make your own pest sprays using simple ingredients like garlic, chili peppers, and dish soap.
Here's a recipe for a simple homemade pest spray:
- 1 clove of garlic, minced
- 1 teaspoon chili pepper flakes
- 1 teaspoon liquid dish soap
- 1 quart of water
Combine all ingredients in a spray bottle and shake well. Spray on affected plants, avoiding direct sunlight.
Beneficial Insects:
Attract beneficial insects to your garden to help control pests. Ladybugs, lacewings, and praying mantises are all excellent predators that will feast on aphids, spider mites, and other pests.
By focusing on prevention and using natural pest control methods, you can keep your container garden healthy and productive without harmful chemicals.
Conclusion: Reap the Rewards of Effortless Edible Container Gardens
Edible container gardening is a rewarding and accessible way to grow your own food, even if you have limited time and space. By choosing the right containers and plants, simplifying watering and fertilizing, and managing pests naturally, you can create a thriving container garden that provides a bountiful harvest with minimal effort.
As summer turns to fall, now is the perfect time to plan for your next container garden adventure! Consider planting cool-season crops like lettuce, spinach, kale, and herbs for a continuous supply of fresh greens throughout the cooler months.
What are your favorite low-maintenance edible plants for container gardens? Share your tips and tricks in the comments below! We want to learn from your experiences! Let's cultivate a community of happy container gardeners!