Gray Water Gold: Building a Simple System for Homestead Savings
Are you letting valuable water resources literally go down the drain? In the world of homesteading, where self-sufficiency and resourcefulness are prized, water conservation is more critical than ever. From watering our gardens to sustaining our livestock, water is life. But what if I told you there's a way to significantly reduce your water consumption, lower your water bills, and boost the health of your plants, all while minimizing your environmental impact? That's where a DIY gray water system comes in!
[VISUAL: healthy garden lush thriving plants]
My journey into gray water systems started during a particularly dry summer. Our well was running low, and I was spending a fortune on water for my vegetable garden. I knew there had to be a better way. After some research, I discovered the potential of gray water – wastewater from showers, sinks, and washing machines, excluding toilet water. It's a fantastic resource that's often overlooked!
This blog post will guide you through building a simple, branched drain gray water system – perfect for beginners. It’s a low-tech, affordable way to reuse water from your laundry machine (or other sources) to irrigate non-edible plants. Let's turn your waste water into a valuable resource for your homestead!
Section 1: Planning Your Gray Water System: Assessment and Design
Before you start digging, careful planning is essential for a successful gray water system. This involves assessing your gray water sources, planning the destination for the water, and understanding the soil suitability.
Source Water Assessment: Begin by identifying potential gray water sources in your home. Common sources include your shower, bathroom sink, and washing machine. Evaluate the volume of gray water each source produces. A washing machine, for instance, can generate a significant amount of water with each load. Also, consider the types of soaps and detergents you use. Opt for biodegradable, plant-based products to minimize harmful chemicals entering your soil. Harsh chemicals like bleach or borax aren't suitable for gray water systems, as they can harm plants and soil microorganisms.
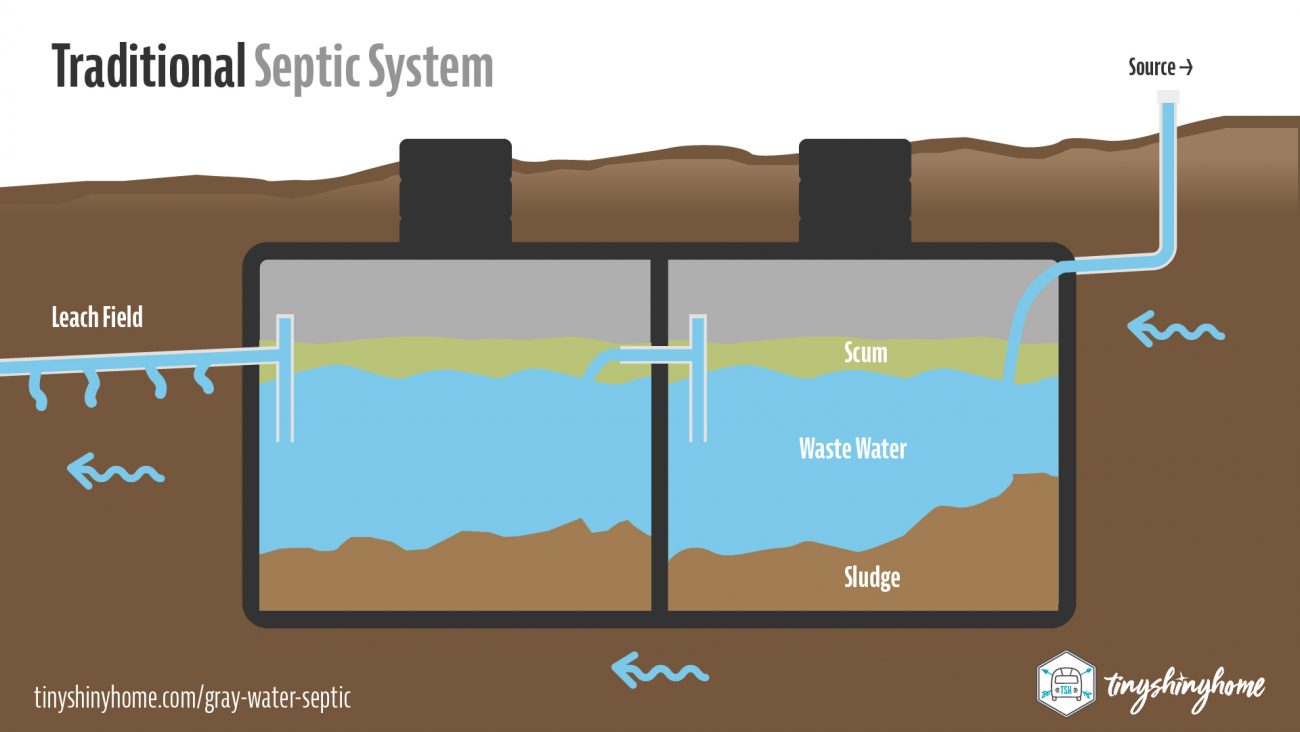
Destination Planning: Next, determine where the gray water will be used. Typically, gray water is used for irrigating non-edible plants, trees, or lawns. Important Note: Always check your local regulations and ordinances regarding gray water usage! Some areas have specific restrictions or permit requirements. In many jurisdictions, using gray water on edible plants or for toilet flushing is prohibited without advanced treatment systems. Also, remember that gray water needs to be used soon after it is generated and never stored longer than 24 hours, because bacteria can grow quickly.
Soil Suitability: Understanding your soil is crucial for proper gray water absorption. Perform a simple percolation test to assess how well your soil drains. Dig a hole approximately 12 inches wide and 12 inches deep. Fill it with water and let it drain completely. Then, refill the hole and measure how quickly the water level drops over time. Sandy soils drain quickly, while clay soils drain slowly. Amend your soil with organic matter, such as compost or aged manure, to improve its drainage and water-holding capacity.
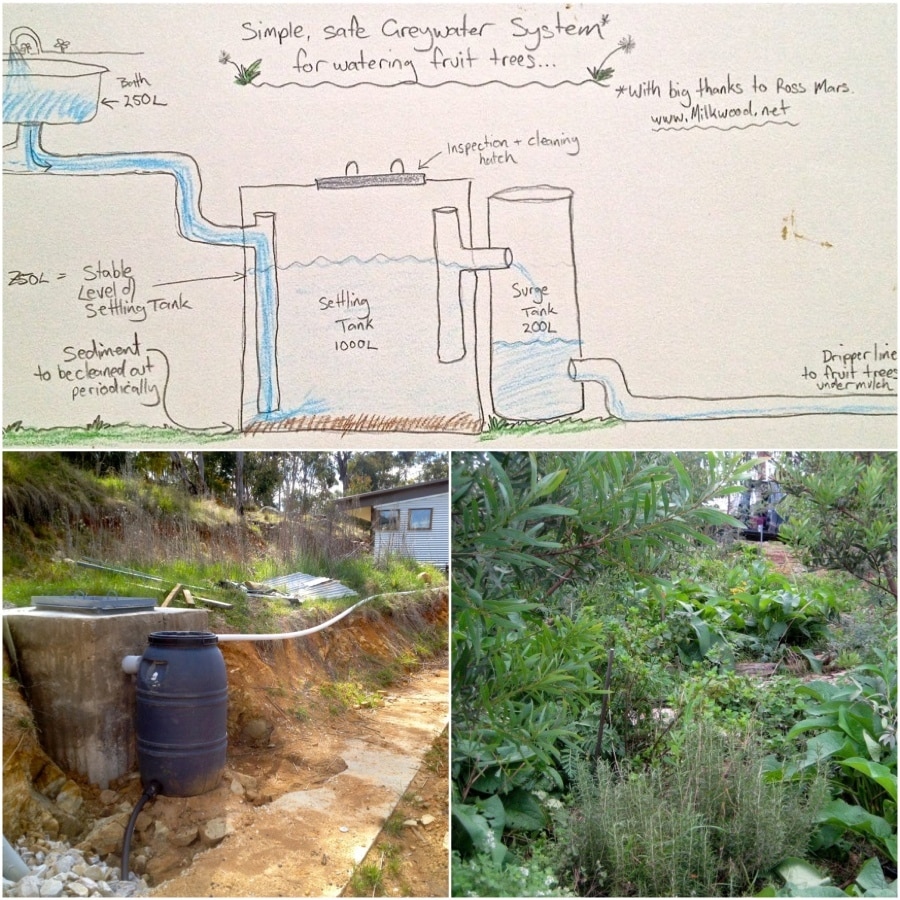
System Design: For this guide, we'll focus on a simple branched drain system. This system distributes gray water through a series of underground pipes to multiple mulch basins. The basic components include:
- Diverter Valve: A valve installed on the gray water source to divert water to either the sewer/septic system or the gray water system.
- Filter: A simple filter to remove large debris, such as hair and lint.
- Piping: PVC pipes to transport the gray water from the source to the irrigation area.
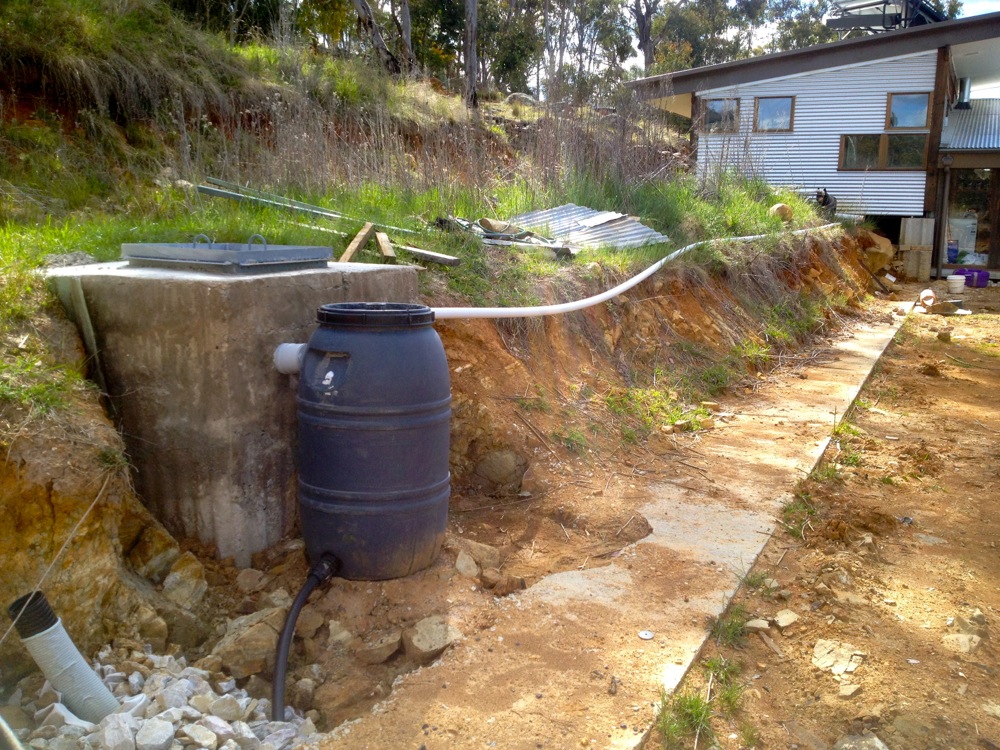
- Mulch Basins: Shallow, gravel-filled basins that surround the plants and distribute the gray water evenly.
[VISUAL: homestead property showing water flow]
[VISUAL: Detailed schematic diagram simple grey water system]
Materials List:
- PVC pipes (various sizes, depending on your system layout)
- PVC fittings (elbows, tees, couplings)
- PVC cement
- Diverter valve
- Filter housing (a large bucket or container with a lid)
- Filter materials (gravel, sand, charcoal, or a pre-made filter)
- Shovel
- Mulch
- Gravel
- Measuring tape
- Level
- Gloves
- Safety glasses
Estimated Cost: $50 - $200 (depending on the size and complexity of your system and whether you already own some of the materials and tools). Materials can be purchased at Lowe's, Home Depot, and local hardware stores.
Careful planning is the cornerstone of a successful gray water system. Considering your specific needs, local regulations, and potential environmental impact beforehand will make your implementation smoother and much more effective. And remember that accurate and comprehensive sourcing information saves time and effort, and ensures that others can replicate your project with ease.
Section 2: Gathering Materials and Tools
Now that you have a design in place, it's time to gather your materials and tools. Having everything organized and readily available will streamline the building process and prevent frustrating interruptions.
[VISUAL: tools needed for plumbing project]
Essential Tools: This project requires a few essential tools:
- Pipe cutter or hacksaw for cutting PVC pipes
- PVC cement applicator
- Wrenches for tightening fittings
- Shovel for digging trenches and mulch basins
- Level for ensuring proper drainage
- Measuring tape for accurate measurements
- Safety glasses and gloves for personal protection.
Material Sourcing: Sourcing your materials wisely can save you money and reduce your environmental impact. Check local hardware stores for competitive pricing on PVC pipes and fittings. Consider purchasing materials in bulk if you plan to expand your system in the future. Online retailers can also be a convenient option for specialized items like diverter valves or pre-made filters.
Material Alternatives: Get creative with alternative materials! Repurposed containers can be used for filter housings. Instead of buying new gravel, consider using rocks from your property. Look for reclaimed PVC pipes or fittings at construction salvage yards. The possibilities are endless!
Organization: Before you start building, take the time to organize your materials and tools. Create a designated workspace and keep everything within easy reach. This will save you time and prevent frustration during the building process.
Gathering all your materials and tools before starting the project prevents delays and allows for uninterrupted progress. Prioritize safety by always using appropriate protective gear, and explore opportunities to integrate recycled or repurposed materials whenever feasible.
Section 3: Building Your Gray Water System: Step-by-Step Instructions
Alright, let's get our hands dirty and start building your gray water system. Follow these step-by-step instructions carefully:
[VISUAL: show connecting pipes using PVC cement]
- Step 1: Installing the Diverter Valve: The diverter valve is the gateway to your gray water system. Install it on the drain line of your chosen gray water source (e.g., under the sink or washing machine). The exact installation process will vary depending on the type of valve you choose. Generally, it involves cutting the existing drain line, inserting the valve, and securing it with clamps or fittings. Make sure the valve is easily accessible for switching between the sewer/septic system and the gray water system.
[VISUAL: step-by-step photos diverter valve install]
Step 2: Connecting the Piping: Connect PVC pipes from the diverter valve to the filter housing. Use PVC cement to create watertight connections. Apply the cement to both the pipe and the fitting, then quickly push them together and twist slightly to ensure a secure bond. Allow the cement to dry completely before proceeding. When laying the pipes, maintain a slight slope downwards to promote gravity flow. Support the pipes with bricks or stones to prevent sagging.
Step 3: Building the Filter: The filter removes debris from the gray water. A simple filter can be built using a large bucket or container with a lid. Drill holes in the bottom of the container for drainage. Layer different filter materials inside the container, starting with a layer of gravel at the bottom, followed by a layer of sand, and then a layer of charcoal. The charcoal helps to remove odors and impurities.
[VISUAL: DIY gray water filter being constructed layered gravel sand charcoal]
- Step 4: Creating the Irrigation Area: Dig shallow mulch basins around the plants you want to irrigate with gray water. The basins should be large enough to hold the gray water without overflowing. Line the basins with gravel to promote drainage and prevent soil erosion.
[VISUAL: Greywater irrigation area, non-edible plants watering through mulch basins]
- Step 5: Connecting Filter to Irrigation: Connect PVC pipes from the filter housing to the mulch basins. Distribute the pipes evenly around the plants to ensure uniform irrigation. You can use a T-fitting to split the flow of gray water into multiple basins. Make sure the pipes are buried underground to protect them from damage and prevent them from becoming a tripping hazard.
Follow these instructions carefully, double-checking each connection to prevent leaks. Take the time to understand the process and don't hesitate to ask for help from experienced DIYers or plumbers if needed.
Section 4: Maintaining Your Gray Water System
Like any system, your gray water setup requires regular maintenance to ensure optimal performance. Here are some crucial maintenance tips:
[VISUAL: hands cleaning gray water filter system]
Filter Maintenance: Clean the filter regularly to prevent clogging. The frequency of cleaning will depend on the amount of gray water you use and the types of soaps and detergents you use. A monthly cleaning is generally recommended. To clean the filter, simply remove the filter materials, rinse them with water, and replace them.
Piping Inspection: Inspect the piping for leaks or clogs. Leaks can be repaired with PVC cement or pipe clamps. Clogs can be cleared with a plumber's snake or by flushing the pipes with water.
Plant Health: Monitor the health of the plants being irrigated. If the plants show signs of stress, such as yellowing leaves or stunted growth, adjust the amount of gray water you're using.
Troubleshooting: Common problems include clogs, leaks, and odor issues. Clogs can be prevented by using a filter and cleaning it regularly. Leaks can be repaired with PVC cement or pipe clamps. Odor issues can be addressed by using biodegradable soaps and detergents and ensuring proper drainage.
Water Quality Testing: Periodically test the gray water to ensure it meets safety standards. Testing can be done by a local laboratory. This is especially important if you have concerns about the quality of your gray water or if you're using it on sensitive plants.
[VISUAL: gardener inspecting plants after watering with grey water]
Regular maintenance is key to the longevity and efficiency of any gray water system. Keep a close watch on your plants and water to ensure they are thriving.
Conclusion: Reaping the Rewards of a Water-Wise Homestead
Congratulations! You've successfully built your own DIY gray water system. By taking this simple step, you're conserving water, saving money, and reducing your environmental impact. You're also increasing the resilience of your homestead by becoming more self-sufficient.
A DIY gray water system is an achievable project that empowers you to harness a valuable resource that would otherwise be wasted. It offers tangible benefits, from reducing your environmental footprint to fostering a more sustainable lifestyle. By integrating a gray water system into your homestead, you can enjoy a healthier, more vibrant landscape while contributing to a greener future.
[VISUAL: thriving garden lush landscape happy]
Are you ready to take the plunge and build your own gray water system? We would love to hear about your experience! Share your thoughts and questions in the comments below! What challenges do you foresee in implementing this project on your homestead? What other sustainable materials have you used in similar projects?