From Seed to Supper: Growing a Rainbow of Salad Greens in Your Backyard
Tired of bland, wilted lettuce from the grocery store? Imagine stepping into your backyard on a warm spring evening, basket in hand, and harvesting a vibrant mix of crisp, flavorful salad greens. The sun is setting, the air is filled with the earthy scent of the garden, and you know that tonight's dinner will be bursting with freshness and goodness, grown entirely by you. This dream can easily become a reality! Growing your own salad greens is a simple, rewarding, and delicious way to embrace healthy eating, self-sufficiency, and seasonal living.

Why Grow Your Own Salad Greens?
Beyond the incredible flavor, there are countless reasons to cultivate your own salad greens. Think about it:
- Unmatched Freshness: Nothing beats the taste of greens harvested just moments before they hit your plate.
- Cost Savings: Say goodbye to expensive, pre-packaged salads. Growing your own is incredibly cost-effective.
- Organic Goodness: You have complete control over what goes into your garden, ensuring your salad is free from harmful chemicals and pesticides through organic gardening practices.
- Environmental Friendliness: Reduce your carbon footprint by eliminating the need for transportation and plastic packaging.
- Pure Joy: There's a unique satisfaction in nurturing plants from seed to supper and enjoying the fruits (or should we say, leaves!) of your labor.
Section 1: Choosing Your Seeds: A Rainbow of Flavors
The world of salad greens is vast and exciting! Experiment with different textures, colors, and flavors to create your perfect salad mix. Here are a few popular options to get you started:
- Lettuce: The foundation of most salads, lettuce comes in various forms:
- Romaine: Crisp, upright leaves with a slightly bitter flavor.
- Butterhead: Soft, buttery leaves with a mild, sweet taste.
- Loose-leaf: Easy to harvest, these varieties offer a range of colors and textures. Consider 'Black Seeded Simpson' for its reliable growth and mild flavor.
- Spinach: A nutritional powerhouse with a slightly earthy flavor. Choose bolt-resistant varieties for warmer climates.
- Arugula: Also known as rocket, arugula adds a peppery kick to your salad. It's fast-growing and easy to cultivate.
- Kale: While often enjoyed cooked, baby kale leaves are delicious in salads. 'Lacinato' (dinosaur kale) is a popular choice.
- Mustard Greens: Offer a spicy, tangy flavor. Use sparingly as they can be quite pungent.
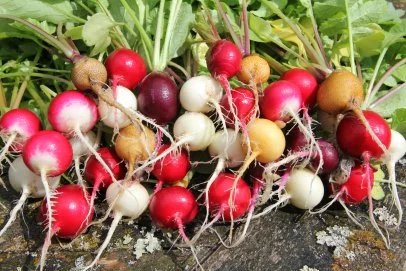
- Radish Greens: Don’t throw them away! Radish greens are edible and add a peppery bite to your salad mix.

Beginner Tip: Start with a mesclun mix, which is a blend of different salad green seeds. This gives you a variety of flavors and textures in one easy planting.
For the Adventurous Gardener: Explore more unusual options like mâche (lamb's lettuce) or cress for a unique culinary experience.

Section 2: Preparing Your Garden Bed: The Foundation for Success
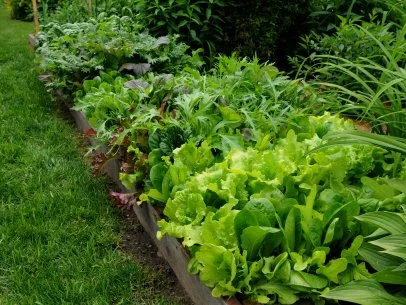
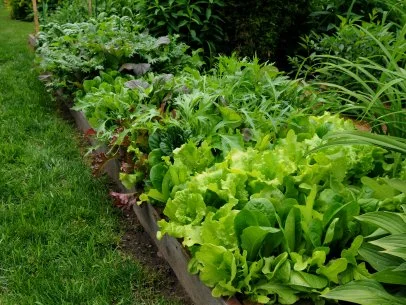
Salad greens thrive in well-drained, fertile soil with plenty of sunlight (at least 6 hours a day). Proper soil preparation is key to a bountiful seasonal harvest.
- Choose Your Location: Select a sunny spot with easy access to water.
- Clear the Area: Remove any weeds, rocks, or debris.
- Amend the Soil: Salad greens prefer slightly acidic soil. Incorporate plenty of compost to improve drainage, fertility, and water retention. Compost is the cornerstone of organic gardening, providing essential nutrients for healthy growth. If you don't have your own compost, you can purchase it from a local nursery.
- Till the Soil: Loosen the soil to a depth of 6-8 inches.
- Rake Smooth: Create a level surface for planting.
Raised Beds: Consider using raised beds for improved drainage and easier gardening, especially if you have poor soil quality.

Section 3: Sowing and Caring for Your Greens: Nurturing Your Crop
Sowing salad greens is a breeze!
- Direct Sowing: Most salad greens are best sown directly into the garden bed.
- Create Furrows: Make shallow furrows (about 1/4 inch deep) in the prepared soil.
- Sow Seeds: Sprinkle the seeds evenly along the furrows.
- Cover Lightly: Gently cover the seeds with soil.
- Water Gently: Use a watering can or gentle spray nozzle to avoid disturbing the seeds.

Caring for Your Greens:
- Watering: Keep the soil consistently moist, but not waterlogged. Water in the morning to allow the foliage to dry before nightfall, which helps prevent fungal diseases.
- Weeding: Regularly remove weeds to prevent them from competing with your salad greens for nutrients and sunlight.
- Pest Control: Use organic methods to protect your plants from pests. Companion planting with herbs like basil or dill can deter pests. You can also use insecticidal soap or diatomaceous earth.
- Thinning: Once the seedlings emerge, thin them out to provide adequate spacing for growth. Refer to your seed packet for specific spacing recommendations.
Section 4: Harvesting Your Bounty: Enjoying the Rewards
Harvesting salad greens is the most rewarding part!
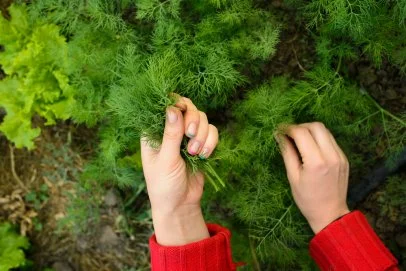
- Cut-and-Come-Again: Most salad greens can be harvested using the "cut-and-come-again" method. Simply snip off the outer leaves, leaving the inner leaves to continue growing. This provides a continuous harvest throughout the season.
- Harvest Time: Harvest your greens when they are young and tender, typically 3-6 weeks after sowing.
- Washing: Wash your harvested greens thoroughly to remove any dirt or debris.
- Storage: Store washed greens in a salad spinner or wrapped in a damp paper towel in the refrigerator. They will typically last for up to a week.

Actionable Tips for Salad Garden Success:
- Succession Planting: Sow new seeds every 2-3 weeks for a continuous salad greens supply throughout the growing season.
- Companion Planting: Plant herbs like basil, dill, and chamomile near your salad greens to deter pests and attract beneficial insects.
- Cut-and-Come-Again Harvesting: Harvest outer leaves regularly to encourage continued growth and extend your harvest.
- Use a Row Cover: Protect your young seedlings from pests and harsh weather with a lightweight row cover.
- Mulch: Apply a layer of mulch around your plants to help retain moisture, suppress weeds, and regulate soil temperature.
Cozy Living: Take your fresh salad greens and create a wonderful meal at home. You can invite over close family and friends to eat your salad.
Closing Reflection:
Growing your own salad greens is a truly rewarding experience that connects you to nature, provides you with fresh, healthy food, and enhances your sense of self-sufficiency. Don't be intimidated to start a backyard garden. Start small, experiment with different varieties, and enjoy the journey from seed to supper. Embrace the farmhouse life and enjoy the simple pleasures of cozy living. The taste of homegrown greens is unlike anything you'll find in a store, and the satisfaction of knowing you grew it yourself is priceless.
Share your salad garden adventures with us in the comments below! What are your favorite salad green varieties? We would love to learn what seeds do the best in your neck of the woods.