From Seed to Supper: Building a Self-Sufficient Seed Starting System
Remember that feeling of anticipation, thumbing through seed catalogs in the depths of winter, dreaming of a garden overflowing with homegrown goodness? Images of ripe tomatoes, crisp lettuce, and fragrant herbs dance in your head. Turn that dream into reality by taking control of your seed starting. This isn't just about starting seeds; it's about creating a system that empowers you to grow your own food sustainably, year after year, using resources you can generate yourself. We'll explore how to cultivate a truly self-sufficient seed starting system, focusing on saving heirloom seeds, creating your own soil mixes, building your own grow light set up, and much more, ensuring a bountiful seasonal harvest that extends far beyond a single growing season.
The Foundation: Heirloom Seeds & Seed Saving
Heirloom seeds are more than just a trendy buzzword; they represent a connection to the past and a path to a more resilient future. These open-pollinated varieties have been passed down through generations, offering unique flavors, characteristics, and often, a greater resistance to local pests and diseases. Saving seeds from your own garden allows you to adapt your plants to your specific climate and soil conditions, resulting in even healthier and more productive harvests over time.
Seed saving has been practiced for centuries, ensuring the survival of countless plant varieties. Before the rise of commercial seed companies, farmers and gardeners relied on their own saved seeds, carefully selecting the best plants each year to perpetuate desirable traits. It's a tradition that empowers us to become active participants in the food system, rather than passive consumers.
Basic Techniques for Saving Seeds:
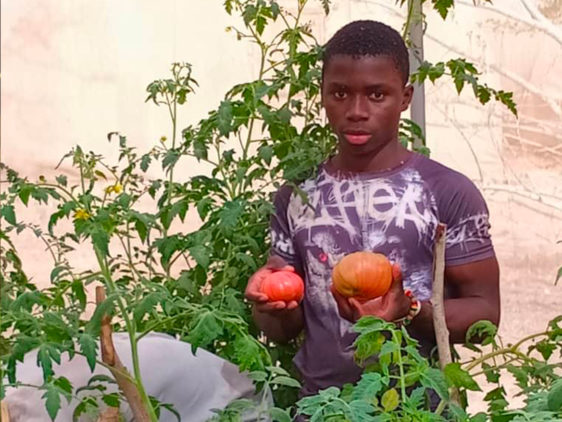
- Tomatoes: Choose ripe tomatoes, scoop out the seeds and pulp, ferment in a jar of water for a few days to remove the gel coating, then rinse and dry thoroughly on a screen.
- Beans: Allow bean pods to dry completely on the plant, then shell the beans and store in an airtight container.
- Peppers: Allow peppers to ripen fully on the plant, then remove the seeds and dry them thoroughly.
When saving seeds, understanding pollination methods is crucial. Tomatoes and beans are generally self-pollinating, meaning they don't require insect pollination, making seed saving relatively straightforward. Peppers, however, can cross-pollinate, so if you're growing multiple varieties, you'll need to isolate them to prevent unwanted hybrids. Drying seeds properly is essential to prevent mold and ensure viability. Store seeds in a cool, dark, and dry place, such as a glass jar in the refrigerator.

Ethical Seed Sources:
Support seed companies that prioritize ethical practices, such as open-pollination, non-GMO seeds, and fair labor standards. Look for companies that are committed to preserving genetic diversity and offering a wide selection of heirloom varieties.
Key Takeaway: Seed saving is the cornerstone of a self-sufficient system, allowing you to continually adapt and improve your homegrown harvests.
The "Soil" Solution: Creating Your Own Seed Starting Mix
The foundation for healthy seedlings isn't just about what you plant, but what you plant in. Many commercially available seed starting mixes rely heavily on peat moss, a non-renewable resource harvested from ecologically sensitive bogs. Choosing to create your own seed starting mix not only reduces your environmental impact but also allows you to tailor the mix to the specific needs of your seedlings.
A Sustainable Seed Starting Mix Recipe:
- Compost (1 part): Use well-rotted compost from your own backyard. The compost should be dark, crumbly, and have a pleasant earthy smell. Properly composted material provides essential nutrients and beneficial microbes for healthy seedling growth. Consider using vermicompost, created from worm castings, for an extra boost of nutrients and microbial activity. Bokashi compost, a fermented compost, is another great option to add to your seed starting mix for a boost of microbial diversity.
- Coir or Coco Fiber (1 part): This sustainable alternative to peat moss is made from coconut husks. It provides excellent drainage and aeration.
- Perlite or Vermiculite (1 part): These amendments improve drainage and aeration, preventing soil compaction and promoting healthy root growth. Look for sustainable alternatives to mined perlite and vermiculite such as rice hulls.
- Lime (optional): A small amount of lime can help to correct the pH of the soil, especially if you are growing seedlings that prefer a slightly alkaline environment.
Optional soil amendments like Mycorrhizae, a beneficial fungi, can aid in nutrient uptake and root development, while rock phosphate provides a slow-release source of phosphorus, which is essential for strong root growth.
Testing the pH of your homemade mix is simple. Purchase a soil pH testing kit from your local garden center or online. Follow the instructions on the kit to test the pH of your mix and adjust as needed by adding lime to raise the pH or sulfur to lower it.
Key Takeaway: Crafting your own seed starting mix not only saves money but allows you to control the quality and sustainability of your growing medium.
Illuminating Growth: DIY Grow Light Setup
Sunlight is essential for plant growth, but many of us start seeds indoors before the natural sunlight is strong enough or available for long enough hours. Grow lights provide the necessary light spectrum and intensity to ensure healthy seedling development, preventing leggy growth and promoting strong stems.
Building your own grow light setup can be surprisingly affordable and effective. LED lights are the way to go, providing energy efficiency and a full spectrum of light that mimics natural sunlight. T5 LED fixtures, LED strip lights, or even repurposed shop lights can all be used to create a DIY grow light setup. The key is to ensure that the lights provide both red and blue light, which are the most important for plant growth.
You can easily build a simple shelving unit using lumber and hardware from your local hardware store to hold the lights and seedlings. Ensure that the shelving unit is sturdy and that the lights are positioned at the correct distance from the seedlings. As the seedlings grow, you'll need to adjust the height of the lights to prevent them from burning the plants. A good rule of thumb is to keep the lights a few inches above the top of the seedlings.
Common lighting mistakes include using lights that are too weak, positioning the lights too far away from the seedlings, or leaving the lights on for too long. Seedlings typically need 14-16 hours of light per day.
Key Takeaway: A well-lit environment is crucial for healthy seedling development, and a DIY setup can be both effective and affordable.
Managing Moisture and Nutrients: Watering and Feeding
Watering and feeding seedlings correctly is essential for their survival and healthy development. Overwatering can lead to damping-off, a fungal disease that can quickly kill seedlings, while underwatering can cause them to dry out and die. Similarly, providing the right nutrients is crucial for strong root growth, healthy foliage, and overall vigor.
Watering Techniques:
Bottom watering is an excellent way to prevent damping-off and encourage root growth. Simply place the seed trays in a shallow tray of water and allow the soil to absorb the water from the bottom up. This encourages the roots to grow downwards in search of moisture, resulting in stronger and more resilient plants. Rainwater is ideal for watering seedlings, as it is free of chlorine and other chemicals that can harm plants. If you don't have access to rainwater, you can dechlorinate tap water by letting it sit out for 24 hours. Check the soil moisture regularly by sticking your finger into the soil. If the top inch of soil feels dry, it's time to water.
Nutrient Management:
Organic fertilizers, such as diluted compost tea, worm casting tea, or fish emulsion, provide a gentle and balanced source of nutrients for seedlings. Compost tea is made by steeping compost in water for a few days, while worm casting tea is made by steeping worm castings in water. Fish emulsion is a liquid fertilizer made from fish byproducts.
Nutrient deficiencies in seedlings can manifest in various ways, such as yellowing leaves, stunted growth, or weak stems. If you notice any of these symptoms, it's important to address the deficiency promptly. Homemade fertilizers, such as fermented plant juice (FPJ) and compost tea, are great options for providing your seedlings with the nutrients they need. Fermented plant juice is made by fermenting plant material in sugar, while compost tea is made by steeping compost in water.
Key Takeaway: Consistent watering and gentle fertilization are essential for nurturing healthy and robust seedlings.
Hardening Off and Transplanting Success
Hardening off is the process of gradually acclimatizing seedlings to outdoor conditions before transplanting them into the garden. This is a crucial step in preventing transplant shock and ensuring that your seedlings thrive in their new environment.
The hardening-off process typically takes about a week. Start by placing the seedlings outdoors in a sheltered location for a few hours each day, gradually increasing the amount of time they spend outdoors. Protect the seedlings from direct sunlight, wind, and frost.
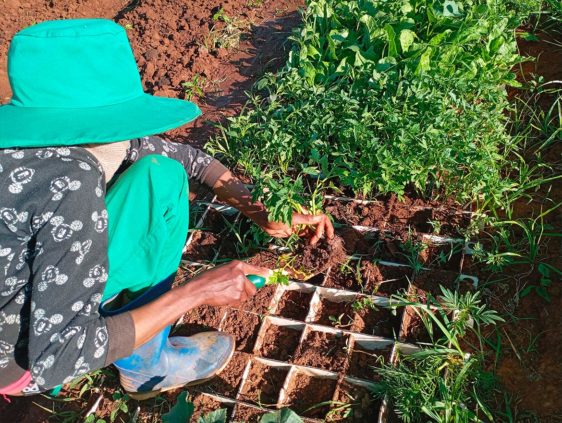
Choosing the right time to transplant is crucial for success. Consider the weather conditions and the specific needs of the plants. Prepare the garden bed by adding compost and other soil amendments to improve drainage and fertility. When transplanting, handle the seedlings gently to minimize root disturbance. Dig a hole slightly larger than the root ball, carefully remove the seedling from its container, and place it in the hole. Backfill the hole with soil and water thoroughly.

Key Takeaway: Proper hardening off and transplanting are crucial for ensuring that your seedlings thrive in their final garden home.
A Thriving Cycle
By embracing these practices, you're not just growing plants; you're cultivating a more sustainable and fulfilling lifestyle. As spring approaches, now is the perfect time to start planning and building your seed starting system.
This self-sufficient seed starting system promotes resilience, sustainability, and connection to the natural world. Don't be afraid to experiment, learn from your mistakes, and celebrate your successes along the way. A success story that comes to mind is my neighbor Sarah. She always bought her starts from the local greenhouse. Last year, she used my tips on creating her own seed starting mix and building her own grow light set up. While her initial set up was a bit rough around the edges, by the end of the season, she doubled her tomato yield and said her peppers had never been so flavorful.
What are your favorite seed starting tips or heirloom varieties? Share your experiences in the comments below! Ready to take the next step? Download our free guide to seed saving!
Share this post with your gardening friends who are looking to grow their own homegrown harvest! #organicgardening #homesteading #seedstarting #heirloomseeds #sustainability #growyourownfood.