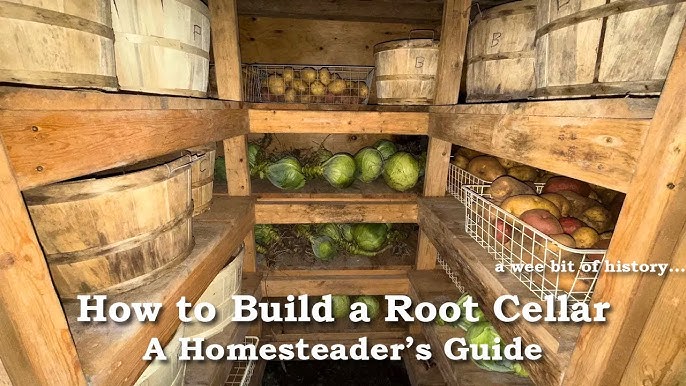
From Scraps to Storage: Building a Super-Efficient Root Cellar from Reclaimed Materials
The air is crisp, the leaves are ablaze with color, and a gentle chill whispers of the coming winter. For homesteaders like us, fall isn't just a season of beauty; it's a season of preparation. It's the time to gather the harvest, preserve the bounty, and ensure our families are well-fed throughout the cold months. This year, we're taking our food preservation to the next level by building a super-efficient root cellar – and we're doing it with reclaimed materials!
If you're anything like me, the idea of a root cellar conjures images of cozy, earthen spaces brimming with potatoes, carrots, and apples, a testament to simpler times and self-sufficiency. But the best part? You don't need to be a master builder or spend a fortune to achieve this. This blog post will guide you, step-by-step, through building your own root cellar using affordable and accessible reclaimed materials. We’ll cover everything from sourcing materials to natural insulation techniques, sharing our triumphs and learning experiences along the way. Get ready to embrace the satisfaction of a job well done and the delicious rewards of sustainable living.
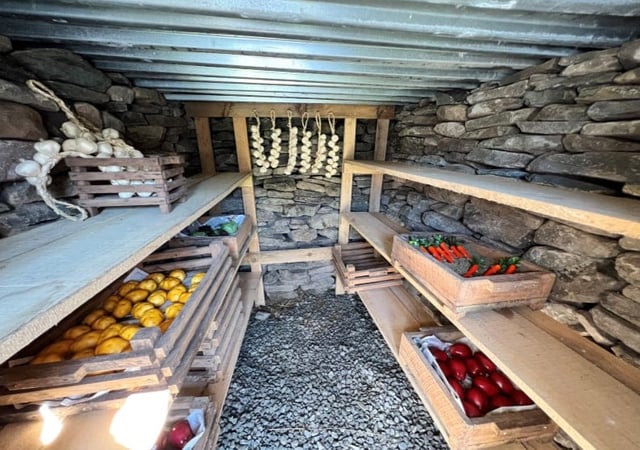
An example of a traditional root cellar. Our build aims for similar functionality with a modern, reclaimed twist.
Why This Root Cellar, Why Now?
For years, we’ve relied on canning, freezing, and dehydrating to preserve our harvest. While these methods are valuable, they require energy and specialized equipment. A root cellar, on the other hand, provides a naturally cool, humid environment ideal for storing root crops, fruits, and even some canned goods, all without electricity!
This year, we had a particularly bountiful harvest, especially of root vegetables. The fridge was overflowing, and we knew we needed a better solution to prevent spoilage and reduce food waste. Building a DIY root cellar using reclaimed materials became the obvious answer – a way to embrace a more sustainable and traditional way of life, save money, and enjoy the fruits (and vegetables!) of our labor all winter long. Plus, we love a good challenge! This project ticked all the boxes for an exciting and rewarding homestead endeavor. We also wanted a space that felt rustic and charming, something that felt like it belonged on our little homestead.
Planning and Design: Rustic Charm Meets Smart Storage
Before diving in, careful planning is crucial. Here's how we approached the design phase:
- Location, Location, Location: The ideal spot for a root cellar is a cool, shaded area with good drainage. A north-facing slope is often recommended, as it stays cooler and more consistent in temperature. We chose a spot near our garden, partially buried into a small hill, taking advantage of the earth's natural insulating properties.
- Size Matters: Consider the amount of storage space you need. We opted for a small, 8ft x 10ft cellar, sufficient for our family's needs. It’s always better to build slightly larger than you initially think you need, as storage needs tend to grow!
- Design Considerations: We wanted a simple, functional design with good ventilation and easy access. We chose a rectangular shape with a slightly sloped roof to aid drainage. We also planned for shelves along the walls to maximize storage space and allow for proper air circulation around the produce.
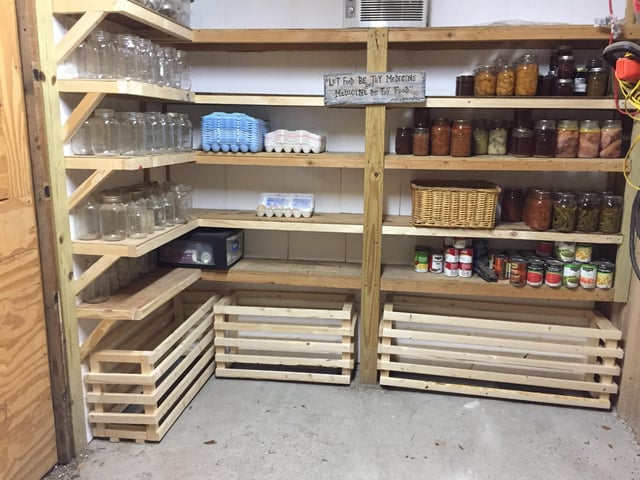
This gives you an idea of the internal structure, though we used primarily reclaimed wood for our shelving.
- Ventilation: Proper ventilation is critical to prevent mold and rot. We planned for two ventilation pipes: one near the floor to draw in cool air and another near the ceiling to exhaust warm, moist air. More on this later!
External Links: Before finalizing your design, research best practices for root cellar design and food storage. Here are a few helpful resources:
- National Center for Appropriate Technology (NCAT): Root Cellaring
- University of Minnesota Extension: Storing Garden Produce
Sourcing Reclaimed Materials: The Hunt for Treasure
This is where the fun (and the work!) begins. The beauty of this project lies in its affordability and sustainability, achieved by using reclaimed materials. Here’s where we found our treasures:
- Salvaged Wood: We scoured local demolition sites, construction sites (with permission, of course!), and online marketplaces for used lumber. We found a stash of old barn wood that was perfect for the walls and shelving, adding a touch of rustic charm. Look for structurally sound pieces free from rot or pests.
- Cinder Blocks: We acquired a pile of used cinder blocks from a local landscaping company. They were slightly weathered but perfectly functional for building the foundation and retaining walls.
- Straw Bales: We sourced straw bales from a nearby farm for insulation. Straw is a natural, affordable, and effective insulator, ideal for creating a temperature-stable environment.
- Reclaimed Doors and Windows: We found an old, solid wood door at a salvage yard for the entrance, and a small, salvaged window to provide a bit of natural light.
Tip: Don't be afraid to get creative! Pallets, old tires (filled with earth and compacted), and even repurposed shipping containers can be incorporated into your root cellar design.
Step-by-Step Construction: From Foundation to Finish
Step 1: Preparing the Site and Laying the Foundation
We started by clearing the site and leveling the ground. We then dug a shallow trench for the cinder block foundation, ensuring it was level and square. We laid the first course of cinder blocks, using mortar to secure them together.
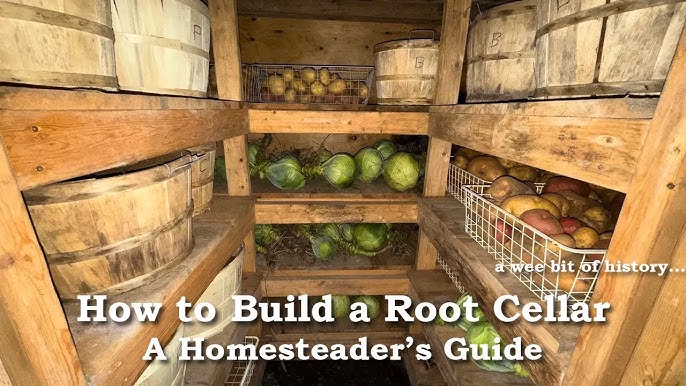
Although this picture is for a building, the principles of laying a solid foundation are the same!
Step 2: Building the Walls
With the foundation in place, we began constructing the walls using the reclaimed barn wood. We built a simple frame using 2x4s and then attached the barn wood planks to the frame. We overlapped the planks slightly to create a weather-tight seal. For areas below ground level, we used cinder blocks to create retaining walls, mortaring them together for added strength.
Challenge Alert: Working with reclaimed wood can be tricky. The planks weren't always perfectly straight or uniform in size. We had to get creative with our cuts and use shims to ensure the walls were plumb and level.
Step 3: Insulating with Straw Bales
This is where the magic happens. We stacked straw bales against the exterior walls, creating a thick layer of natural insulation. We secured the bales with wooden stakes to prevent them from shifting. For the roof, we created a framework of 2x6s and then layered straw bales on top, covering them with a waterproof tarp to protect them from the elements. Eventually, we will cover this with a layer of earth.
Step 4: Installing the Door and Window
We installed the reclaimed door, ensuring it was properly sealed to prevent drafts. We also installed the small window, providing a source of natural light and ventilation.
Step 5: Creating Ventilation
We installed two 4-inch PVC pipes for ventilation. One pipe was placed near the floor, extending just above ground level, to draw in cool air. The other pipe was placed near the ceiling, extending above the roofline, to exhaust warm, moist air. We added screens to the ends of the pipes to prevent pests from entering.
Step 6: Building Shelving
We used more reclaimed barn wood to build sturdy shelves along the walls. We spaced the shelves appropriately to allow for good air circulation around the produce. Remember those primary and secondary SEO keywords? Shelving is key for good food storage!
Step 7: The Finishing Touches
We added a gravel floor for drainage and to help maintain humidity levels. We also installed a thermometer and hygrometer to monitor temperature and humidity.
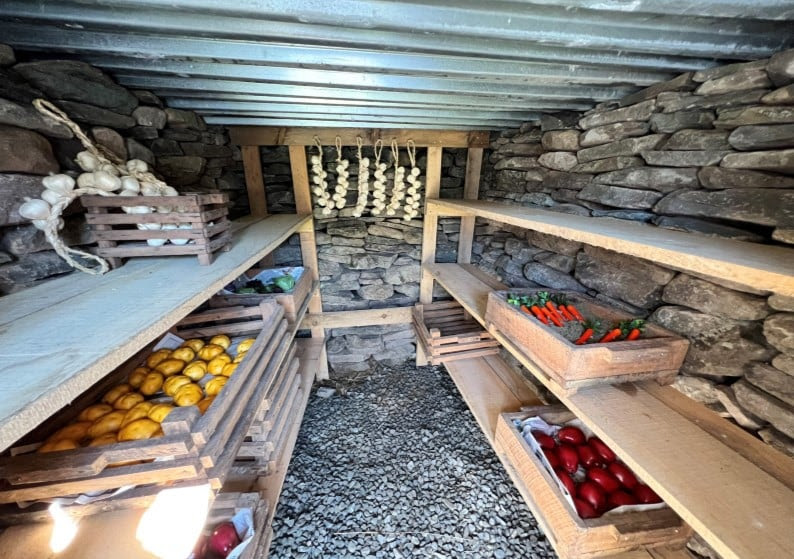
Another historical example of a root cellar! Notice the shelving – crucial for air circulation.
Personal Anecdotes and Joys of Sustainable Living
Building this root cellar has been an incredibly rewarding experience. It's not just about preserving food; it's about connecting with our past, embracing a more sustainable way of life, and taking pride in creating something with our own hands. There's nothing quite like the feeling of knowing that we're providing nutritious food for our family, reducing our reliance on the grocery store, and minimizing our environmental impact.
I remember the first time we filled the root cellar with our harvest. The earthy aroma of potatoes, carrots, and apples filled the air. It was a moment of pure satisfaction, a tangible representation of our hard work and dedication. And knowing that we built it ourselves, using mostly reclaimed materials, made it even more special.
Tips for Success
- Do your research: Understand the principles of root cellaring and choose a design that suits your climate and needs.
- Be patient: Building with reclaimed materials takes time and effort. Don't be afraid to experiment and adapt your plans as needed.
- Enlist help: This is a great project to tackle with friends or family.
- Monitor temperature and humidity: Use a thermometer and hygrometer to ensure optimal storage conditions.
- Inspect your produce regularly: Remove any spoiled or damaged items to prevent them from affecting the rest of your harvest.
Call to Action
We hope this blog post has inspired you to enhance your self-sufficiency this fall by building your own root cellar. Whether you're a seasoned homesteader or just starting out, this project is achievable with a little planning, effort, and creativity.
Now, we want to hear from you! Share your own root cellar plans, food preservation tips, or experiences with reclaimed materials in the comments below. Let's learn from each other and build a community of sustainable living enthusiasts.
And don't forget to sign up for the Better Homes and Harvests newsletter to receive exclusive homesteading guides, tips, and inspiration delivered straight to your inbox! Let's cultivate a better future together.