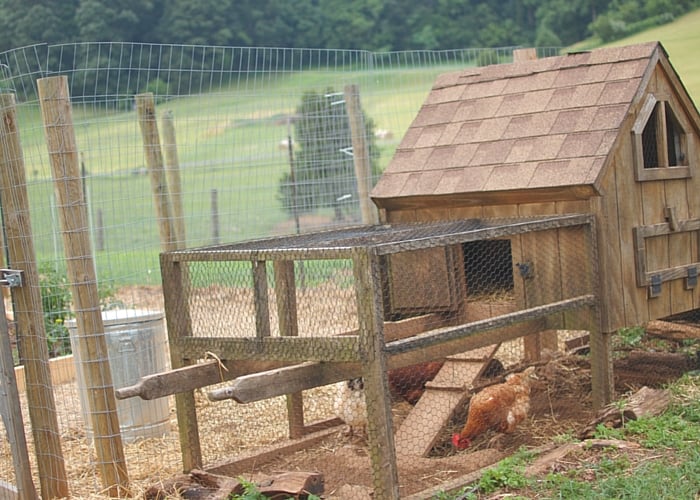
From Scrap Heap to Happy Hens: Building a Reclaimed Lumber Chicken Coop
For years, my morning routine involved a slightly guilty trip to the grocery store for eggs. I knew I could, and should, be doing better. The dream of a truly self-sufficient homestead nagged at me, and it all started with a vision: happy hens clucking contentedly in their own backyard paradise. But I didn't want just any chicken coop. I wanted one that reflected our homesteading values – sustainable, resourceful, and beautiful. That meant building a reclaimed wood chicken coop.
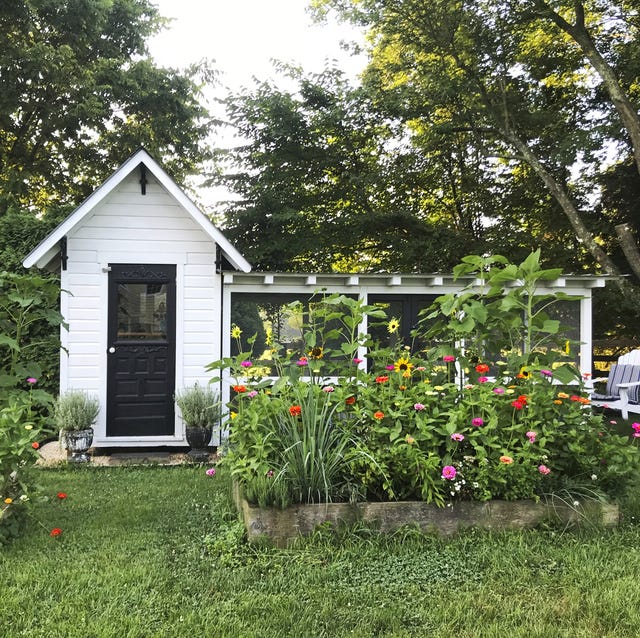
This isn't just about building a chicken coop; it’s about embracing a more conscious way of living. It’s about turning what others discard into something beautiful and useful. And, of course, it's about getting those delicious, fresh eggs right from our backyard! Ready to join me on this journey? Here’s how we built our sustainable chicken coop using reclaimed lumber, a project that significantly increased our egg production and reduced our reliance on store-bought goods.
Why Reclaimed Lumber?
My grandfather was a master craftsman, always repurposing old barn wood into stunning furniture. He instilled in me a love for the character and history that only reclaimed materials can offer. Sourcing reclaimed lumber projects for our chicken coop wasn't just an aesthetic choice; it was an ethical one. It diverted materials from the landfill, reduced our carbon footprint, and gave our coop a unique, rustic charm that you just can’t get with new lumber. Plus, it saved us a significant amount of money!
Planning and Design: Making the Vision a Reality
Before diving in, careful planning is crucial for a successful DIY chicken coop plans project. We wanted a coop large enough for 6-8 hens, offering plenty of space for roosting, nesting, and scratching. Here's what we considered:
- Size: Our coop measures 6ft wide x 8ft long x 6ft high. This provides ample space for our flock and allows for easy cleaning.
- Location: We positioned the coop in a sunny spot with good drainage, close to our garden for easy composting of chicken manure. Integrating the coop into our permaculture garden design was essential.
- Features: We included a secure run, raised nesting boxes, easy-to-clean flooring, and good ventilation.
Step-by-Step Guide: Building Your Own Reclaimed Wood Chicken Coop
Now, let’s get to the nitty-gritty. Here’s how we brought our reclaimed wood chicken coop to life:
Step 1: Sourcing and Preparing Reclaimed Lumber
This is arguably the most important step. We sourced our lumber from a local salvage yard. Old barns, deconstructed houses, and even pallet suppliers are great places to find reclaimed lumber.
- Clean Up: Remove any nails, screws, or debris. A metal detector can be a lifesaver here!
- Sort and Assess: Sort the lumber by size and condition. Discard any pieces that are rotten or structurally unsound.
- Plane and Sand (Optional): We chose to leave much of the lumber in its raw state for a rustic look. However, planing and sanding some pieces will make the coop easier to handle and more aesthetically pleasing.
Step 2: Building the Frame
We used a combination of 2x4s and 4x4s (some reclaimed, some new for structural integrity) to build the frame.
- Cut the lumber to the desired lengths for the base, walls, and roof.
- Assemble the base frame using screws or nails. Ensure it's square and level.
- Build the wall frames, attaching them to the base frame.
- Construct the roof frame, ensuring a slight slope for water runoff.
Step 3: Adding the Walls and Roof
Now comes the fun part: cladding the frame with our reclaimed wood.

- Attach the reclaimed boards to the wall frames, overlapping them slightly for weatherproofing.
- Use a variety of board widths and textures for a more visually interesting look.
- For the roof, we used corrugated metal roofing panels (new), which are durable and easy to install.
- Ensure the roof overhangs the walls to protect them from rain.
Step 4: Constructing the Nesting Boxes and Roosting Bars
These are essential for happy hens!

- Build the nesting boxes using reclaimed wood, ensuring they are dark and cozy. We made three boxes, each approximately 12x12x12 inches.
- Install the nesting boxes at a comfortable height, around 2 feet off the ground.
- Create roosting bars using sturdy branches or 2x4s, positioned at varying heights.
Step 5: Building the Chicken Run
The run provides a safe and enclosed space for the chickens to roam and forage.
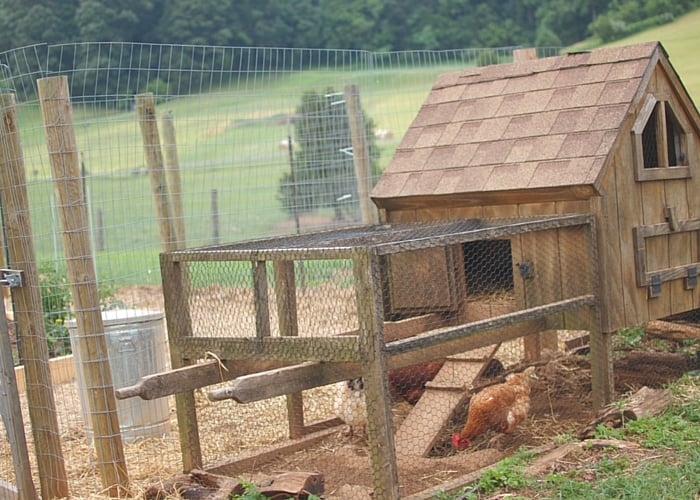
- Construct the run frame using 2x4s.
- Enclose the run with chicken wire or hardware cloth, burying it a few inches into the ground to prevent predators from digging underneath.
- Add a door to the run for easy access.
Step 6: Adding Finishing Touches
These details will make your coop functional and aesthetically pleasing.
- Ventilation: Ensure adequate ventilation to prevent moisture buildup. We added vents near the roofline.
- Door and Latch: Install a secure door with a predator-proof latch.
- Flooring: We used a thick layer of wood shavings for easy cleaning.
- Paint or Stain (Optional): We chose to leave the wood natural, but you can paint or stain it to match your homestead's aesthetic.
Cost Breakdown
Here's a breakdown of our expenses for this cheap chicken coop project:
- Reclaimed Lumber: $100 (salvage yard prices vary)
- New Lumber (for framing): $80
- Roofing Panels: $60
- Chicken Wire/Hardware Cloth: $50
- Screws, Nails, and Hardware: $30
Total Cost: $320
While building a coop from scratch requires an investment of time and effort, the cost savings compared to buying a pre-built coop are significant. Plus, you get the satisfaction of knowing you built it yourself using upcycled chicken coop materials!
Efficiency Metrics: The Impact of Our Reclaimed Lumber Chicken Coop
This project wasn’t just about aesthetics; it was about increasing our homestead's self-sufficiency and sustainability. Here's how it measures up:
- Egg Production: Our six hens now provide us with approximately 30 eggs per week, reducing our reliance on store-bought eggs by 80%.
- Waste Reduction: By using reclaimed lumber, we diverted approximately 500 pounds of material from the landfill.
- Soil Enrichment: Chicken manure is an excellent fertilizer. We now compost it and use it to enrich our garden soil, reducing our need for store-bought fertilizers.
- Financial Savings: By producing our own eggs and fertilizer, we estimate saving approximately $50 per month.
Challenges and Lessons Learned
Building a chicken coop from reclaimed lumber wasn't without its challenges. Finding suitable lumber took time and effort. We also had to be creative in adapting our design to the available materials. But these challenges made the project even more rewarding. We learned valuable skills, gained a deeper appreciation for resourcefulness, and created a beautiful and functional space for our hens.
Your Turn!
Building a chicken coop using reclaimed lumber is a rewarding and sustainable project that can transform your homestead. It's a chance to embrace resourcefulness, reduce your environmental impact, and enjoy the delicious rewards of fresh, homegrown eggs. So, gather your tools, source your materials, and get building!
Have you built your own chicken coop? What challenges did you face, and what tips would you share? Share your experiences and questions in the comments below! Let's inspire each other to create more sustainable and self-sufficient homesteads. Building a chicken coop with reclaimed lumber is a transformative experience, improving your sustainable homesteading efforts one egg at a time.