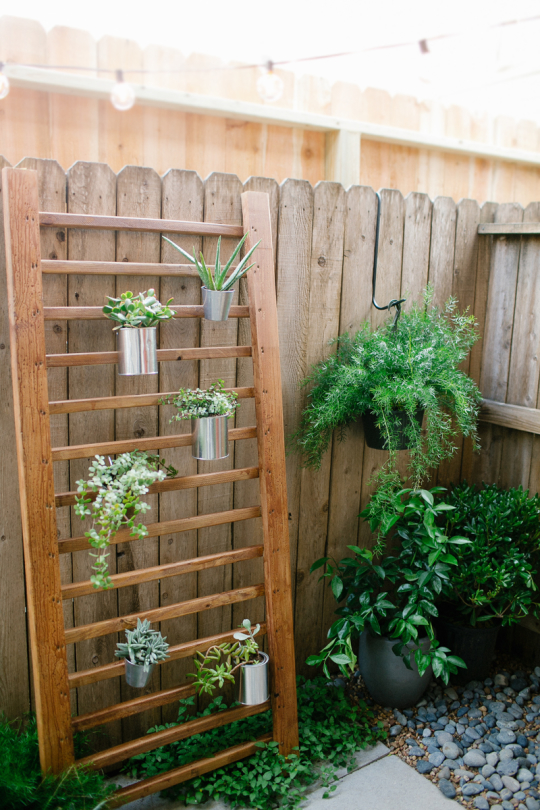
From Pallet to Plate: Building a DIY Vertical Herb Garden for Under $50
There's nothing quite like the taste of fresh herbs plucked straight from the garden. I remember one particularly lean winter; our root cellar was dwindling, and the canned goods were starting to feel monotonous. It was the aroma of the last of my dried basil, crumbled into a simple tomato soup, that truly saved the meal. That vibrant scent, a whisper of summer, reminded us of the abundance to come and the power of resourcefulness. That's when I knew I needed a more consistent, accessible way to grow fresh herbs, even in a small space. Thus began my journey into the world of vertical gardening! And today, I'm sharing my simple, cost-effective solution with you. Let’s build a DIY vertical herb garden together – a project perfect for any small space gardening enthusiast looking to bring fresh flavor to their homestead.
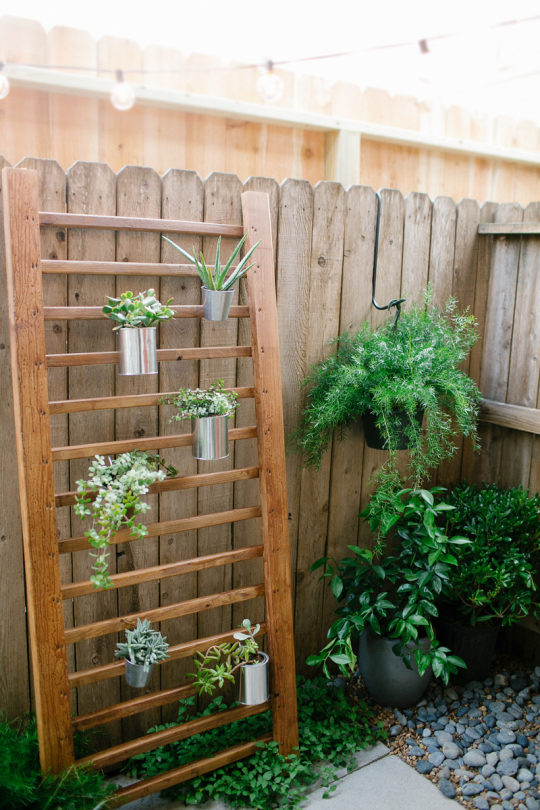
This project focuses on reclaimed materials gardening, allowing you to create a beautiful and functional homestead herb garden without breaking the bank. We're talking under $50, using materials you likely already have lying around! This is one of the best cheap garden ideas around.
Why a Vertical Herb Garden?
Before we dive in, let's quickly cover why vertical gardening is so beneficial, especially for the time-strapped and budget-conscious homesteader:
- Space Saving: Perfect for small yards, balconies, or even indoor spaces.
- Accessibility: Easier to tend to your herbs without bending or kneeling.
- Aesthetics: Adds a touch of green and beauty to any area.
- Cost-Effective: Using reclaimed materials keeps expenses low.
- Increased Yield (Potentially): Concentrated growing area can sometimes lead to increased yields in a small area.
Our Secret Weapon: The Reclaimed Pallet (and Other Treasures!)
For this project, we'll primarily be using a reclaimed wood pallet. Pallets are often readily available for free from local businesses, construction sites, or online marketplaces (check local listings first!). Besides a pallet, we'll also be looking for other materials you may have on hand. Don’t limit yourself to just these:
- Reclaimed Plastic Bottles/Containers: Cut in half, these make excellent individual planters.
- Leftover Chicken Wire/Hardware Cloth: Can be used to create pockets within the pallet.
- Old Burlap Sacks: Perfect for lining planters and helping with moisture retention.
- Scrap Wood: For reinforcing the pallet structure, if needed.
Tools You'll Need:
Keep it simple! Here's what I recommend:
- Drill with various sized bits: For drainage holes and securing planters.
- Saw (Hand saw or Circular Saw): For modifying the pallet or cutting wood scraps.
- Measuring Tape: Precision is key!
- Staple Gun (Optional): For securing burlap or chicken wire.
- Gloves: Protect those hands!
- Safety Glasses: Safety first!
Step-by-Step Guide to Building Your DIY Vertical Herb Garden:
Step 1: Pallet Prep - The Foundation
- Inspect the Pallet: Choose a pallet that's in good condition, free from obvious damage or chemical stains (avoid pallets marked with "MB" which indicates methyl bromide fumigation).
- Clean the Pallet: Use a stiff brush and soapy water to remove any dirt or debris. Let it dry completely.
- Sand the Pallet (Optional): Lightly sanding the pallet will remove splinters and create a smoother surface.
- Seal or Paint (Optional): Applying a sealant or paint will protect the wood from the elements and extend the life of your garden. Choose a non-toxic, outdoor-rated product.
Step 2: Creating the Planters - Reclaiming and Repurposing
This is where your creativity shines! Here are a few options for creating planters within your pallet:
- Option 1: Plastic Bottle Planters: Cut plastic bottles in half horizontally. Drill drainage holes in the bottom. Secure them to the pallet slats using screws or zip ties, creating a row of individual planters.
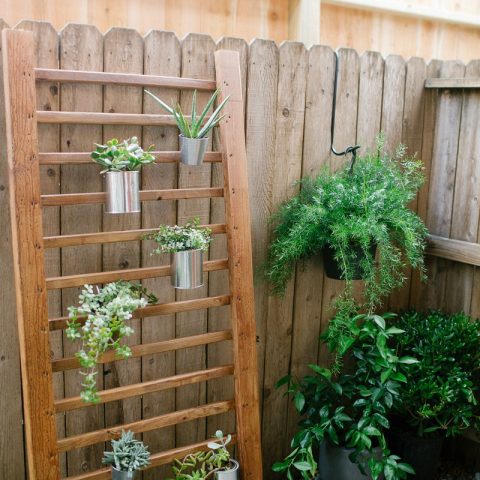
- Option 2: Chicken Wire Pockets: Staple chicken wire or hardware cloth to the back of the pallet, creating pockets between the slats. Line these pockets with burlap or landscape fabric to hold the soil.
- Option 3: Combination Approach: Mix and match! Use a combination of plastic bottle planters and chicken wire pockets for a more diverse look.
Step 3: Reinforcement (If Necessary)
If your pallet feels flimsy, reinforce it with scrap wood. Attach extra pieces of wood to the back of the pallet for added stability.
Step 4: Planting Your Herbs - The Heart of the Garden
- Choose Your Herbs: Select herbs that thrive in your local climate and the amount of sunlight your vertical garden will receive. Popular choices include basil, mint, parsley, thyme, oregano, and rosemary. Consider things like companion planting and plan your garden strategically.
- Prepare Your Soil: Use a well-draining potting mix suitable for herbs. Amend with compost for added nutrients. Check out Better Homes and Harvests composting guide for tips!
- Planting Time: Gently transplant your herb seedlings into the planters, ensuring adequate spacing between plants.
Step 5: Hanging and Securing Your Garden
- Choose a Location: Select a sunny spot that receives at least 6 hours of sunlight per day (most herbs need this). Ensure the location is easily accessible for watering and harvesting.
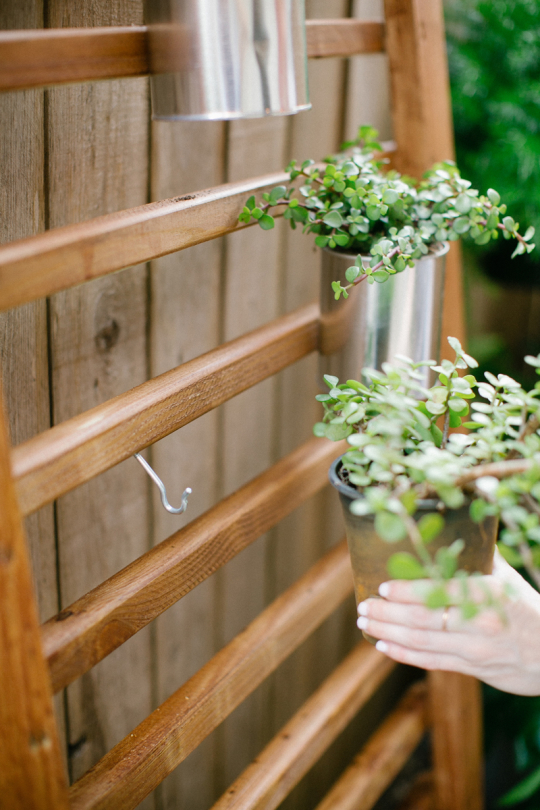
- Hanging Options: Use heavy-duty hooks, chains, or rope to hang your vertical garden securely. Make sure it's level!

- Securing to a Wall (Alternative): If you prefer not to hang it, you can lean the pallet against a wall and secure it with brackets.
Addressing Potential Challenges:
- Drainage: Ensure all planters have adequate drainage holes to prevent waterlogging.
- Sunlight Exposure: Monitor the amount of sunlight your garden receives and adjust its location as needed.
- Pest Control: Regularly inspect your plants for pests. Use organic pest control methods like neem oil or insecticidal soap. Companion planting can also help deter pests.
- Watering: Water your herbs regularly, especially during hot, dry weather. Vertical gardens tend to dry out faster than traditional gardens. Consider using a watering can with a long spout for easy access.
Climate Considerations:
- Cold Climates: Consider bringing your vertical herb garden indoors during the winter months.
- Hot Climates: Provide afternoon shade to prevent your herbs from scorching.
Material Modifications:
- No Pallet? Use stacked cinder blocks, repurposed shelving units, or even build a simple wooden frame.
- No Plastic Bottles? Use tin cans, yogurt containers, or any other recycled container.
The Flavorful Reward:
Growing your own herbs is incredibly rewarding. The fresh flavor elevates your meals, and the act of gardening connects you to nature. This DIY vertical herb garden is a simple, affordable way to embrace the homesteading spirit, no matter how small your space. It's all about embracing frugal gardening and using what you have to create something beautiful and beneficial.
Now, it's your turn! Share your own experiences with vertical gardening in the comments below. What creative materials have you used? What are your favorite herbs to grow? Let's inspire each other to create thriving, flavorful homesteads!