From Overwhelmed to Empowered: Embracing the Slow Life, One Skill at a Time

Do you ever feel like you’re constantly chasing your tail, pulled in a million different directions? I did too. The modern world, with its constant demands and digital distractions, can leave us feeling disconnected from the simple joys of life. I craved something more grounded, more intentional. Then I discovered the power of embracing just ONE homesteading skill at a time.
The term "homesteading" might conjure images of sprawling farms and self-sufficient families living entirely off the land. While that's certainly an admirable goal, it can also feel incredibly daunting, especially if you're just starting out. The good news is, you don't need acres of land or years of experience to incorporate sustainable living into your daily routine.
This post will break down sustainable living into five manageable skills you can easily integrate into your daily routine, no matter where you live. Each skill is an entry point to more connected and intentional living, and it doesn’t involve quitting your day job or moving to the countryside (unless you want to, of course!). We'll cover seed saving, composting, seasonal preserving, natural cleaning, and herb gardening – skills that not only benefit the environment but also enrich your life in unexpected ways. So, take a deep breath, slow down, and let's embark on this journey together, one skill at a time.
Seed Saving 101: Preserving Your Garden's Legacy

Seed saving is one of the most fundamental and rewarding skills you can learn as a gardener. It's about more than just saving money; it's about preserving genetic diversity, adapting plants to your local environment, and participating in a tradition that stretches back centuries. By saving seeds, you're actively contributing to a more resilient and sustainable food system.
But where do you start? While saving seeds from some plants can be tricky, there are plenty of easy-to-save options perfect for beginners. Beans, peas, tomatoes, lettuce, and marigolds are all excellent choices. These plants tend to be self-pollinating or have readily identifiable seeds that are easy to collect and store.
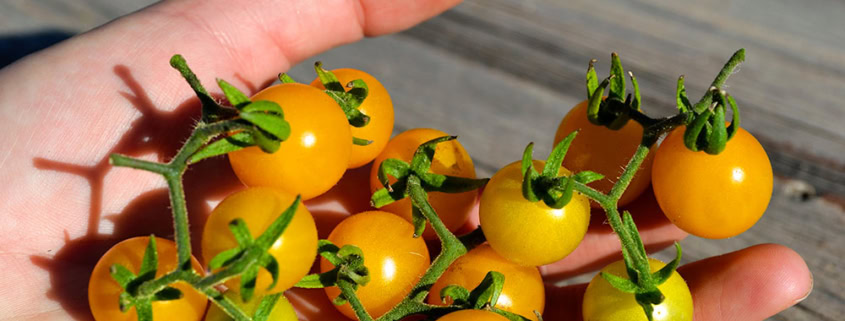
Let’s focus on tomatoes. Here’s a step-by-step guide to saving tomato seeds using fermentation:
- Harvest When Fully Ripe: Choose your best, healthiest tomatoes. They should be fully colored and slightly soft to the touch.
- Scoop out the Seeds: Cut the tomato in half and scoop out the seeds and surrounding pulp into a jar. Add a little water (about the same amount as the pulp)
- Ferment: Cover the jar loosely and let it sit at room temperature for 3-4 days, stirring daily. A white mold will form on the surface – this is normal!
- Test for Viability: The viable seeds will sink to the bottom, while the non-viable seeds will float.
- Rinse and Dry: Pour off the mold and floating seeds. Rinse the good seeds thoroughly until the water runs clear.
- Dry Thoroughly: Spread the seeds out on a coffee filter or paper towel in a single layer and let them dry completely for 1-2 weeks. Make sure to flip them once or twice during the process.
- Proper Storage: Once the seeds are completely dry, store them in an airtight container in a cool, dark, and dry place. A mason jar in the refrigerator or freezer is ideal.
Important Tip: Always label your saved seeds with the variety and the date you saved them. This will help you keep track of your collection and ensure you're planting the most viable seeds each season. Also, it's vital to understand if your tomatoes are heirloom varieties or hybrids. Heirloom seeds will "come true," meaning they'll produce plants that are similar to the parent plant. Hybrids, on the other hand, may not breed true, and you might get unexpected results if you save their seeds. Germination testing can be done by placing a handful of seeds on a damp paper towel, sealing it in a bag, and waiting for signs of germination (usually within a week).
Backyard Composting: Turning Waste into Garden Gold

Composting is a game-changer for any gardener, and it's far simpler than many people think. It’s also a powerful way to reduce waste, enrich your soil, and create a healthier garden ecosystem. It's a win-win for your home and the environment. Many believe that composting is messy and smelly – these are common myths that are easily debunked with proper technique!
There are several composting methods to choose from, each with its own advantages:
- Traditional Composting: This involves creating a pile or bin where organic materials decompose over time. Hot composting requires more management (turning the pile regularly to maintain a high temperature), while cold composting is a slower, less labor-intensive approach.
- Vermicomposting: Also known as worm composting, this method uses worms to break down organic matter. It's ideal for smaller spaces, like apartments or balconies.
- Bokashi Composting: This is an anaerobic (oxygen-free) method that uses inoculated bran to ferment food scraps. It's particularly useful for composting meat, dairy, and oily foods, which are generally not recommended for traditional composting.
The key to successful composting is understanding the balance between "browns" and "greens." Browns are carbon-rich materials like dried leaves, shredded paper, and cardboard. Greens are nitrogen-rich materials like kitchen scraps, grass clippings, and coffee grounds. A good rule of thumb is to aim for a ratio of about 2:1 or 3:1 browns to greens.
What to Compost:
- Kitchen Scraps: Fruit and vegetable peels, coffee grounds, tea bags, eggshells.
- Yard Waste: Grass clippings, leaves, twigs, weeds (make sure they haven't gone to seed).
- Paper: Shredded newspaper, cardboard, paper towels (avoid glossy or colored paper).
What Not to Compost:
- Meat and Dairy: These can attract pests and create unpleasant odors.
- Oily Foods: Oils and fats can slow down the decomposition process.
- Diseased Plants: These can spread diseases to your compost and back into your garden.
- Pet Waste: Can contain harmful pathogens.
Troubleshooting:
- Odor: If your compost smells bad, it probably means it's too wet or lacks aeration. Add more browns and turn the pile regularly.
- Slow Decomposition: If your compost isn't breaking down quickly enough, it may need more nitrogen. Add more greens and make sure the pile is moist.
Simple Seasonal Preserves: Making the Most of Your Harvest
The joy of biting into a sun-ripened strawberry in the dead of winter, thanks to a jar of homemade jam, is simply unparalleled. Preserving your harvest doesn't have to be intimidating! These simple methods allow you to enjoy the flavors of the season long after the harvest is over.
Let's focus on two very simple methods suitable for beginners:
Freezing: Freezing is perhaps the easiest way to preserve many fruits, vegetables, and herbs. Simply wash and prepare your produce, then blanch vegetables (briefly immerse them in boiling water followed by an ice bath) to preserve their color and texture. Pack the produce into freezer-safe bags or containers, removing as much air as possible to prevent freezer burn. Label with the date and contents.
Refrigerator Pickles: These are quick and easy pickles that don't require canning. Here's a simple recipe:
- Ingredients: 1 pound cucumbers, thinly sliced; 1/2 onion, thinly sliced; 1/4 cup white vinegar; 2 tablespoons sugar; 1 tablespoon salt; 1 teaspoon dill seeds (or fresh dill).
- Instructions: Combine all ingredients in a jar or container. Shake or stir well to dissolve the sugar and salt. Refrigerate for at least 24 hours before serving. These pickles will keep in the refrigerator for up to two weeks.
While these methods are great for beginners, if you're interested in long-term storage, it's important to learn about safe canning practices. The National Center for Home Food Preservation (NCHFP) is an excellent resource for reliable information and recipes.
Natural Cleaning Solutions: Ditch the Chemicals, Embrace the Herbs and Vinegar

Many conventional cleaning products are filled with harsh chemicals that can be harmful to your health and the environment. Fortunately, you don't need them! Natural cleaning solutions are effective, affordable, and better for your health and the environment.
Here are recipes for essential natural cleaners:
All-Purpose Cleaner: Combine equal parts white vinegar and water in a spray bottle. Add a few drops of your favorite essential oil for fragrance (lavender, lemon, or tea tree are good choices).
Glass Cleaner: Mix 1/4 cup white vinegar with 4 cups water in a spray bottle.
Lemon Peel Infused Vinegar Cleaner: Place lemon peels in a jar and cover with white vinegar. Let it infuse for several weeks, then strain and use as an all-purpose cleaner.
Dish Soap: Combine 1/2 cup liquid castile soap with 1/2 cup water and a few drops of essential oil.
Safety Precautions: Never mix vinegar and bleach, as this can create toxic fumes. When using essential oils, test a small area first to ensure they don't damage the surface.
Back to Basics: Growing Culinary Herbs
Having fresh herbs readily available is a simple and rewarding way to add flavor and freshness to your cooking while connecting with nature. Growing your own herbs offers flavor enhancement, health benefits, and visual appeal. You don’t need a vast garden! Many herbs thrive in containers on a sunny windowsill, balcony, or patio.
Here are some easy-to-grow herbs for beginners:
- Basil: A must-have for Italian cuisine. Requires plenty of sunlight and well-drained soil.
- Mint: Easy to grow but can be invasive, so it's best to grow it in a container.
- Chives: A mild onion-flavored herb that's great in salads and soups.
- Parsley: A versatile herb that can be used in a variety of dishes.
- Thyme: A drought-tolerant herb that's perfect for adding flavor to meats and vegetables.
- Rosemary: A fragrant herb that's great for grilling and roasting.
Tips for Growing:
- Soil: Use a well-draining potting mix or garden soil amended with compost.
- Sunlight: Most herbs need at least 6 hours of sunlight per day.
- Watering: Water regularly, but avoid overwatering. Let the soil dry out slightly between waterings.
Harvesting and Preserving:
- Harvest herbs regularly to encourage new growth.
- Dry herbs by hanging them upside down in a cool, dark, and dry place.
- Freeze herbs by chopping them and placing them in ice cube trays with water or olive oil.
- Infuse herbs in oil or vinegar for a flavorful addition to dressings and marinades.
Conclusion: Cultivating Connection, One Simple Skill at a Time
Embracing sustainable living isn't about making drastic changes overnight. It's about incorporating small, manageable practices into your daily life that connect you with nature, reduce your environmental impact, and enrich your overall well-being.
As summer fades and autumn approaches, now is the perfect time to start saving seeds from your garden and begin composting fallen leaves. By embracing these simple skills, you're not just creating a more sustainable home and garden; you're cultivating a more meaningful and connected life.
Share Your Journey!
Which of these skills are you most excited to try? Do you have any tips or experiences to share? We'd love to hear from you! Share your thoughts in the comments below or post photos of your projects on social media using #BetterHomesHarvestSkills. Looking for more inspiration? Check out our post on building a raised garden bed!