From Leaky to Cozy: Insulating Your Homestead Home on a Budget!
Do you feel a shiver run down your spine even when the wood stove is roaring? Have you ever watched your hard-earned cash disappear, sucked away by a drafty, energy-guzzling house? I know I have. My first homestead was a charming old farmhouse, but charm quickly faded when the winter winds started howling. The heating bills were astronomical, and no matter how high I cranked the thermostat, there was always a cold spot near the windows. That's when I realized I needed to tackle the issue of insulation – and I needed to do it on a budget.
Insulating your homestead home is one of the most impactful investments you can make in your comfort, your finances, and your self-sufficiency. It reduces energy consumption, lowers heating and cooling costs, and creates a more comfortable and sustainable living environment. The good news is that you don't need to break the bank to achieve significant results. This guide will walk you through practical, budget-friendly DIY insulation techniques to transform your drafty house into a cozy homestead haven.
Why Insulate? The Homestead Perspective
Before we dive into the how-to, let’s talk about the “why.” For homesteaders, energy efficiency isn't just about saving money; it's about resilience. Reducing our reliance on external energy sources makes us more self-sufficient and less vulnerable to price fluctuations and supply disruptions. Plus, a well-insulated home is simply more comfortable and healthier to live in.
Insulation helps in several ways:
- Reduces Energy Consumption: Minimizes heat loss in winter and heat gain in summer.
- Lowers Heating and Cooling Costs: Cuts down on your energy bills, freeing up funds for other homestead projects.
- Improves Comfort: Eliminates drafts and cold spots, creating a more even temperature throughout your home.
- Increases Property Value: A well-insulated home is more attractive to potential buyers.
- Promotes Sustainability: Reduces your carbon footprint by lowering your energy demand.
Step 1: Assessing Your Insulation Needs – Where’s the Heat Going?
Before you start ripping into walls, it's crucial to identify where your home is losing heat. A simple visual inspection can reveal obvious problems like cracks around windows and doors. You can also perform a more thorough energy audit using these methods:
- The Hand Test: On a cold day, hold your hand near windows, doors, walls, and ceilings. Can you feel a draft?
- The Incense Test: Light an incense stick and slowly move it around windows, doors, and outlets. Watch the smoke – if it wavers, there’s a draft.
- The Thermal Leak Detector: A thermal leak detector allows you to see exactly where cold air is leaking into your home.
- Check your existing insulation: Is the insulation old or is it water logged.
Common areas of heat loss include:
- Attic: A significant amount of heat escapes through the roof.
- Walls: Especially in older homes with inadequate insulation.
- Windows and Doors: Drafts can seep through gaps and cracks.
- Basement or Crawl Space: Uninsulated foundations can lead to significant heat loss.
Step 2: Budget-Friendly Insulation Options
Now for the fun part! Here are some affordable insulation options suitable for DIY homesteaders:
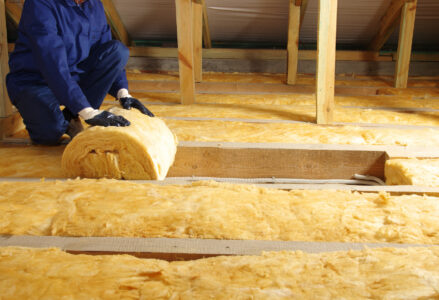
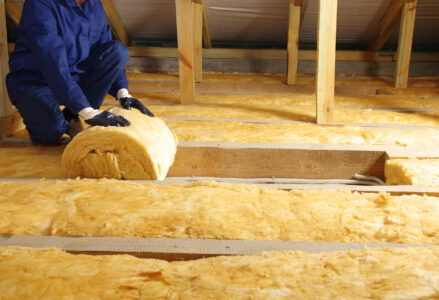
Fiberglass Insulation: A classic and cost-effective choice, fiberglass batts are relatively easy to install between studs and joists.
Cellulose Insulation: Made from recycled paper, cellulose is an eco-friendly option that can be blown into walls or attics. It provides excellent insulation value and helps to reduce noise transmission.

Rigid Foam Board: Suitable for insulating basement walls, foundations, and exterior walls. It provides a good thermal barrier and is resistant to moisture.
Spray Foam Insulation: While more expensive than other options, spray foam provides excellent air sealing and insulation in hard-to-reach areas. Consider using it for small gaps and cracks or for insulating your rim joists (where the foundation meets the floor).
Reclaimed Materials: Get creative! Consider using reclaimed materials like denim, old carpets, or even straw bales (for non-load-bearing walls).
Step 3: DIY Insulation Projects – Getting Your Hands Dirty
Let's get started with some specific DIY projects:
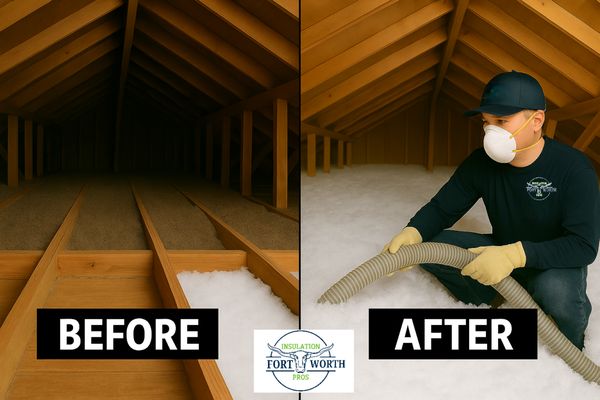
Project 1: Insulating Your Attic
The attic is often the easiest and most impactful place to start.
Materials:
- Fiberglass or cellulose insulation
- Rake
- Utility knife
- Safety glasses
- Dust mask
- Gloves
- Measuring tape
Instructions:
- Safety First: Wear safety glasses, a dust mask, and gloves to protect yourself from insulation fibers.
- Measure: Measure the area you need to insulate.
- Install Baffles: Install rafter vents or baffles at the eaves to ensure proper airflow.
- Lay Insulation: Unroll the insulation batts between the joists, ensuring they fit snugly. For loose-fill cellulose, rent a blower from your local hardware store and follow the manufacturer's instructions.
- Achieve the Right R-Value: Aim for an R-value of R-38 or higher in your attic.
- Finishing Touches: Be sure to cover all surface areas to ensure you are reducing the possibility of heat loss.
Project 2: Insulating Walls (Without Tearing Down the Drywall)
If you can't access your wall cavities, you can still improve insulation by focusing on outlets, switches, and baseboards.
Materials:
- Caulk
- Foam sealant
- Weather stripping
- Outlet and switch plate insulators
- Screwdriver
- Utility knife
Instructions:
- Seal Cracks and Gaps: Caulk around windows, doors, and baseboards to seal any air leaks.
- Insulate Outlets and Switches: Turn off the power at the breaker. Remove the outlet and switch plates and install foam insulators behind them.
- Weatherstrip Doors and Windows: Apply weather stripping around the edges of doors and windows to create a tight seal.
Project 3: Insulating Your Crawl Space
A cold crawl space can significantly impact the temperature of your floors.
Materials:
- Rigid foam board insulation
- Construction adhesive
- Utility knife
- Safety glasses
- Gloves
Instructions:
- Measure: Measure the perimeter walls of your crawl space.
- Cut Insulation: Cut the rigid foam board to fit the walls.
- Apply Adhesive: Apply construction adhesive to the back of the foam board.
- Attach Insulation: Press the foam board firmly against the crawl space walls.
- Seal Seams: Seal the seams between the foam boards with tape or caulk.
Remember Safety First!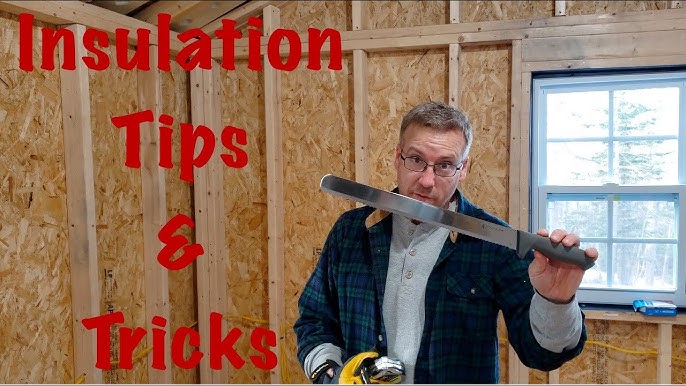
- Always wear safety glasses, gloves, and a dust mask when working with insulation.
- Turn off the power when working around electrical outlets and switches.
- Follow the manufacturer's instructions for all materials and tools.
Step 4: Finding Budget-Friendly Materials
Here are some tips for sourcing affordable insulation materials:
Reclaimed Building Supply Stores: Check local architectural salvage yards or reclaimed building supply stores for used insulation materials.
Online Marketplaces: Search online marketplaces like Craigslist or Facebook Marketplace for discounted or free insulation materials.
Local Construction Sites: Ask local construction sites if they have any leftover insulation materials they are willing to donate.
Bulk Purchases: Buy insulation materials in bulk to save money.
Sales and Discounts: Keep an eye out for sales and discounts at your local home improvement stores.
Have you ever tried using reclaimed denim for insulation? Share your experience in the comments below!
Success Stories and Homestead Inspiration
Don't just take my word for it. Countless homesteaders have successfully insulated their homes on a budget and experienced significant improvements in comfort and energy savings.
Consider researching other alternative and natural insulation methods that have been used for centuries!
The Importance of Air Sealing
Insulation is only as effective as the air sealing that accompanies it. Air leaks can bypass your insulation and allow heat to escape. Sealing air leaks is a simple and inexpensive way to improve your home's energy efficiency.
Monitoring and Adjusting
After completing your insulation projects, monitor your energy bills and indoor temperatures. Make adjustments as needed to optimize your home's energy efficiency.
Your Cozy Homestead Awaits!
Insulating your homestead home on a budget is a challenging but rewarding project that offers significant benefits for your comfort, finances, and self-sufficiency. By following these steps and getting creative with materials, you can transform your drafty house into a warm, efficient haven without breaking the bank. So, are you ready to say goodbye to those winter chills and hello to a cozy, energy-efficient homestead?
Take the leap and start insulating your home today! Share your progress and results on social media using the hashtag #BetterHomesHomestead. We can’t wait to see your transformations!
Don't forget to subscribe to the Better Homes and Harvests newsletter for more homesteading tips and tricks. Happy insulating!