From Lawn to Lunch: My Weekend Rainwater Harvesting Revolution
Sitting on my porch, sipping chamomile tea warmed by the setting sun, I often reflect on how much our property has transformed. It wasn't always this way. Just a few years ago, this was simply "the house." Now, it's a budding homestead, a place where we're striving for greater self-sufficiency, one DIY project at a time. And it all started with something surprisingly simple: a rainwater harvesting system.
This wasn’t some grand, expensive undertaking. In fact, it was a perfectly manageable weekend project that delivered huge returns. For any "Better Homes and Harvests" reader eager to dip their toes into sustainable living DIY, this is it. Forget theoretical advice – let's get practical!
Why Rainwater Harvesting?
We live in an area with unpredictable rainfall. Sometimes it pours for weeks, other times we face extended droughts. Seeing perfectly good rainwater rushing off our roof and down the drain while our garden withered felt…wrong. Rainwater is naturally soft, free of chlorine and other chemicals, making it ideal for plants. Plus, the idea of reducing our reliance on municipal water felt incredibly empowering. That desire for self-sufficiency really drove the project.
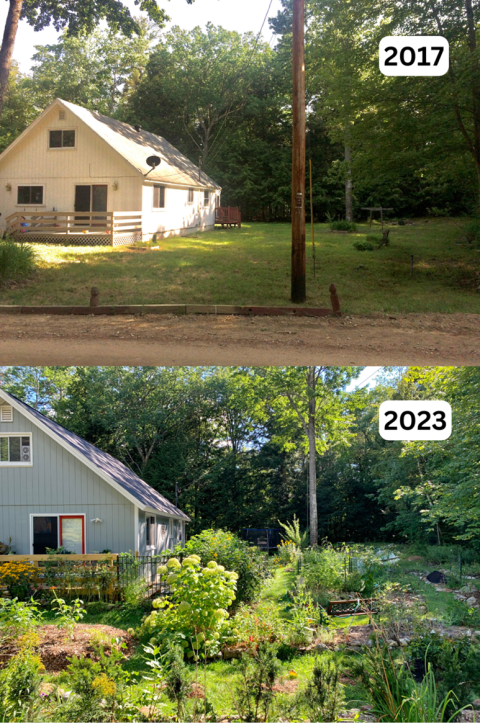
The Transformation: From Thirsty Lawn to Flourishing Garden
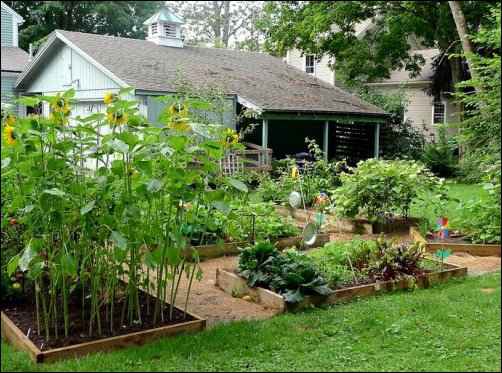
Before our rainwater harvesting system, our garden was heavily reliant on the sprinkler system, leading to high water bills and a less-than-thriving vegetable patch. The soil often felt dry, and the plants seemed stressed. Now, after installing the system, our plants are vibrant, healthy, and require far less supplemental watering. It's been a dramatic improvement!
The DIY Process: A Step-by-Step Guide
This project is genuinely beginner-friendly. Here's how we did it:
1. Planning and Assessment: First, we assessed our roof's catchment area and estimated our water needs. A simple online calculator helped determine the number of barrels we'd need. We chose two 55-gallon food-grade barrels to start. We positioned our barrels near the garden, aiming for a downspout that drained a significant portion of the roof.
2. Gathering Materials: This is where "weekend homesteading project" became a reality! We needed:
- Two 55-gallon food-grade plastic barrels.
- A downspout diverter (essential for filtering debris).
- A drill with various drill bits.
- A hole saw (sized to match the diverter and spigot).
- A spigot (for easy access to the water).
- A short length of garden hose.
- Screen mesh (for additional filtration).
- Bricks or cinder blocks (to elevate the barrels).
- Basic hand tools: screwdriver, measuring tape, level.
3. Modifying the Barrels:
- Drilling the Inlet: Using the hole saw, we carefully drilled a hole in the top of each barrel to accommodate the downspout diverter.
- Installing the Diverter: We followed the diverter's instructions to connect it to the downspout and securely attach it to the barrel. This step is crucial for preventing leaves and debris from entering the water.
- Drilling for the Spigot: Near the bottom of the barrel, we used a smaller drill bit to create a pilot hole, then the hole saw to create a larger hole for the spigot.
- Installing the Spigot: We wrapped the spigot threads with Teflon tape to prevent leaks and screwed it firmly into the hole.
- Overflow System: To prevent overflowing, we drilled a hole near the top of the second barrel and attached a short length of garden hose to direct excess water away from the foundation.
4. Setting Up the Barrels:
Elevating the Barrels: We placed the bricks under the barrels. Elevation provides gravity feed for better water pressure and makes it easier to fill watering cans.
Connecting the Barrels: We positioned the barrels close to each other and connected them using a short length of hose. This allows the second barrel to fill once the first one is full.
Mesh Filtration: We added a layer of screen mesh inside the diverter and over the hose openings to further filter out debris.
5. The Moment of Truth: We waited for the next rainstorm with bated breath. As the rain poured, we watched the system work flawlessly, diverting clean water into our barrels.
Challenges and Lessons Learned
Of course, it wasn't all smooth sailing. We initially underestimated the amount of debris that could accumulate, so we learned the importance of regularly cleaning the diverter screen. We also realized that mosquito control is essential; we added mosquito dunks (safe for garden use) to the barrels to prevent larvae from hatching. And we discovered the joy of fixing mistakes and the satisfaction of creating something useful with our own hands.
Impact on Our Homesteading Life
Our DIY rainwater harvesting system has had a profound impact. Our garden is thriving, our water bills are lower, and we feel a deeper connection to the natural world. It's a small but significant step towards our goal of sustainable living DIY. We've even started collecting rainwater in smaller containers to water our indoor plants!
Resources:
- Rain Barrels: Check your local hardware stores or online retailers like Amazon for food-grade plastic barrels. (As an Amazon Associate I earn from qualifying purchases). Here's a link to similar barrels available on Amazon. Example Amazon Link for Rain Barrels
- Downspout Diverter: A crucial component. Again, Amazon and hardware stores have options. Example Amazon Link for Downspout Diverter
- Mosquito Dunks: Essential for preventing mosquito larvae. Example Amazon Link for Mosquito Dunks
Your Turn!
What DIY homesteading project are you dreaming of tackling? What are your biggest challenges when it comes to sustainable home project initiatives? Share your thoughts and questions in the comments below! Let's inspire each other to create better homes and harvests, one weekend project at a time. It is easier than you think to start homesteading for beginners! Don't feel like your space has to look like the sustainable modern office building pictured below. Any step towards self-reliance helps you improve your homestead.

Even small actions can have big impacts, don't feel like you have to build tiny homes or farm large acreages to make a difference.

It's important to start somewhere and learn as you go.
