From Kitchen Scraps to Garden Gold: Harness the Power of Worm Castings
Do you ever look at your overflowing compost bin and wonder if there's a better way? A way to not only reduce waste but also create something truly valuable for your garden? I remember my grandmother always had the most vibrant garden on the block, and her secret wasn't just a green thumb, it was "black gold," as she lovingly called it – worm castings!
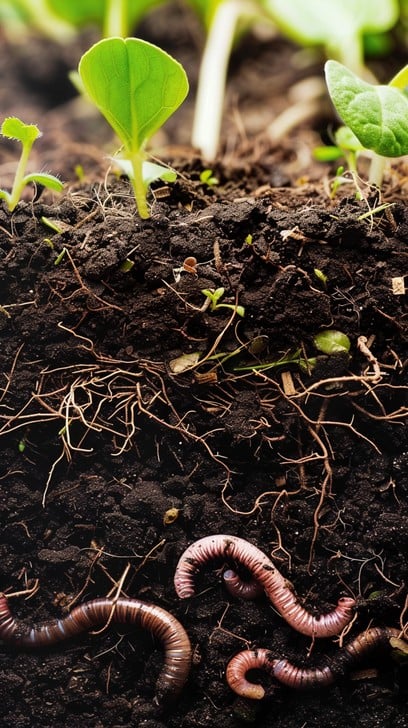
Well, you're in luck! In this post, we're diving into the fascinating world of worm composting, also known as vermicomposting. We’ll unlock the secret to turning your everyday kitchen scraps into a potent, nutrient-rich soil amendment that will have your plants thriving. Not only is it a fantastic way to reduce your environmental footprint, but it's also a super sustainable way to improve the health and productivity of your organic garden. Get ready to say goodbye to store-bought fertilizers and hello to a thriving ecosystem, powered by the amazing power of worms! We'll cover everything from setting up your worm bin, feeding your wiggly friends, to harvesting and using those precious worm castings.
Setting Up Your Worm Composting Bin: A Home for Your Wiggly Friends
The first step towards creating your own "black gold" is setting up the perfect home for your composting worms. Don't worry, it's easier than you think! There are several options for worm bins, each with its own set of pros and cons.
DIY Bins: These are often the most affordable and customizable option. You can use stackable totes, plastic storage containers, or even a repurposed wooden box. Just be sure to drill plenty of ventilation holes (at the top) and drainage holes (at the bottom) to ensure proper airflow and prevent waterlogging.
Pre-Made Worm Bins: If you prefer a ready-to-go solution, there are several commercially available worm bins on the market, such as the Worm Factory or the Hungry Bin. These bins are often designed with multiple trays, making harvesting castings much easier.
Bin Size: For a household of 2-4 people, a bin that is approximately 2 feet by 2 feet is a great starting point. As your worm population grows, so does their appetite!
Once you've chosen your bin, it's time to create the ideal bedding. Worms need a moist, dark, and comfortable environment to thrive.
Best Bedding Materials:
- Shredded Newspaper: Avoid glossy paper or colored inks, as these can be harmful to worms.
- Shredded Cardboard: Corrugated cardboard is an excellent choice and provides a good source of carbon.
- Coconut Coir: This is a natural and sustainable bedding material that retains moisture well.
Before adding the bedding to your bin, it's crucial to moisten it thoroughly. The bedding should be damp, like a wrung-out sponge. If it's too dry, the worms will dehydrate; if it's too wet, the bin will become anaerobic (lacking oxygen) and start to smell.

Sourcing Your Worms:
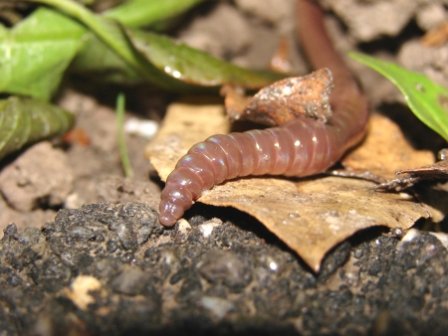
It’s important to use the right type of worms for composting. Garden worms won't work, they require a different enviornment. Red wigglers (Eisenia fetida) are the champions of composting! These worms are voracious eaters and thrive in the confined environment of a worm bin. You can find red wigglers at local bait shops, worm farms, or online retailers.
Once you have your worms and prepared bedding, it's time to introduce them to their new home. Gently place the worms on top of the bedding and let them burrow in. Add a small handful of food scraps to get them started, and you're on your way to creating nutrient-rich compost!
Feeding Your Worms and Managing Your Compost: A Balanced Diet for Happy Worms
Maintaining a healthy worm bin requires providing your worms with a balanced diet and managing the compost environment. It's kind of like having little, wiggly, composting pets!
- What to Feed Your Worms: Worms aren't picky eaters, but they do have their preferences. They love fruit and vegetable peels, coffee grounds, tea bags, and crushed eggshells. Avoid feeding them meat, dairy, oily foods, or processed foods, as these can attract pests and create unpleasant odors.
- How Much to Feed Your Worms: Start small and gradually increase the amount of food you provide as the worm population grows. Overfeeding is a common mistake that can lead to foul odors and unhappy worms. A good rule of thumb is to only add more food when the previous feeding has been mostly consumed.
- Bury Food Scraps: This helps prevent fruit flies and other pests from invading your worm bin. Dig a small hole in the bedding, add the food scraps, and cover them with bedding.
- Maintaining Moisture Levels: As mentioned earlier, the bedding should be damp like a wrung-out sponge. Check the moisture level regularly and add water as needed. If the bin is too wet, add dry bedding material to absorb excess moisture.
- Troubleshooting Common Problems:
- Foul Odors: This is usually a sign of overfeeding or anaerobic conditions. Reduce the amount of food you're adding and ensure there's adequate ventilation.
- Fruit Flies: Cover food scraps well with bedding and consider using a fruit fly trap.
- Worms Escaping: This can be caused by dry conditions, acidic conditions, or overcrowding. Adjust the moisture level, add crushed eggshells to balance the pH, and consider dividing the worm population if the bin is too crowded.

Harvesting and Using Your Black Gold: The Fruits (and Veggies) of Your Labor
After several months of feeding and care, your worm bin will be teeming with nutrient-rich worm castings. Harvesting these castings is the final step in the vermicomposting process, and it's where you get to reap the rewards of your efforts.
There are several methods for harvesting castings:
- Dump and Sort: This method involves dumping the entire contents of the bin onto a tarp and sorting through the castings to remove the worms. While effective, it can be time-consuming.
- Migration Method: This method involves moving the food to one side of the bin. The worms will migrate to that side, leaving the castings behind. You can then scoop out the castings from the other side of the bin.
- Stacking Bin Method: This method involves using a multi-tray worm bin. When the bottom tray is full of castings, you add a new tray on top with fresh bedding and food. The worms will migrate upwards to the new tray, leaving the castings in the bottom tray.
Preparing Castings for Use:
After harvesting the castings, it's a good idea to screen them to remove any larger debris, such as undecomposed food scraps or bedding material. You can use a simple sifting screen for this purpose. Allow the castings to dry slightly before storing them in a cool, dry place.
How to Use Worm Castings:
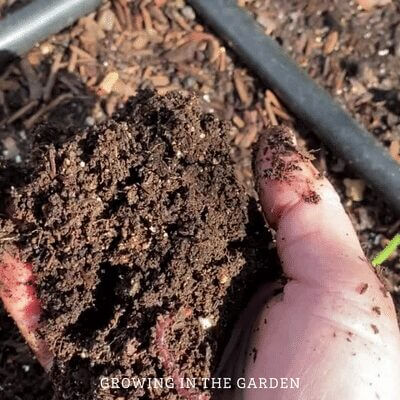
Worm castings are a powerhouse of nutrients and beneficial microbes that can significantly improve the health and productivity of your garden.
- Soil Amendment: Mix castings into garden beds or potting soil to improve soil structure, drainage, and fertility.
- Seed Starter: Use castings as a seed starting medium for strong, healthy seedlings.
- Compost Tea: Brew compost tea for a liquid fertilizer boost. Soak a handful of castings in a bucket of water for 24-48 hours, then strain the liquid and use it to water your plants.
- Top Dressing: Add castings to the top of established plants for a nutrient rich boost.

- Top Dressing: Add castings to the top of established plants for a nutrient rich boost.
Digging Deeper: Advanced Techniques & Going Beyond the Basics
Once you've mastered the basics of worm composting, you might be interested in exploring some more advanced techniques. One exciting option is integrating Bokashi composting with vermicomposting. Bokashi involves fermenting food waste with beneficial microbes before adding it to the worm bin. This process can significantly improve composting efficiency and allow you to compost certain foods that would normally be problematic for worms, such as meat and dairy.
Another fascinating concept is vermiponics, which combines hydroponics with worm castings. This system involves using worm castings as a nutrient source for plants grown in water. While more complex, vermiponics opens up interesting sustainable growing options.
If you find yourself with an abundance of worms, you can even try breeding them to expand your vermicomposting setup or share them with friends and neighbors. To encourage reproduction, provide your worms with plenty of food, maintain optimal moisture levels, and avoid disturbing the bin too much.
From Scraps to Soil: A Sustainable Cycle of Life

Worm composting is more than just a way to get rid of kitchen scraps, it’s a journey towards a more sustainable and self-sufficient lifestyle. By embracing this simple yet powerful method, you're not only reducing waste and improving your garden, but also connecting with nature and creating a healthier planet. It's been shown time and time again that homegrown fruits and vegetables are far more delicious when you know your soil has been crafted with love and sustainable practices.
As we head into the season of abundance and seasonal harvest, consider giving your garden a boost with those nutrient-rich worm castings. Your plants will thank you for it!
Ready to embark on your own vermicomposting adventure? Share this post with your gardening friends and let's build a community of worm composting enthusiasts! We would love to see you share photos and your favorite tip. Leave a comment below!