From Garden to Table: Savoring the Last Tomatoes of Summer (and Preserving for Winter)
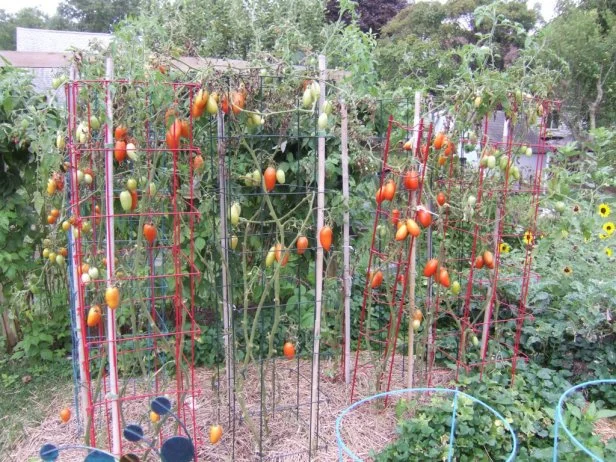
The late summer sun casts long shadows across the garden, painting the ripening tomatoes in hues of fiery orange and deep crimson. The air is thick with the sweet, earthy scent of soil and the tangy aroma of sun-warmed fruit. A gentle breeze rustles through the leaves, carrying whispers of the coming autumn. While there's a touch of melancholy knowing summer's carefree days are fading, there’s also an undeniable thrill in the abundance surrounding us – a treasure trove of homegrown goodness begging to be savored and, more importantly, preserved.
In this post, you'll learn how to make the most of your end-of-season tomatoes, turning that beautiful harvest into delicious sauces, hearty stews, and flavorful condiments to enjoy throughout the cozy winter months. We’ll explore simple techniques for canning, freezing, and even oven-drying, ensuring that the taste of summer sunshine graces your table even when the snow is falling outside. Get ready to extend the joy of your organic gardening efforts and embrace the satisfying art of preserving food!

The Heart of the Harvest: Why Preserve Tomatoes?
Beyond the obvious benefit of enjoying homegrown flavor year-round, preserving tomatoes is a cornerstone of sustainable home living and a testament to the joys of slow living. It’s about connecting with the seasons, reducing food waste, and taking pride in self-sufficiency. Imagine the satisfaction of ladling homemade tomato sauce, crafted from your own garden's bounty, onto a steaming plate of pasta on a cold winter evening. That's the magic of preserving.
Plus, let's be honest, store-bought canned tomatoes simply can't compare to the vibrant taste of homegrown, organically grown varieties. By preserving your own, you control the ingredients, ensuring a delicious and healthy final product.
Choosing Your Preservation Method: A Guide for Every Homesteader
The best preservation method for your tomatoes depends on your available time, resources, and desired end product. Here’s a breakdown of three popular options:
- Canning: A classic method ideal for long-term storage and producing sauces, salsas, and whole peeled tomatoes. Requires some equipment and a bit more time investment, but the results are shelf-stable and readily available.
- Freezing: The simplest and quickest option for preserving whole tomatoes, sauces, and purees. Requires freezer space but preserves a fresh, vibrant flavor.
- Oven-Drying: A delicious way to concentrate the flavor of tomatoes, creating sun-dried tomatoes perfect for snacking, adding to salads, or incorporating into pasta dishes. Requires minimal equipment but a longer drying time.
Canning Tomatoes: A Step-by-Step Guide
Canning tomatoes requires careful attention to safety guidelines to prevent spoilage. Always use approved canning recipes and follow these steps meticulously.
What you'll need:
- Ripe, unblemished tomatoes (Roma or San Marzano varieties are excellent)
- Canning jars with lids and bands
- Large pot for blanching tomatoes
- Slotted spoon
- Sharp knife
- Jar lifter
- Canning pot with rack
- Lemon juice or citric acid (for acidity)
- Optional: Salt, herbs, spices
Instructions:
- Prepare your jars: Wash jars, lids, and bands in hot, soapy water. Sterilize jars by boiling them in water for 10 minutes. Keep them hot until ready to use.
- Blanch the tomatoes: Bring a large pot of water to a boil. Score the bottom of each tomato with an "X". Blanch tomatoes in boiling water for 30-60 seconds, until the skin begins to crack.
- Peel and core: Immediately transfer tomatoes to a bowl of ice water to stop the cooking process. Peel off the skins and remove the cores.
- Prepare the tomatoes: Depending on your recipe, you can leave the tomatoes whole, chop them, or puree them.
- Add acidity: Add 1 tablespoon of bottled lemon juice or ¼ teaspoon of citric acid to each pint jar (double for quarts). This ensures proper acidity for safe canning.
- Fill the jars: Pack the prepared tomatoes into the sterilized jars, leaving ½ inch of headspace.
- Remove air bubbles: Run a non-metallic spatula around the inside of the jar to release any trapped air bubbles.
- Wipe rims and adjust lids: Wipe the jar rims clean with a damp cloth. Place the lids on the jars and screw on the bands until fingertip tight.
- Process in a boiling water bath: Place the jars in the canning pot filled with boiling water, ensuring the water covers the jars by at least 1 inch. Bring the water back to a rolling boil and process for the recommended time (typically 85 minutes for quarts and 40 minutes for pints at altitudes of 0-1000 feet). Adjust processing time for higher altitudes.
- Cool and check seals: Carefully remove the jars from the canning pot and place them on a towel-lined surface to cool completely. After 12-24 hours, check the seals by pressing down on the center of the lid. If the lid doesn't flex, it's sealed properly.
- Store: Store sealed jars in a cool, dark place.

Freezing Tomatoes: A Quick and Easy Option
Freezing is a fantastic option for preserving the fresh flavor of tomatoes without the commitment of canning.
What you'll need:
- Ripe tomatoes
- Freezer bags or containers
- Optional: Blender or food processor
Instructions:
- Wash and prepare: Wash tomatoes thoroughly. You can freeze them whole, chopped, or pureed.
- Freeze whole tomatoes: To freeze whole tomatoes, simply place them on a baking sheet lined with parchment paper and freeze until solid. Then, transfer them to freezer bags. This prevents them from sticking together. When you're ready to use them, run them under warm water to easily remove the skins.
- Freeze chopped or pureed tomatoes: Chop or puree tomatoes using a blender or food processor. Pour the mixture into freezer bags or containers, leaving some headspace for expansion.
- Label and freeze: Label each bag or container with the date and contents. Freeze for up to 12 months.
Oven-Drying Tomatoes: Concentrated Flavor
Oven-dried tomatoes offer a delicious alternative to sun-dried, capturing a rich, intense flavor.
What you'll need:
- Roma tomatoes, halved lengthwise
- Olive oil
- Salt
- Herbs (optional: thyme, oregano, basil)
Instructions:
- Prepare tomatoes: Preheat oven to 200°F (95°C). Halve Roma tomatoes lengthwise and remove the seeds.
- Season: Arrange tomato halves on a baking sheet lined with parchment paper, cut-side up. Drizzle with olive oil, sprinkle with salt, and add your favorite herbs.
- Dry: Bake for 6-8 hours, or until tomatoes are shriveled and slightly leathery but still pliable.
- Store: Store oven-dried tomatoes in an airtight container in the refrigerator for up to 2 weeks or packed in olive oil in the refrigerator for up to 1 month.
The Feeling of Self-Sufficiency
There's a profound sense of accomplishment that comes with preserving your own food. It's a connection to the past, a way to honor the earth's bounty, and a tangible expression of self-sufficiency. As you stand back and admire those jars of vibrant tomatoes lined up on your shelf, you'll know you've captured a little piece of summer to brighten the winter months ahead. And that, my friends, is a feeling worth savoring.

Your Call to Action: Share Your Harvest!
Now it's your turn! What are your favorite ways to preserve tomatoes? Share your tips, tricks, and recipes in the comments below. Let's build a community of passionate homesteaders and celebrate the abundance of the seasonal harvest together! Embrace the farmhouse life, cultivate your organic gardening skills, and discover the joy of slow living, one tomato at a time.