From Garden to Jar: Mastering Herbal Infused Oils for Cozy Winter Wellness
As the leaves turn from vibrant greens to fiery hues, a quiet melancholy settles over the garden. We savor the last tomatoes, the final squash, knowing the season of abundance is drawing to a close. But what if you could capture the essence of your garden's herbs and transform them into nourishing oils for winter wellness and natural homekeeping? Imagine the soothing warmth of rosemary-infused oil massaged into aching muscles after a day shoveling snow, or the comforting scent of lavender oil wafting through your home, easing the winter blues. This post will guide you through the simple yet rewarding process of creating your own herbal-infused oils, offering a connection to your garden's bounty and a touch of cozy self-sufficiency during the colder months. From skin-nourishing calendula to aromatic thyme, let's transform your garden’s gifts into golden elixirs.
Section 1: Choosing & Preparing Your Herbs for Infusion

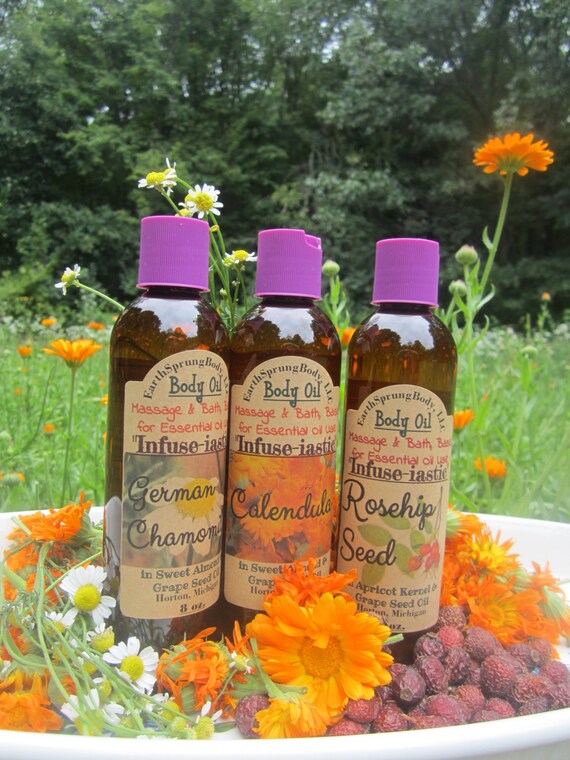
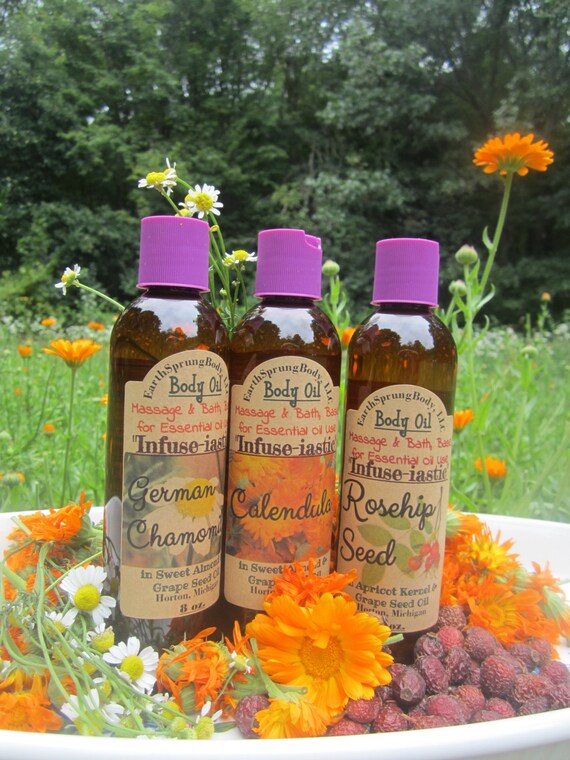
The foundation of any successful herbal infusion lies in the quality of your herbs. Fortunately, many potent medicinal and aromatic herbs thrive in late-season gardens. Rosemary, with its invigorating scent and muscle-relaxing properties, is a fantastic choice. Thyme, known for its antiseptic qualities, offers immune support. Calendula, with its vibrant orange petals, soothes irritated skin. Lavender, the queen of relaxation, eases stress and promotes restful sleep. Sage brings a cleansing aromatic experience. Lemon balm has a light and cheerful scent that can help improve the winter blues.
When harvesting your herbs, timing is key. Aim to harvest in the morning, after the dew has dried but before the sun reaches its peak. This is when the essential oil content is at its highest, resulting in a more potent infusion. The essential oils are important because they are the medicinal properties of the herb.
The debate between using dried versus fresh herbs is ongoing, but for oil infusions, dried herbs are generally preferred. The reason? Fresh herbs contain moisture, which can lead to spoilage and mold growth in your infused oil. Drying removes this excess water, extending the shelf life of your finished product. To dry your herbs, simply hang them upside down in a cool, dark, well-ventilated space for several days, or use a dehydrator on a low setting. When they crumble easily, they are ready to be used.
Before infusing, always ensure your herbs are clean and thoroughly dried. Gently rinse them under cool water to remove any dirt or debris, and then pat them dry with a clean towel. Then, proceed with one of the aforementioned drying methods. This careful preparation is essential for preventing spoilage and maximizing the potency of your infused oil.
Section 2: Oil Selection - Carrier Oils and Their Benefits

Just as important as your herbs is the carrier oil you choose. The carrier oil acts as the solvent, extracting the beneficial compounds from the herbs and carrying them to your skin or body. Different oils offer unique properties, so consider your intended use when making your selection.
Olive oil, particularly extra virgin olive oil, is a classic choice. It's rich in antioxidants, making it excellent for skincare and massage. Olive oil is also shelf-stable and relatively inexpensive. If you have olive trees on your homestead, pressing your own oil adds an extra layer of connection to the land.
Other options include almond oil, which is light and easily absorbed, making it ideal for delicate skin. Apricot kernel oil is similar to almond oil but has a slightly richer feel. Jojoba oil closely resembles the skin's natural sebum, making it a great choice for facial serums and hair treatments. Grapeseed oil is a lightweight oil with a neutral scent and good for sensitive skin. Avocado oil is a heavier oil, which is moisturizing and soothing, with vitamin A, D, and E.
No matter which oil you choose, opt for high-quality, organic, cold-pressed varieties whenever possible. These oils retain more of their natural nutrients and are free from harsh chemicals.
Section 3: The Infusion Process: Two Proven Methods
There are two primary methods for infusing herbs into oil: the slow infusion method and the quick infusion method. Both yield high-quality results, but they differ in time and technique.
Slow Infusion (Solar Infusion): This traditional method involves placing herbs and oil in a jar and allowing the sun's gentle warmth to do the work.
- Fill a clean, dry glass jar about halfway with your chosen dried herbs.
- Pour your carrier oil over the herbs, ensuring they are completely submerged. Leave about an inch of headspace at the top of the jar.
- Seal the jar tightly and place it in a warm, sunny windowsill.
- Shake the jar gently every day to help release the herbs' beneficial compounds.
- After 4-6 weeks, strain the oil through cheesecloth or a fine-mesh sieve, discarding the spent herbs.
- Important Note: Keep an eye out for any signs of moisture buildup in the jar. "Burping" the jar every few days by briefly opening it to release any trapped condensation can help prevent mold growth.
Quick Infusion (Gentle Heat Method): This method uses gentle heat to speed up the infusion process.
- Place your herbs and oil in a double boiler or a heat-safe bowl set over a simmering pot of water. Use the same herb-to-oil ratio as the slow infusion method.
- Heat the mixture on very low heat for 2-4 hours, stirring occasionally. The goal is to keep the oil warm, not hot. Avoid letting it simmer or boil.
- Alternatively, you can use a slow cooker on the "warm" setting. Check the oil temperature and adjust the setting if needed to ensure it stays at a gentle warmth.
- After 2-4 hours, strain the oil through cheesecloth or a fine-mesh sieve, discarding the spent herbs.
Once you have strained your oil, you may choose to filter it further for a clearer product. Line a sieve with a coffee filter or a clean piece of muslin cloth and pour the strained oil through.
Testing the oil for potency may be hard to do since it involves smelling the oil. If you can clearly smell the scent from the herb used, then you know the oil is infused.
Section 4: Creative Uses for Your Herbal Infused Oils

The possibilities for using your herbal infused oils are vast and varied. Here are just a few ideas:
- Skincare: Use infused oils as a natural moisturizer for dry skin, a soothing massage oil for sore muscles, or an ingredient in DIY skincare products like balms, salves, and lotions. Calendula oil is wonderful for sensitive skin, while lavender oil can calm irritated skin.
- Home Remedies: Infused oils can offer relief for minor ailments. Rosemary oil can ease muscle aches, and thyme oil, diluted and applied topically, may provide comfort during a cold. Important Note: This information is for educational purposes only and should not be considered medical advice. Always consult with a healthcare professional for any health concerns.
- Aromatherapy: Add a few drops of your favorite infused oil to a diffuser to create a relaxing and aromatic atmosphere. Lavender oil promotes relaxation, while lemon balm oil can uplift your mood. You can also apply the infused oil to your skin.
- Culinary Uses: When safe and appropriate, certain infused oils can add a delicious flavor to your dishes. Rosemary-infused olive oil is wonderful for drizzling over roasted vegetables or using as a dipping oil for bread. Always use culinary-grade herbs and ensure the oil is safe for consumption.
- Homemade Cleaning Products: Enhance your natural cleaning routine by adding herbal infused oils to your homemade cleaning solutions. Lavender or lemon balm-infused oil can add a refreshing scent to your all-purpose cleaner.
Section 5: Safe Storage & Shelf Life
Proper storage is crucial for preserving the quality and extending the shelf life of your herbal infused oils.
- Proper Containers: Always store your infused oils in dark glass bottles to protect them from light exposure, which can degrade the oil over time. Amber or blue bottles are ideal.
- Labeling: Clearly label each bottle with the herb used, the date of infusion, and the intended use. This will help you keep track of your creations and avoid confusion.
- Storage Conditions: Store your infused oils in a cool, dark place away from direct sunlight and heat. A pantry or cabinet is ideal.
- Shelf Life: Herbal infused oils typically have a shelf life of 6-12 months. To extend it, you can add Vitamin E oil. Check the oil for signs of spoilage, such as a rancid odor, before each use. If it smells off, discard it.
Conclusion: Bringing the Garden Indoors for Winter Warmth
Creating herbal infused oils is a rewarding way to capture the essence of your garden's bounty and bring a touch of cozy wellness to your home during the winter months. By carefully selecting your herbs, choosing the right carrier oil, and following the simple infusion process, you can create personalized blends that nourish your skin, soothe your senses, and enhance your overall well-being.
As winter approaches, these infused oils are a beautiful reminder of the vibrant garden we'll enjoy again. Take time to nurture yourself with these natural gifts and find joy in the simple act of bringing the garden's warmth indoors.
Want more ideas for using your garden's bounty? Subscribe to our newsletter for weekly tips and inspiration! Share your own herbal infusion recipes and experiences in the comments below. What herbs are you most excited to infuse? Do you have any questions about the process or uses of infused oils? We'd love to hear from you!