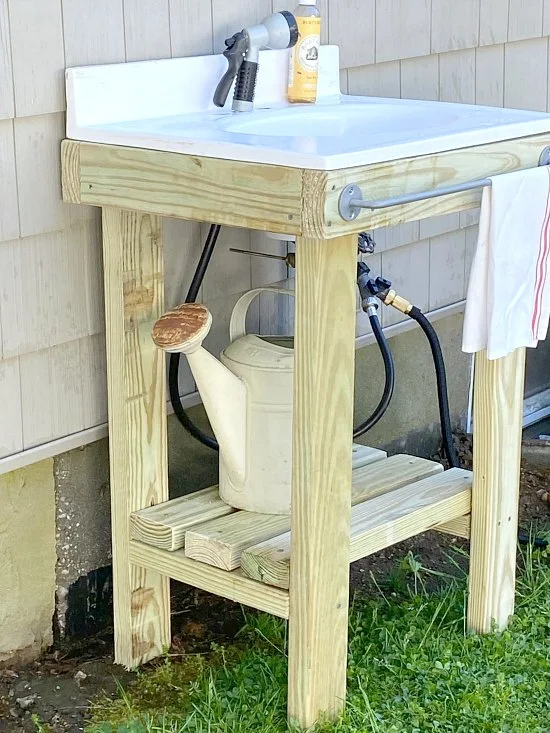
From Garden to Grub: Build a DIY Outdoor Kitchen Sink for Easy Homesteading
Homesteading – it’s a dream come true for many. Fresh air, homegrown veggies, and a connection to the land. But let's be honest, it’s also a muddy affair! From tending the garden to caring for animals, dirt is simply part of the package. And that means constant trips inside to wash hands, rinse vegetables, or clean up tools. Wouldn't it be amazing to have a convenient, dedicated space right outside, minimizing indoor mess and maximizing outdoor efficiency?
Enter the outdoor kitchen sink – a game-changer for any homestead! This simple addition can dramatically streamline your daily tasks, reduce the dirt tracked into your home, and improve hygiene when preparing food harvested straight from the garden. This post will guide you through building your own functional and affordable outdoor sink, using readily available materials and basic tools. Get ready to embrace a more efficient and enjoyable homesteading experience. Let's get building!

3. Main Sections:
3.1. Planning & Design: Mapping Out Your Sink
Careful planning is key to a successful outdoor kitchen sink project. Rushing into it can lead to wasted time, materials, and a less-than-ideal end result.
Location, Location, Location: Where you place your sink is crucial. Consider these factors:
- Proximity to Garden/Water Source/House: Ideally, your sink should be close to your garden for easy vegetable washing, near a water source (hose bib or plumbed line), and conveniently accessible from your house to reduce travel time.
- Sun Exposure: Consider the amount of sun your chosen location receives. While some sun can help dry the sink area, too much can make it uncomfortable to work in. Partial shade might be ideal.
- Drainage: Proper drainage is essential to prevent standing water and mosquito breeding. Ensure the area slopes slightly away from the sink.
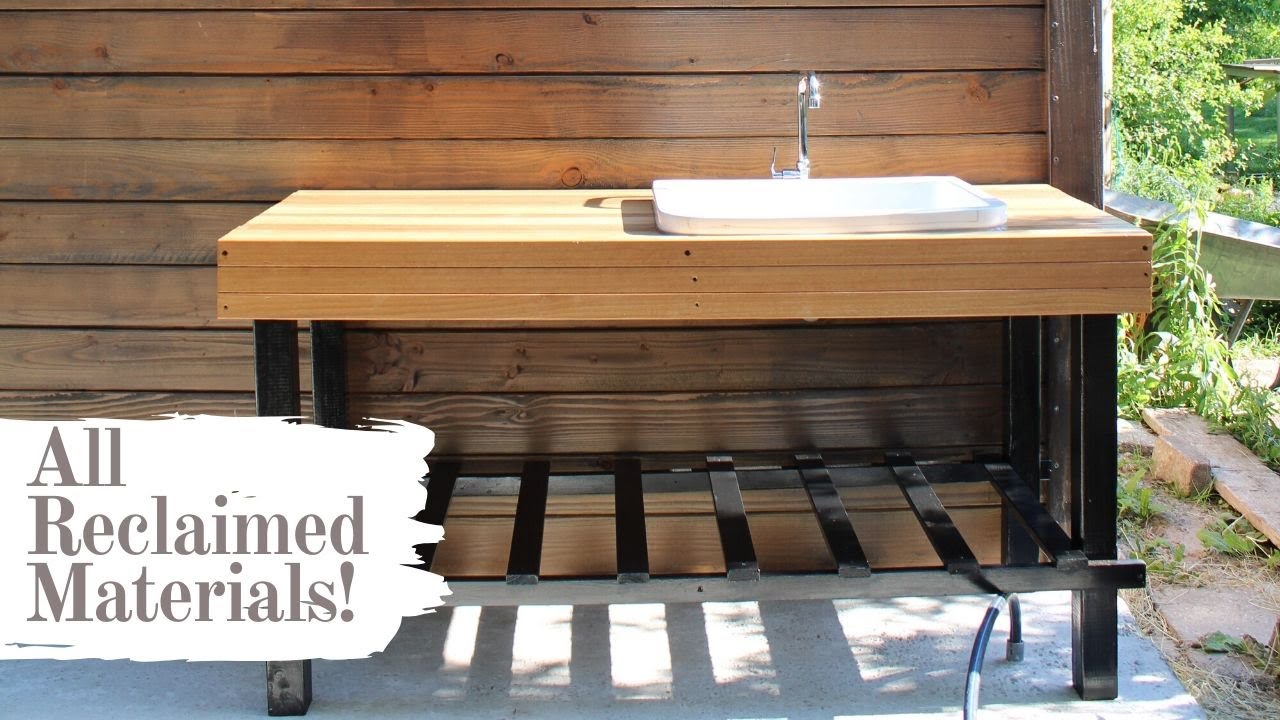
Sink Size & Type: You have various options for the sink itself.
- Reclaimed Sinks: Old kitchen sinks, utility sinks, or even large stainless steel bowls can be repurposed. These are often the most affordable and eco-friendly option. Check salvage yards, online marketplaces (Facebook Marketplace, Craigslist), and ask friends or neighbors who might be remodeling.
- Stainless Steel Sinks: New stainless steel sinks are durable and easy to clean, but they tend to be more expensive.
- Concrete Sinks: Concrete sinks offer a rustic and durable option but require more construction skill and are heavier.
- Size Matters: Consider the size of the sink based on your needs. Do you primarily need it for handwashing, or will you be cleaning large quantities of vegetables? A larger sink will be necessary for the latter.
Support Structure: The frame that supports your sink can be built from various materials.
- Wood Frames: Wood frames are relatively easy to build with basic carpentry skills. Use pressure-treated lumber to resist rot and insect damage.
- Metal Frames: Metal frames offer superior durability but require welding skills or the ability to assemble pre-fabricated metal components.
- Cinder Blocks: Cinder blocks provide a simple and inexpensive option for a more rustic look. They're incredibly sturdy.
- Stability and Longevity: Ensure the frame is sturdy enough to support the weight of the sink when filled with water. Consider the long-term durability of the materials you choose, especially in your local climate.
Drainage System: Decide how you will handle wastewater.
- Direct Drain to a Garden Bed: This is a simple option, but only suitable if you are using biodegradable soaps and cleaning agents. The wastewater can provide nutrients to your plants.
- Greywater System: A more sophisticated greywater system can filter and reuse wastewater for irrigation. This is a great way to conserve water but may require permits depending on your local regulations.
- Septic Tank Connection: Connecting your outdoor sink to your septic tank is the most environmentally sound option but requires professional plumbing and permits.
- Local Regulations: Always check your local regulations regarding greywater systems and wastewater disposal before installing any drainage system.
Sourcing Materials: Repurposing is the name of the game for cost savings and sustainability!
- Salvage Yards: A treasure trove of reclaimed sinks, lumber, and other materials.
- Online Marketplaces: Check Facebook Marketplace, Craigslist, and other online platforms for used materials.
- Construction Sites (with Permission): Ask construction sites if they have any leftover lumber or materials they are willing to give away or sell at a discount.
- Your Own Homestead: Look around your property for materials you can repurpose, such as old pallets, scrap wood, or stones.
Key Takeaway: Careful planning ensures a functional and efficient sink that meets your specific needs and homestead setup.
3.2. Gathering Materials & Tools: Your Homesteading Arsenal
Preparation is half the battle! Having everything you need before you start building will make the process much smoother and less frustrating.
Comprehensive List: Here's an example material list for a simple wooden frame sink:
- Reclaimed Sink (stainless steel kitchen sink)
- Pressure-Treated Lumber:
- (4) 4x4 posts (for legs) - 36" long
- (4) 2x4 boards (for top frame) - Length depends on the size of your sink. Measure the sink's outer dimensions and add a few inches for overhang.
- (4) 2x4 boards (for lower frame/shelf) - Same length as the top frame.
- Plumbing Fittings:
- Sink drain with strainer
- PVC pipe (diameter depends on drain size)
- PVC fittings (elbows, couplings)
- Hose adapter
- Plumber's tape
- Fasteners:
- Exterior wood screws (various lengths)
- Gravel (for drainage)
- Optional: Exterior paint or sealant for the wood frame
Tool Checklist:
- Safety Glasses
- Work Gloves
- Measuring Tape
- Pencil
- Circular Saw or Hand Saw
- Drill with drill bits
- Level
- Wrench
- Pipe Cutter (if using PVC pipe)
- Shovel (for drainage)
Cost-Saving Tips:
- Borrow or Rent Tools: If you don't own a particular tool, consider borrowing it from a friend or renting it from a tool rental shop.
- Buy Used Tools: Look for used tools at flea markets, garage sales, or online marketplaces.
- Repurpose Materials: As mentioned earlier, using reclaimed materials is a great way to save money.
Safety First:
- Wear safety glasses to protect your eyes from flying debris.
- Use work gloves to protect your hands from splinters and sharp edges.
- Wear ear protection when using power tools.
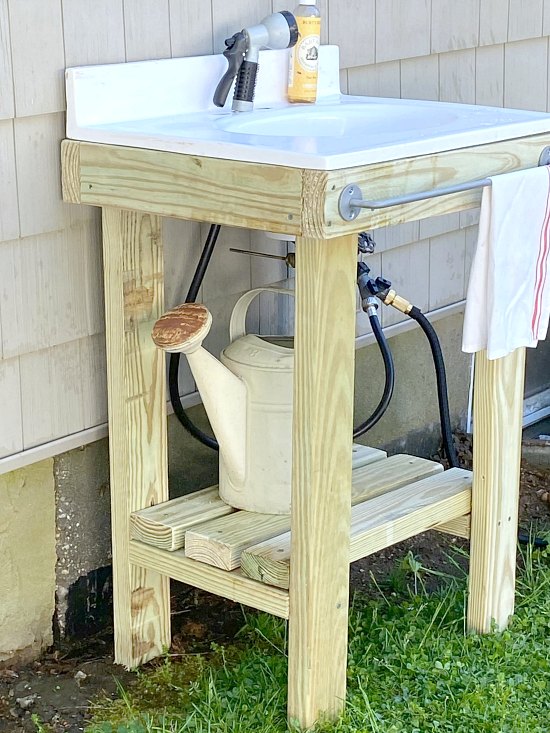
Key Takeaway: Having all materials and tools ready before you start streamlines the building process and prevents frustration.
3.3. Building the Frame: The Foundation of Your Sink
We'll build a simple wooden frame for this example. Remember to adjust the measurements based on the size of your sink.
Step-by-Step Instructions:
- Cut the Lumber: Cut the 4x4 posts to 36" in length (these will be the legs). Cut the 2x4 boards for the top and bottom frames according to the outer dimensions of your sink, adding a few inches for overhang.
- Assemble the Top Frame: Use screws to assemble the 2x4 boards into a rectangular frame. Ensure the corners are square.
- Assemble the Bottom Frame: Repeat the process to assemble the bottom frame.
- Attach the Legs: Attach the 4x4 posts to the inside corners of the top frame using screws. Make sure the legs are flush with the top of the frame.
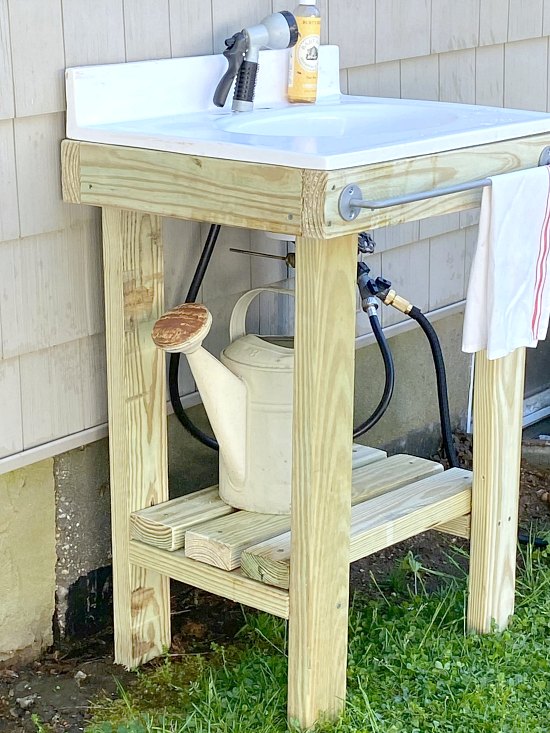
- Attach the Bottom Frame: Attach the bottom frame to the legs at your desired height (typically 12-18 inches from the ground). This will create a shelf for storage.
- Optional: Add Cross Braces: For added stability, you can add 2x4 cross braces between the legs.
Stability & Support: A sturdy frame is essential! Use plenty of screws and ensure all joints are tight.
Leveling: Use a level to ensure the frame is level before attaching the sink. Adjust the legs if necessary by adding shims under the legs.
Adding Finishing Touches:
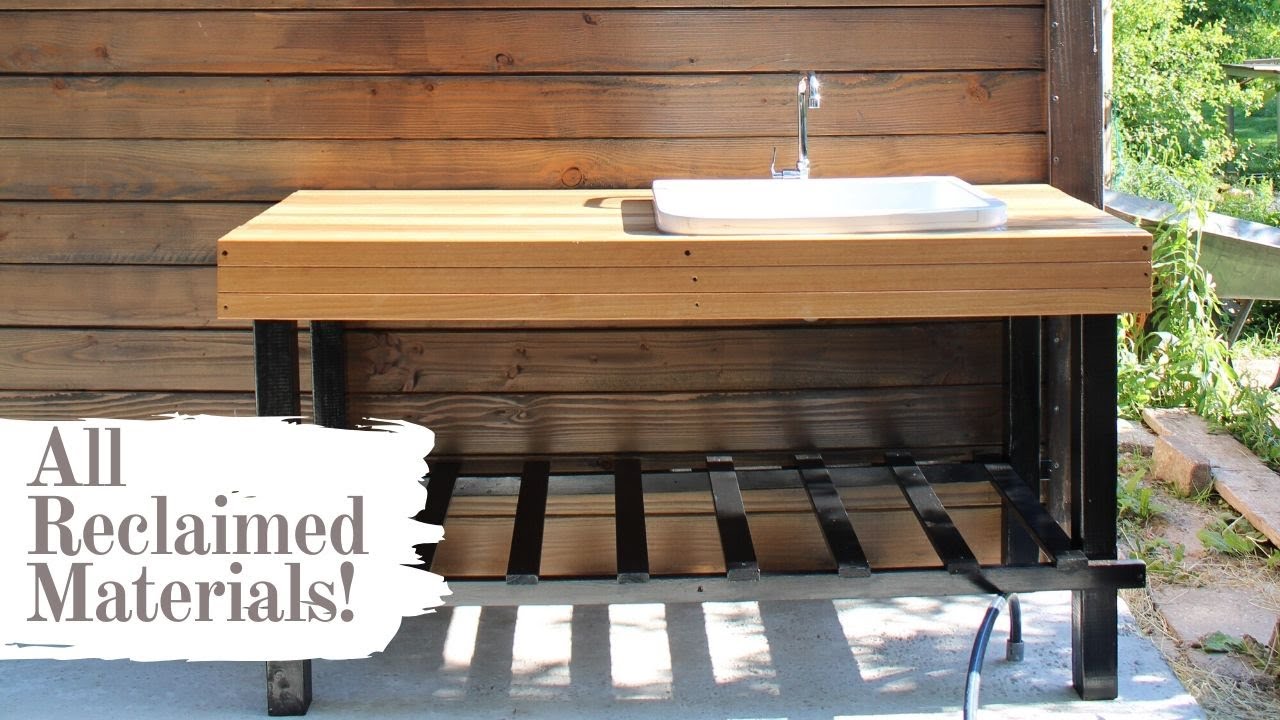
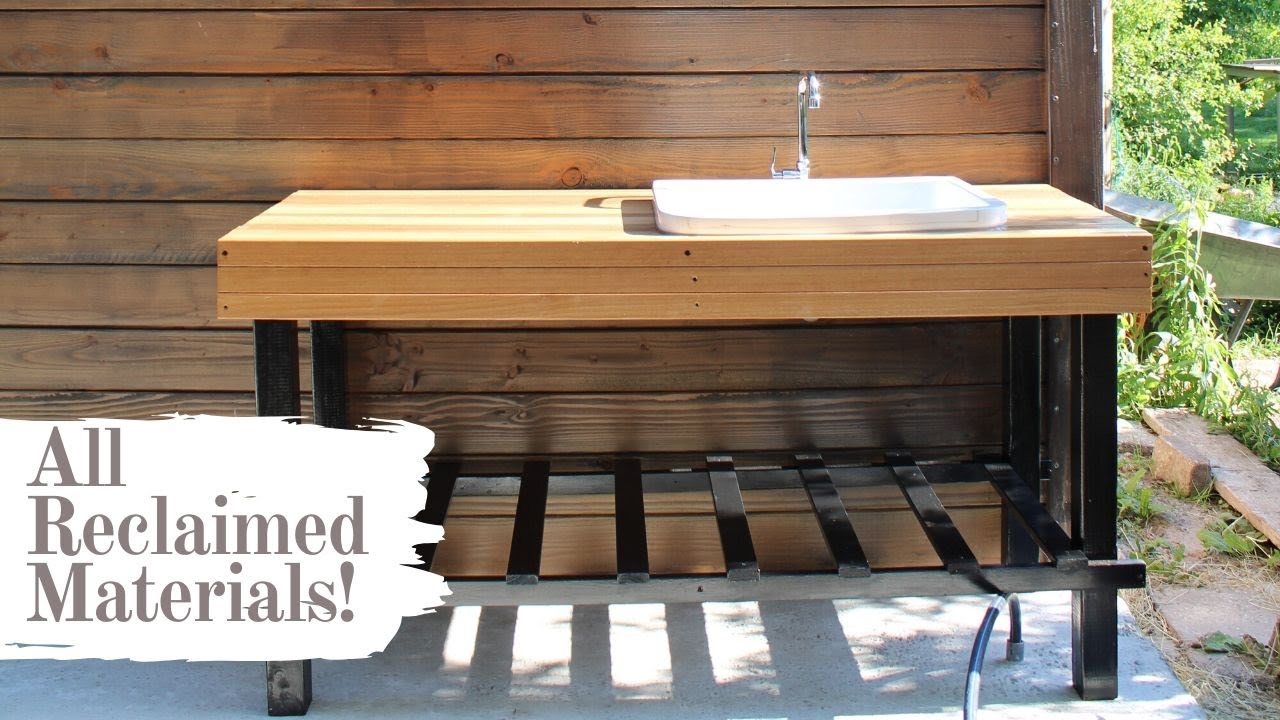
- Backsplash: Add a piece of plywood or reclaimed wood to the back of the frame to create a backsplash.
- Shelf: The bottom frame creates a convenient shelf for storing gardening tools or cleaning supplies.
- Countertop: Consider adding a countertop made of reclaimed wood or concrete to provide additional workspace.
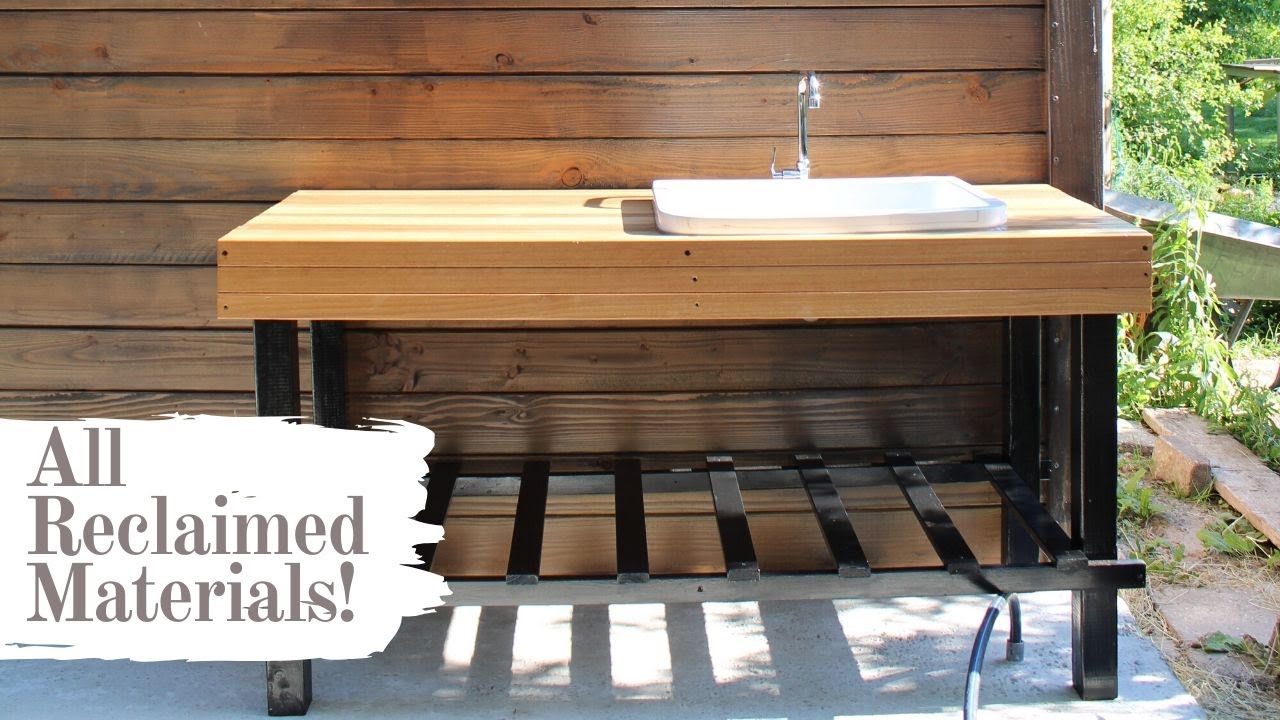
Key Takeaway: A well-built frame provides a solid foundation for your outdoor kitchen sink and enhances its functionality.
3.4. Installing the Sink & Plumbing: Bringing Water to Life
Now for the exciting part – making your sink functional!
Sink Installation:
- Place the Sink: Carefully place the sink into the frame opening.
- Secure the Sink: Depending on the type of sink and frame, you may need to use clips, screws, or adhesive to secure the sink to the frame.
Plumbing Connections:
- Install the Drain: Install the sink drain with strainer according to the manufacturer's instructions.
- Connect PVC Pipe: Connect PVC pipe to the drain outlet using PVC fittings (elbows, couplings).
- Direct the Drainage: Route the PVC pipe to your chosen drainage location (garden bed, greywater system, or septic tank connection).
Water Source Connection:
- Connect Hose Adapter: Attach a hose adapter to the faucet connection on the sink.
- Connect Water Source: Connect a garden hose to the hose adapter, or plumb in a permanent water line if desired.
Drainage System Installation: Ensure the drainage pipe has a slight downward slope to promote proper drainage.
Leak Testing:
- Turn on the Water: Slowly turn on the water and check for leaks at all connections.
- Tighten Connections: If you find any leaks, tighten the connections with a wrench.
- Use Plumber's Tape: If tightening doesn't stop the leak, disassemble the connection, apply plumber's tape to the threads, and reassemble.
Key Takeaway: Proper plumbing installation ensures a reliable water supply and efficient drainage for your outdoor kitchen sink.
3.5. Finishing Touches & Maintenance: Enjoying Your Outdoor Oasis
The final touches are what make your sink truly functional and enjoyable.
Adding Accessories:
- Soap Dispenser: Install a soap dispenser for easy handwashing.
- Towel Rack: Add a towel rack to keep towels within easy reach.
- Cutting Board: Place a cutting board on the countertop for food preparation.
Sealing & Protection:
- Paint or Sealant: Apply exterior paint or sealant to the wood frame to protect it from the elements.
Cleaning & Maintenance:
- Regular Cleaning: Regularly clean the sink and frame with soap and water to prevent dirt and grime buildup.
- Check for Leaks: Periodically check for leaks and repair them promptly.
Winterizing:
- Drain the Water: Before winter, drain all water from the sink and pipes to prevent freezing.
- Insulate Pipes: Insulate any exposed pipes to protect them from freezing temperatures.
- Cover the Sink: Cover the sink with a tarp or other protective cover to prevent snow and ice buildup.
Key Takeaway: Regular maintenance ensures your outdoor kitchen sink remains a valuable asset to your homestead for years to come.
4. Conclusion
Building an outdoor kitchen sink is a fantastic project for any homesteader looking to improve efficiency and convenience. By following these steps, you can create a functional and affordable sink that will make your outdoor tasks much easier and more enjoyable. The feeling of accomplishment from building something useful with your own hands is truly rewarding. Don't be afraid to give it a try, even if you're a beginner! With a little planning and effort, you can have your own outdoor oasis in no time.
5. Call to Action
Have you considered an outdoor kitchen sink to resolve the issues of homesteading cleanliness and water conservation on your property? Let us know your thoughts in our quick poll!