From Garden to Grill: Build Your Own Smokehouse for Flavorful Homestead Meats
Imagine the rich, smoky aroma of perfectly cured bacon, the tender pull of a smoked ham, or the succulent flavor of fish kissed by the gentle kiss of smoldering wood. Forget the bland, mass-produced meats from the grocery store – on the homestead, we believe in taking control of our food from start to finish. That includes preserving the bounty from our gardens and pastures with time-honored techniques like smoking.
Smoking meat isn't just a way to preserve food; it's an art form, a connection to our heritage, and a delicious way to enhance the flavors of our harvest. It offers self-sufficiency, significant cost savings compared to buying commercially smoked products, and the ability to control every ingredient that touches your food. No mystery additives or preservatives here!
In this comprehensive guide, we'll walk you through the process of building your very own DIY smokehouse. Whether you're a seasoned homesteader or just starting out, we'll provide step-by-step instructions, from planning and material selection to construction and safe smoking practices. We’ll cover a simple, budget-friendly design suitable for beginners, while also touching on considerations for those dreaming of a more elaborate smokehouse setup. Let's get started!

Section 1: Planning Your Smokehouse: Location, Size, and Materials
Before you start swinging a hammer, careful planning is crucial. The success of your smokehouse depends on several factors, including its location, size, and the materials you choose.
Location, Location, Location: Where you place your smokehouse matters.
- Wind Direction: Consider the prevailing wind direction in your area. You don't want smoke constantly blowing into your house or your neighbor's. Position the smokehouse downwind from your home.
- Distance from the House: Fire safety is paramount. Keep the smokehouse a safe distance from your house, barn, and other flammable structures. Check local fire codes for specific requirements.
- Accessibility: Choose a location that's easily accessible, even in inclement weather. You'll be hauling meat, wood, and equipment back and forth, so a convenient location is essential.
- Ground Stability: Ensure the ground is stable and well-drained. You don't want your smokehouse sinking or shifting over time.
Size Matters (Kind Of): The size of your smokehouse will depend on the quantity of meat you plan to smoke at one time.
- Start Small: If you're a beginner, it's better to start with a small, manageable smokehouse. You can always scale up later if needed.
- Consider Your Needs: Think about the size of the cuts of meat you'll be smoking (whole hams, slabs of bacon, etc.) and the number of people you'll be feeding.
Material World: A variety of materials can be used to build a smokehouse, each with its own advantages and disadvantages.
- Wood: Naturally rot-resistant woods like cedar, redwood, and oak are excellent choices. Avoid treated lumber, as it can release harmful chemicals when heated.
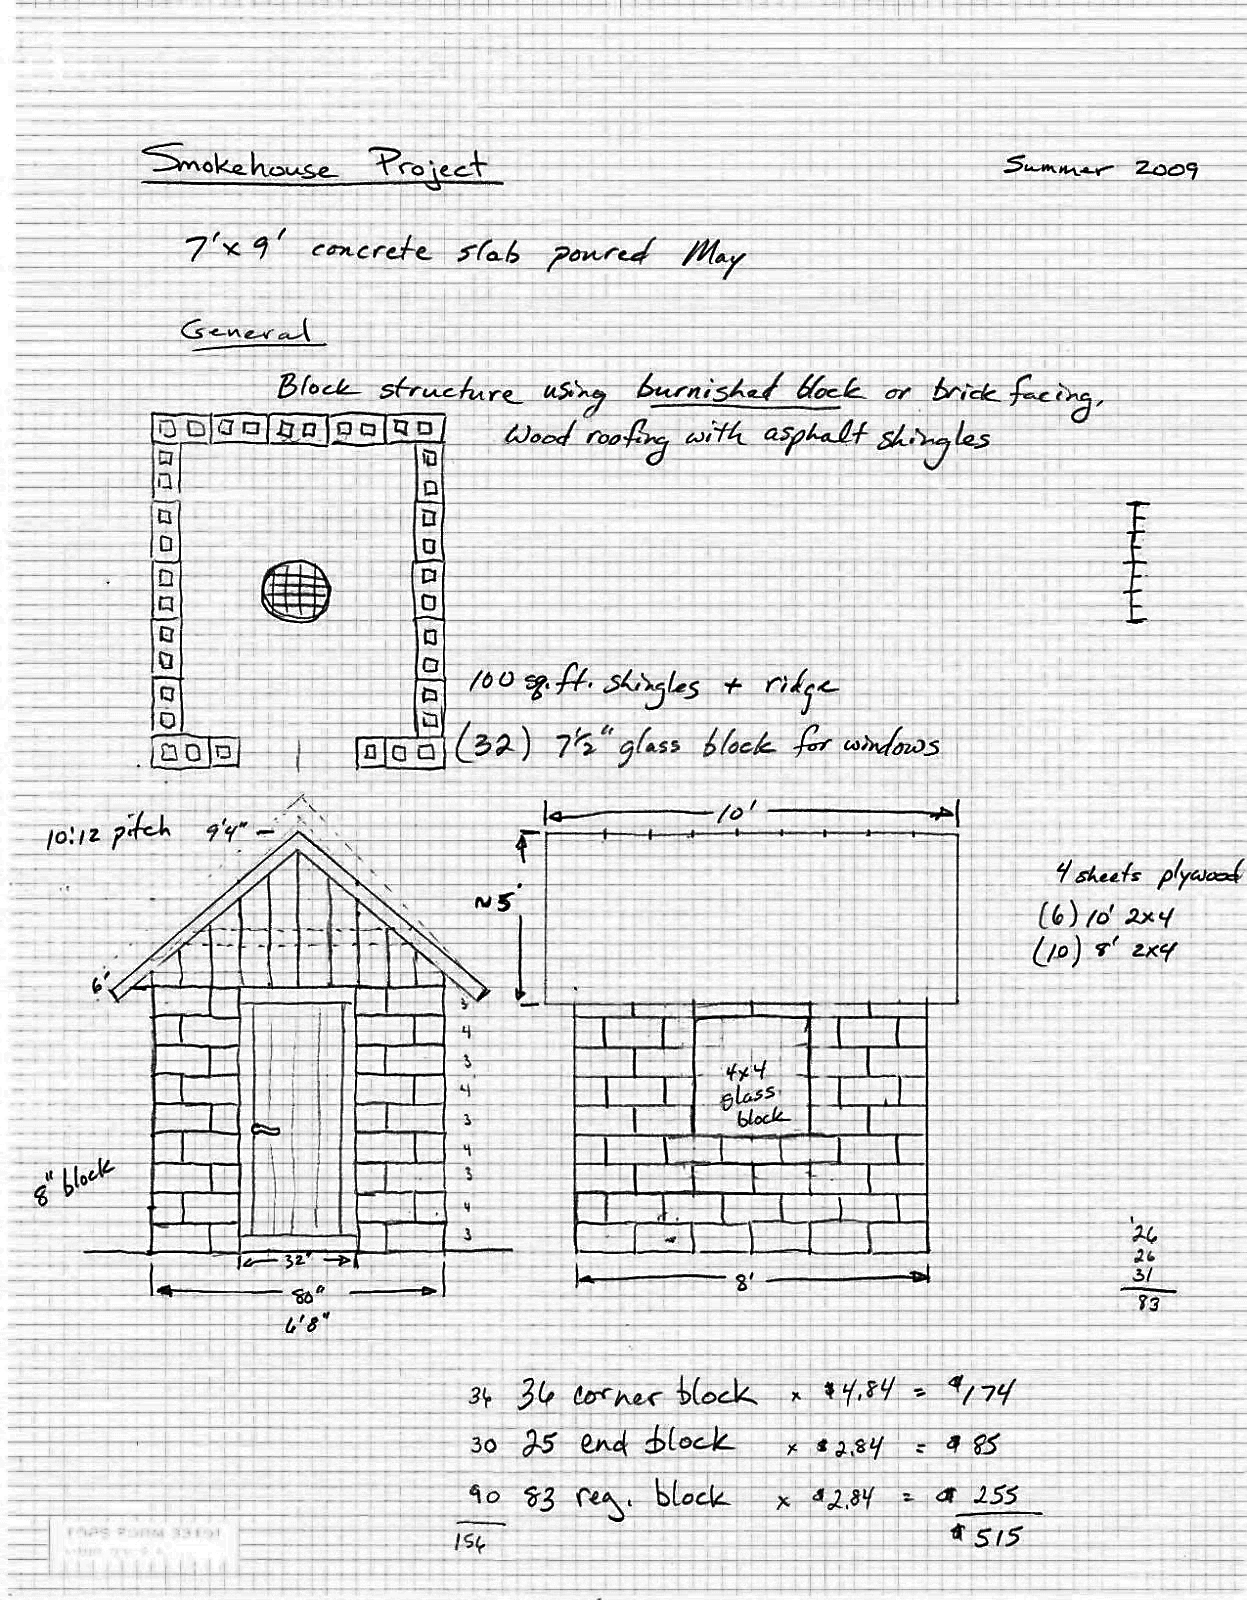
- Concrete Blocks: Durable and fire-resistant, concrete blocks are a good option for a more permanent smokehouse.
- Repurposed Materials: Old sheds, shipping containers, and even refrigerators (with modifications) can be repurposed into smokehouses. Be creative and resourceful!
- Sustainability Considerations: Choosing locally sourced or recycled materials reduces your environmental impact and saves money.
Building Codes and Regulations: Before you start construction, check with your local building department to see if any permits or inspections are required. Also, be aware of any fire safety regulations in your area.
Careful planning is the foundation of a successful smokehouse. Consider your needs, resources, and local regulations before you start building. A little planning now will save you a lot of headaches later.

Section 2: The Basic Structure: Building the Smokehouse Shell
Now that you've planned your smokehouse, it's time to start building! We'll focus on a basic shed-style smokehouse using lumber, as it's a relatively simple and affordable option.
Laying the Foundation: The foundation provides a stable base for your smokehouse.
- Gravel Base: A simple and cost-effective option. Clear the area, level the ground, and spread a layer of gravel for drainage.
- Concrete Slab: Provides a more solid and level foundation. Requires more work and materials but offers greater stability.
- Raised Platform: Keeps the smokehouse off the ground, preventing rot and pest infestations. Can be built using wood or concrete blocks.
Framing the Structure: The frame provides the skeleton of your smokehouse.
- Lumber Selection: Use pressure-treated lumber for the base frame to prevent rot. For the rest of the frame, untreated lumber is fine.
- Measurements: A basic 4'x4'x6' shed-style smokehouse is a good starting point. Adjust the dimensions to suit your needs.
- Construction: Build the frame using standard framing techniques. Use screws or nails to secure the lumber together. Ensure the frame is square and level.
Adding Siding: The siding encloses the frame and creates a smoke-tight seal.
- Material Options: Cedar siding is a good choice for its rot resistance and natural insulation. Pine siding is more affordable but requires more maintenance.
- Attachment: Attach the siding to the frame using nails or screws. Overlap the boards slightly to create a weather-tight seal.
- Insulation (Optional): In colder climates, consider adding insulation to the walls to help maintain a consistent temperature inside the smokehouse.
Roof Construction: The roof protects the meat from rain and snow.
- Simple Gable Roof: A simple and easy-to-build roof design.
- Materials: Use plywood or OSB for the roof sheathing and cover it with roofing felt and shingles.
- Ventilation: Install a vent at the peak of the roof to allow smoke to escape.
Focus on building a structurally sound and weather-resistant shell. Pay attention to sealing gaps to contain the smoke and prevent drafts.

Section 3: The Smoking Chamber: Racks, Vents, and Temperature Control
The smoking chamber is where the magic happens. Optimizing this space is crucial for even smoking and proper temperature control.
Installing Smoking Racks: Racks provide a platform for the meat and allow for adequate airflow.
- DIY Racks: Build your own racks using stainless steel or wood. Ensure the racks are strong enough to support the weight of the meat.
- Commercial Racks: Purchase pre-made smoking racks from a restaurant supply store.
- Spacing: Space the racks far enough apart to allow for good airflow around the meat.
Ventilation: Controlling the Smoke: Adjustable vents are essential for controlling the smoke and temperature inside the chamber.
- Placement: Install vents near the top and bottom of the smokehouse to create a natural convection current.
- Size: The size of the vents will depend on the size of your smokehouse. Start with small vents and enlarge them if needed.
- Adjustability: Ensure the vents can be easily opened and closed to control the smoke and temperature.
Temperature Gauge: Monitoring the Heat: A reliable temperature gauge is essential for monitoring the smoking process.
- Analog Thermometers: Affordable and easy to use.
- Digital Thermometers: More accurate and offer features like alarms and timers.
- Placement: Place the thermometer inside the smoking chamber, away from direct heat.
Hanging vs. Racks: Both methods have their advantages.
- Hanging: Ideal for larger cuts of meat like hams and sausages. Provides even smoking and allows for better airflow.
- Racks: Suitable for smaller cuts of meat like bacon and fish. Easier to load and unload.

Section 4: The Smoke Source: Fire Pit or Smoke Generator
The smoke source is the heart of your smokehouse. Choosing the right source and fuel is essential for flavor and safety.
Direct Fire Pit Method: A simple and traditional method.
- Construction: Build a fire pit separate from the smokehouse, connected by a trench or pipe.
- Safety: Use caution when working with open fires. Keep a fire extinguisher nearby and never leave the fire unattended.
- Cold Smoking: This method is ideal for cold smoking, where the meat is smoked at low temperatures (below 80°F).
Smoke Generator Options: Provides more controlled smoking.
- Electric Smoke Generators: Use an electric heating element to smolder wood chips.
- Gas Smoke Generators: Use a propane or natural gas burner to heat wood chips.
- Benefits: More consistent smoke and temperature, easier to control.
Wood Selection: The Flavor Factor: The type of wood you use will greatly affect the flavor of your smoked meat.
- Hardwoods: Hickory, oak, apple, cherry, and pecan are excellent choices.
- Softwoods: Avoid softwoods like pine and fir, as they contain resins that can impart a bitter taste to the meat.
- Experimentation: Try different types of wood to find your favorite flavor combinations.
Sawdust or Wood Chips: Fueling the Fire: Both sawdust and wood chips can be used to generate smoke.
- Sawdust: Produces a more consistent and smoldering smoke.
- Wood Chips: Provide a more intense and flavorful smoke.
- Control: Soak wood chips in water before adding them to the fire to slow down the burning process and produce more smoke.

Section 5: Safe Smoking Practices and Ongoing Maintenance
Safety is paramount when smoking meat. Follow best practices to prevent fires and ensure food safety.
Fire Safety: Prevention is Key:
- Clearance: Keep the area around the smokehouse clear of flammable materials.
- Fire Extinguisher: Have a fire extinguisher readily available.
- Supervision: Never leave the smokehouse unattended while the fire is burning.
Food Safety: Protecting Your Health:
- Handling: Wash your hands thoroughly before and after handling raw meat.
- Temperature: Use a meat thermometer to ensure the meat reaches a safe internal temperature.
- Storage: Store smoked meat properly to prevent spoilage.
Cleaning and Maintenance: Keeping Your Smokehouse in Top Condition:
- Creosote Buildup: Clean the smokehouse regularly to remove creosote buildup.
- Ventilation: Ensure the vents are clear and functioning properly.
- Repairs: Inspect the smokehouse regularly and repair any damage to the structure.
Pest Control: Rodents and insects can be a nuisance in the smokehouse.
- Sealing: Seal any cracks or holes in the structure to prevent pests from entering.
- Traps: Use traps to catch rodents and insects.
- Natural Repellents: Use natural repellents like peppermint oil or cedar chips to deter pests.
:max_bytes(150000):strip_icc()/smoker9faustman-9a5b81e577714097ac8972bbcbcd668a.jpg)
Conclusion: Enjoying the Fruits (and Meats) of Your Labor
Building your own DIY smokehouse is a rewarding project that will provide you with delicious, home-smoked meats for years to come. We've covered the key steps involved, from planning and construction to safe smoking practices.
Remember to start with a simple design, choose your materials carefully, and prioritize safety. Experiment with different types of wood and recipes to find your favorite flavor combinations.
The satisfaction of enjoying home-smoked meats with family and friends is unmatched. So, gather your tools, gather your materials, and get ready to embark on a delicious journey of self-sufficiency and culinary creativity. Happy smoking!

Call to Action:
What types of meat will you smoke first? Share your plans and any questions you have in the comments below!