From Drab to Coop: Converting Your Shed into a Luxurious Chicken Palace
Hey there, fellow homesteaders! Grab a mug of that homegrown chamomile tea, because today we're diving into a project that'll not only make your chickens cluck with joy, but also free up some valuable space in your yard: converting an underutilized shed into a deluxe DIY chicken coop! This isn't your basic beginner build; we're leveling up and tackling a project that requires a bit more planning and elbow grease, but the payoff is a sturdy, customized home for your feathered friends. Plus, it's a fantastic way to repurpose something you already have!
Many of us acquire sheds with grand intentions, only to have them slowly morph into glorified storage units for forgotten tools and holiday decorations. Why not give that forgotten structure a new lease on life and create a safe and comfortable haven for your flock? This shed to chicken coop conversion project is perfect for the experienced homesteader looking for a practical and rewarding DIY chicken coop build.
Assessing Your Shed and Planning Your Chicken Coop Design
Before you even think about picking up a hammer, you need to thoroughly assess your shed. Consider these factors:
- Size Matters: How many chickens are you planning to house? A good rule of thumb is 4 square feet per chicken inside the coop and 8-10 square feet per chicken in the run. Make sure your shed is large enough to comfortably accommodate your flock. Smaller breeds like bantams will require less space, while larger breeds like Jersey Giants will need more.
- Structural Integrity: Is the shed structurally sound? Check for rot, water damage, and insect infestations. Repair any issues before proceeding. Replacing a rotten sill plate now is much easier than dealing with a collapsing coop later.
- Location, Location, Location: Is the shed located in a suitable spot for a chicken coop? Consider sunlight, drainage, and proximity to your house (you'll want to be able to easily collect eggs and check on your chickens). Also, research your local ordinances regarding backyard chickens – some municipalities have restrictions on coop placement.
- Ventilation: Adequate ventilation is crucial for a healthy chicken coop. Chickens produce a lot of moisture, and a poorly ventilated coop can lead to respiratory problems. Plan for ventilation openings near the roofline.
- Predator Protection: This is paramount. Raccoons, foxes, hawks, and even neighborhood dogs can pose a threat to your chickens. Your coop needs to be Fort Knox for fowl.
Once you've assessed your shed, it's time to sketch out your chicken coop design. Consider the following elements:
- Nesting Boxes: Provide one nesting box for every 3-4 hens. A standard nesting box is about 12x12x12 inches.
- Roosting Bars: Chickens prefer to roost off the ground. Provide roosting bars at least 2 inches wide and spaced about 12 inches apart.
- Chicken Run: This is the outdoor area where your chickens can scratch, peck, and dust bathe. Enclose the run with sturdy wire mesh and consider burying the bottom to prevent digging predators.
- Access Door: You'll need a door to access the coop for cleaning and egg collection.
- Chicken Door (Pop Door): This is the small door that allows your chickens to enter and exit the coop.
Step-by-Step Guide to Converting Your Shed into a Chicken Coop
Alright, let's get down to business! Here's a detailed step-by-step guide to transforming your shed into a DIY chicken coop from shed.
Step 1: Cleaning and Preparation
- Empty the shed completely.
- Thoroughly clean the interior, removing any debris, cobwebs, and dust.
- Repair any structural damage, such as replacing rotten boards or reinforcing weak spots.
- Consider adding insulation to the walls and roof to help regulate temperature. This is especially important in areas with harsh winters or summers.
Step 2: Flooring (if needed)
If your shed has a dirt floor, you'll want to install a solid floor to prevent rodents and make cleaning easier.
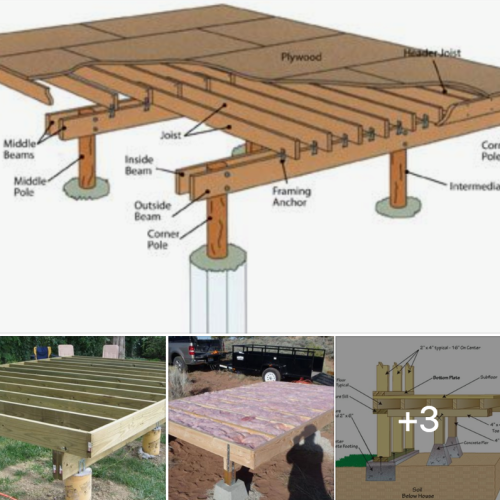
- Option 1: Plywood Floor: Frame a floor with pressure-treated lumber and cover it with plywood.
- Option 2: Concrete Slab: Pour a concrete slab for a durable and easy-to-clean floor. This is a more permanent option.
- Option 3: Existing Floor Reinforcement: If you already have a solid floor, inspect for any damage and reinforce as needed.
Step 3: Installing Ventilation
- Cut openings for ventilation near the roofline.
- Cover the openings with hardware cloth to prevent predators from entering.
- Consider installing a small fan to improve airflow during hot weather.
Step 4: Building Nesting Boxes
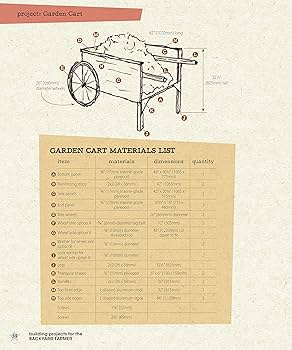
- Construct nesting boxes from plywood or reclaimed lumber.
- Place the nesting boxes in a quiet, dark corner of the coop.
- Line the nesting boxes with straw or wood shavings.
Step 5: Installing Roosting Bars
- Install roosting bars at least 18 inches off the ground.
- Space the roosting bars about 12 inches apart.
- Use sturdy lumber that can support the weight of your chickens.
Step 6: Creating the Chicken Door (Pop Door)
- Cut an opening in the wall for the chicken door. The size should be appropriate for your breed of chickens. 8x10 inches is a good general size.
- Install a door that can be easily opened and closed. You can use a simple sliding door or an automatic chicken door opener. Automatic door openers, like this one are becoming more popular.
Step 7: Building the Chicken Run
- Enclose the area around the shed with sturdy wire mesh. Hardware cloth is preferable to chicken wire as it offers better predator protection.
- Bury the bottom of the wire mesh at least 12 inches deep to prevent digging predators.
- Consider adding a roof to the run to provide shade and protection from the rain.
Step 8: Predator Proofing
- Reinforce any weak spots in the shed with hardware cloth.
- Install predator-proof latches on all doors and windows.
- Consider adding a motion-activated light to deter predators at night.
- Check coop regularly for any signs of predator activity (digging, chewing, etc.).
Step 9: Finishing Touches
- Add bedding to the floor of the coop (straw, wood shavings, etc.).
- Provide food and water for your chickens.
- Introduce your chickens to their new home!

Challenges and Solutions
Every DIY project comes with its own set of challenges. Here are a few common issues you might encounter and how to overcome them:
- Rotten Wood: If you find rotten wood, replace it immediately. Don't try to patch it up – it will only get worse.
- Uneven Ground: If the ground around your shed is uneven, you may need to level it before building the chicken run.
- Predator Problems: If you're having trouble with predators, consider adding extra layers of protection, such as electric fencing.
- Ventilation Issues: If your coop is too hot or humid, add more ventilation openings.
Safety Precautions
Safety should always be a top priority when undertaking any DIY project. Here are a few safety precautions to keep in mind:
- Wear safety glasses and gloves when working with power tools.
- Use a dust mask when working with wood or insulation.
- Be careful when lifting heavy objects.
- Disconnect power tools before making any adjustments.
Cost-Effective Chicken Coop Design Using Repurposed Materials
One of the best parts of a DIY chicken coop from shed project is the opportunity to save money by using repurposed materials. Look for reclaimed lumber, old windows, and recycled hardware. You can often find these materials for free or at a fraction of the cost of new materials. Using repurposed materials not only saves money, but it also reduces waste and gives your chicken coop a unique and rustic look.
Optimizing for Search Engines (SEO)
Remember to incorporate relevant keywords throughout your blog post to improve its search engine ranking. Use keywords like "DIY chicken coop," "shed to chicken coop conversion," "backyard chicken coop," and "chicken coop plans" naturally throughout your content.
Final Thoughts
Converting a shed into a chicken coop is a rewarding project that can save you money and provide your chickens with a safe and comfortable home. With careful planning and a little bit of elbow grease, you can transform that forgotten shed into a luxurious chicken palace. So, what are you waiting for? Get out there and start building!
Now it's your turn! Have you ever converted a shed into a chicken coop? Share your experiences, tips, and photos in the comments below! Don't forget to tag @BetterHomesAndHarvests when you post on social media using the hashtag #HomesteadDIY. We can't wait to see your amazing creations!