From Cluck to Comfort: Building a Budget-Friendly and Beautiful DIY Chicken Run
Raising chickens is a rewarding experience, bringing fresh eggs, natural pest control, and a touch of homestead charm to your backyard. But keeping your feathered friends safe and happy is paramount. Predators, harsh weather, and boredom can all impact their well-being and egg production. The solution? A well-designed and sturdy chicken run!
Building a chicken run might seem daunting, but it doesn't have to break the bank or require advanced carpentry skills. With some planning, creativity, and repurposed materials, you can create a secure and aesthetically pleasing space for your flock that also enhances the beauty of your homestead. This guide will walk you through building a DIY chicken run that's both budget-friendly and predator-proof, ensuring the safety and happiness of your backyard chickens. Plus, we'll share tips on making it a beautiful addition to your property.

Why Build a Chicken Run?
Before we dive into the "how," let's quickly recap the "why." A well-built predator-proof chicken run offers several crucial benefits:
- Enhanced Chicken Safety: Protection from foxes, hawks, raccoons, dogs, and other potential threats.
- Increased Egg Production: Happy and secure chickens lay more consistently. Stress-free environments are key!
- Aesthetically Pleasing Design: A thoughtfully designed run can complement your garden and add to your homestead's charm.
- Cost Savings: Repurposed and readily available materials minimize expenses.
- Personal Satisfaction: The joy of creating something useful and beautiful with your own two hands is incredibly rewarding!
Planning Your Chicken Run: Size, Location, and Design
Before you start hammering, consider these crucial factors:
- Size: A general rule of thumb is at least 8-10 square feet per chicken in the run. More space is always better! Consider the mature size of your breed.
- Location: Choose a well-drained area, preferably with some shade to protect your chickens from the summer heat. Proximity to the chicken coop is also important for easy access.
- Layout: Think about the shape and configuration. A rectangular or square run is typically the easiest to build. Consider incorporating existing features like fences or trees.
- Budget: Determine how much you're willing to spend. Repurposed materials are your best friend when building a budget chicken run.
- Predator Pressure: Assess the types of predators common in your area. This will determine the strength and security of your run's construction.
Materials List: Building on a Budget
Here's a materials list for a basic DIY chicken run. Prices are approximate and will vary depending on your location and material choices. Look for salvaged or repurposed options whenever possible.
- Lumber:
- 4x4 pressure-treated posts (for corners and support): $10-$20 each (6-8 posts depending on size)
- 2x4 lumber (for framing): $5-$10 each (quantity depends on size)
- Wire Mesh:
- Hardware cloth (1/2 inch or smaller): $50-$100 per roll (choose based on run size – this is crucial for predator protection!)
- Fasteners:
- Screws (exterior grade)
- Staples (for attaching wire mesh)
- Gate Hardware:
- Hinges
- Latch (ideally a locking latch)
- Optional:
- Repurposed doors or windows (for adding character and ventilation)
- Gravel or wood chips (for flooring)
- Paint or stain (for aesthetics)
- Chicken wire (for extra barrier if needed)
Consider checking local classifieds, construction sites (with permission!), and salvage yards for affordable lumber and other materials. Repurposed materials are your best friend!

Step-by-Step Guide: Constructing Your Chicken Run
Safety First: Wear safety glasses, gloves, and appropriate clothing when working with tools and materials.
Step 1: Mark the Area and Dig Post Holes
- Clearly mark the perimeter of your chicken run.
- Dig post holes at each corner and every 6-8 feet along the sides. The depth of the holes should be at least 2 feet, or even deeper in areas with frost.
Step 2: Set the Posts
- Place the 4x4 posts into the holes.
- Ensure they are plumb (perfectly vertical) using a level.
- Pour concrete around the base of each post to secure them. Let the concrete cure completely according to the manufacturer's instructions.
Step 3: Build the Frame
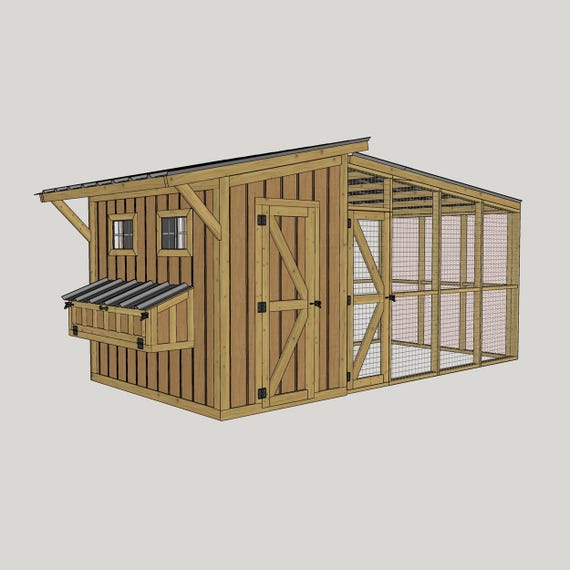
- Attach the 2x4 lumber horizontally between the posts to create a frame.
- Use screws for a strong and durable connection.
- Consider adding a bottom frame piece directly on the ground or slightly buried to deter digging predators.
Step 4: Attach the Wire Mesh
- This is the most important step for predator-proofing. Use heavy-duty hardware cloth, not just chicken wire (chicken wire is designed to contain chickens, not keep predators out).
- Start at one corner and unroll the mesh along the frame.
- Use a staple gun to securely attach the mesh to the frame, overlapping edges slightly.
- Bury the bottom edge of the hardware cloth at least 6 inches into the ground to prevent digging. Consider adding an "apron" of hardware cloth that extends outward from the base of the run, further deterring diggers.
Step 5: Build and Install the Gate
- Construct a simple gate using 2x4 lumber and wire mesh.
- Attach hinges to one of the posts and the gate frame.
- Install a secure latch. A locking latch is highly recommended to keep predators out.
Step 6: Add Flooring (Optional)
- Consider adding a layer of gravel or wood chips to the floor of the run. This will improve drainage and make it easier to clean.
Step 7: Add Creature Comforts
- Provide dust bathing areas with sand or dirt.
- Add perches made from branches or scrap lumber.
- Consider a small shelter within the run for shade and protection from the rain.

Tips and Tricks for Customization
- Incorporate Existing Structures: If you have an existing fence, you can use it as part of your run, saving you time and money.
- Vertical Space: Add vertical elements like climbing structures or hanging feeders to keep your chickens entertained.
- Plant Vegetation: Consider planting chicken-safe plants inside or around the run to provide shade and foraging opportunities.
- Repurposed Materials: Get creative! Old windows can be used for ventilation, pallets can be disassembled for lumber, and scrap metal can be used for roofing.
Making it Beautiful: Aesthetic Touches
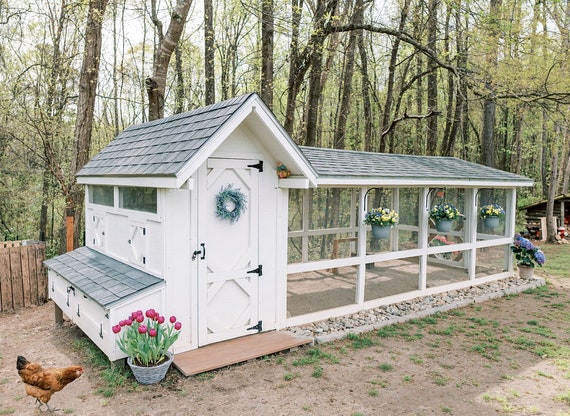
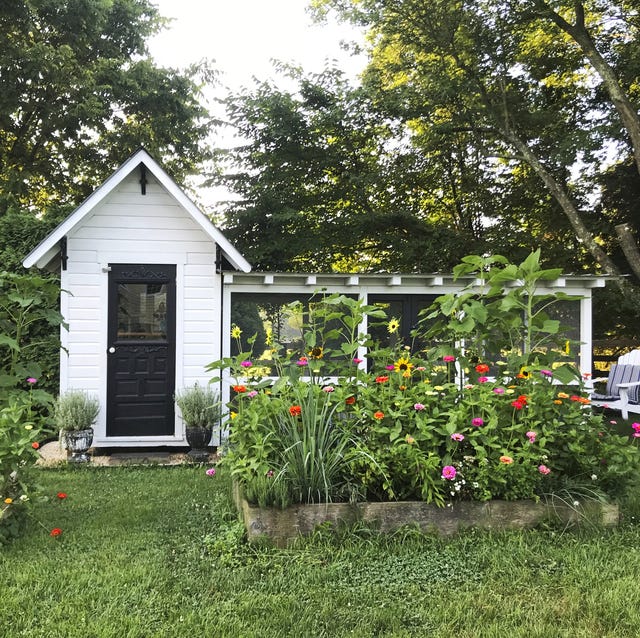
A functional chicken run doesn't have to be an eyesore! Here are some ideas for making your aesthetic chicken run a beautiful addition to your homestead:
- Paint or Stain: Choose a color that complements your house or garden.
- Add Decorative Elements: Hang planters, add fairy lights, or incorporate decorative stones.
- Build a Trellis: Train climbing plants to grow up the sides of the run.
- Incorporate Vintage Finds: Repurpose old garden tools or furniture as decorative accents.

The Joy of Homesteading: A Worthwhile Project
Building a DIY chicken run is a rewarding homesteading project that offers numerous benefits for you and your flock. It’s a chance to exercise your creativity, save money, and create a safe and happy environment for your chickens. By using repurposed materials and following these steps, you can build a run that's not only functional but also a beautiful addition to your backyard.
Now it's your turn! Gather your materials, put on your thinking cap, and embark on your chicken run building adventure. Don't be afraid to adapt these plans to fit your specific needs and preferences. Share your experiences and photos in the comments below – we'd love to see your creations!
For more homesteading tips and inspiration, subscribe to the Better Homes and Harvests newsletter today!