Fresh Herbs All Winter: A Guide to Indoor Herb Gardening Success
The first frost has kissed your garden goodbye, leaving behind a landscape of muted browns and skeletal branches. The vibrant greens and enticing aromas of summer feel like a distant memory. But what if you could recapture a touch of that warmth and flavor inside your home, even amidst the winter chill? While outdoor gardening might be on hold, growing herbs indoors offers a fantastic solution. It brings a burst of freshness to your winter cooking, fills your home with delightful fragrances, and provides a much-needed dose of green to brighten even the grayest days. While basil and mint are staples, this guide will delve deeper, showing you how to cultivate a variety of less common herbs indoors, propagate them to expand your collection, and transition your garden favorites inside for continued enjoyment. Get ready to transform your kitchen windowsill into a thriving winter herb oasis!

A snow-covered window box shows the stark contrast between the winter landscape outside and the promise of green growing indoors. The image illustrates the appeal of bringing a touch of summer into the home during the colder months.
Beyond the Basics: Uncommon Herbs for Indoor Growing
While basil, mint, and parsley are reliable choices for indoor herb gardens, venturing beyond these familiar faces can significantly enhance your culinary repertoire and add unique dimensions to your indoor greenery. These lesser-known herbs offer distinct flavor profiles and can thrive beautifully in the controlled environment of your home.
Lemon Verbena: If you adore the bright, citrusy scent of lemon, lemon verbena is a must-have. Its leaves boast an intense lemon fragrance that infuses teas, desserts, and even savory dishes with a refreshing twist. This herb appreciates bright, indirect sunlight and well-drained soil. Avoid overwatering, as it's susceptible to root rot. Pinch back the tips regularly to encourage bushier growth and prevent it from becoming leggy.

Terracotta pots containing Lemon Verbena, Chervil, and Ginger sit on a windowsill, showcasing a diverse selection of herbs for indoor growing. This image highlights the variety of flavors and fragrances you can cultivate within your home.Chervil: With its delicate, anise-like flavor, chervil adds a sophisticated touch to salads, egg dishes, and sauces. It's a cool-season herb that actually prefers slightly shadier conditions compared to some of its sun-loving counterparts. Consistent moisture is key, but avoid letting the soil become waterlogged. Its flavour is ruined by drying, and freezing is only somewhat more successful; thus, growing indoors provides access to fresh Chervil year round!
Ginger: For a touch of warmth and spice, consider growing ginger indoors. Start with a fresh ginger rhizome (the "root" that you buy in the grocery store) that has visible "eyes" (small buds). Plant it in a pot filled with well-draining potting mix, burying it just below the surface. Ginger thrives in warm, humid conditions and needs consistent moisture. Place the pot in a location with bright, indirect sunlight. It can take several months for ginger to mature enough to harvest, but the wait is well worth it for the fresh, pungent flavor it adds to your cooking.
Expand your herb garden beyond the ordinary for unique flavors and year-round enjoyment. Experiment with these less common herbs to discover new culinary favorites and add a touch of intrigue to your indoor garden.
Propagation Secrets: Expanding Your Indoor Herb Collection
Why limit yourself to store-bought herb starts when you can easily expand your indoor garden through propagation? Propagating your own herbs is not only a cost-effective way to increase your collection but also a rewarding experience that connects you more deeply to the growing process. You can propagate through cuttings, seeds, and layering.
Let's focus on propagating rosemary from cuttings, a simple yet effective method:
- Take a Cutting: In late spring or early summer, use sharp, sterile pruners to take a 4-6 inch cutting from a healthy rosemary plant. Choose a stem that is not flowering.
- Prepare the Cutting: Remove the leaves from the bottom inch or two of the cutting.
- Rooting Hormone (Optional): Dip the cut end of the stem in rooting hormone powder to encourage root development.
- Planting: Insert the cutting into a small pot filled with a well-draining potting mix.
- Humidity: Create a humid environment by covering the pot with a clear plastic bag or humidity dome. This helps to prevent the cutting from drying out before it develops roots.
- Location: Place the pot in a location with bright, indirect sunlight.
- Watering: Keep the soil consistently moist, but not waterlogged.
- Patience: Roots typically develop within 4-8 weeks. You can gently tug on the cutting to check for resistance, which indicates root growth.
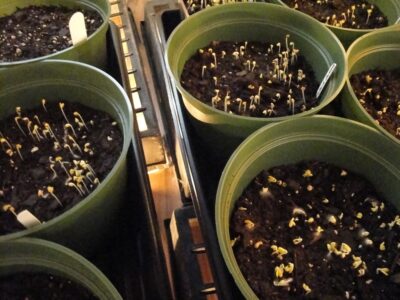
Hands carefully propagating a rosemary cutting, demonstrating the process of expanding your indoor herb collection. This image showcases a sustainable and rewarding way to grow your own herbs.
Propagating chives from division is also simple! Gently lift an established chive plant from its pot and carefully separate the bulb clusters. Replant each cluster in its own pot.
Always remember to use sterile tools and a clean potting mix to prevent the spread of diseases.
Transitioning Your Garden Herbs Indoors
Before the first frost threatens your outdoor herb garden, it's time to think about transitioning your favorite plants indoors. This process requires careful planning and execution to ensure that your herbs adapt successfully to their new environment.
- Selection: Choose healthy, pest-free plants to bring indoors. Avoid plants that show signs of disease or infestation.
- Preparation: Trim back the plants to about one-third of their original size. This reduces the amount of foliage that the plant needs to support, making it easier for it to adjust to indoor conditions. Also, inspect the plants carefully for any pests, such as aphids or spider mites. Treat any infestations with insecticidal soap or neem oil before bringing the plants indoors.
- Potting: Choose pots that are appropriately sized for the plants. Use a high-quality potting mix that drains well.
- Acclimation: Gradually acclimate the plants to indoor conditions by bringing them inside for a few hours each day, gradually increasing the amount of time they spend indoors over the course of a week or two. This helps them to adjust to the lower light levels and humidity levels indoors.
Garden herbs are being moved into pots, ready for transition indoors. This image represents the process of extending the life of your outdoor herbs by bringing them inside before the frost.
One common issue is leaf drop, which can occur when plants are suddenly exposed to lower light levels. To prevent this, provide supplemental lighting with grow lights. Another common issue is pest infestations. Monitor your plants regularly and treat any infestations promptly.
Creating the Ideal Indoor Herb Growing Environment
Optimizing the indoor environment is essential for the health and productivity of your herbs. Here’s how to mimic their ideal growing conditions inside:
- Light: Most herbs require at least 6 hours of sunlight per day. If you don't have a sunny windowsill, supplement with grow lights. LED grow lights are energy-efficient and provide the full spectrum of light that plants need.
- Watering: Water your herbs when the top inch of soil feels dry to the touch. Avoid overwatering, which can lead to root rot.
- Humidity: Indoor air can be very dry, especially during the winter months. Increase humidity by grouping plants together, using pebble trays filled with water, or running a humidifier.
- Fertilizing: Feed your herbs with an organic fertilizer every 2-4 weeks.
- Pest Control: Use natural pest control methods, such as neem oil or insecticidal soap, to control pests.
- Temperature: Maintain an indoor temperature between 60-75°F (15-24°C).
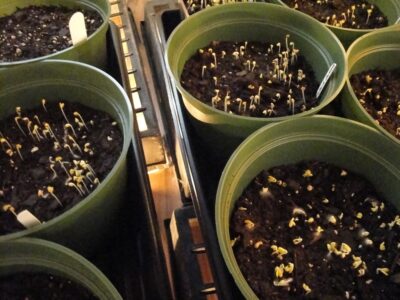
Grow lights illuminate an indoor herb garden, highlighting the importance of supplemental lighting for healthy herb growth during winter. This image shows how to create an ideal environment for your indoor herbs.
A Winter Garden Oasis
Transforming your kitchen windowsill into a thriving winter herb garden is not only possible but also incredibly rewarding. By selecting a variety of uncommon herbs, mastering propagation techniques, transitioning your garden favorites indoors, and optimizing the growing environment, you can enjoy fresh, flavorful herbs throughout the winter months. The aroma of lemon verbena, the delicate taste of chervil, and the warmth of ginger will bring a touch of summer into your winter kitchen, brightening your meals and your spirits. Remember that proper care in winter will lead to a bountiful herb garden in the spring.
A cozy kitchen with herbs growing on the windowsill, with a steaming cup nearby, capturing the comfort and warmth that an indoor herb garden brings to the home during winter.
What herbs are you most excited to grow indoors this winter? Share your experiences and tips in the comments below! And don't forget to share photos of your indoor herb gardens on social media using #BHGHWinterHerbs. Check out our other great gardening articles for more tips!