Fix It, Don't Nix It: The Homesteader's Guide to Tool Repair & Upcycling
Remember that old shovel your grandfather used? The one with the slightly wobbly handle but that perfect curve for digging in your garden? Mine broke last spring. I was devastated. My initial reaction was to head to the hardware store for a shiny, new replacement. But something stopped me. It wasn't just the price tag. It was the thought of tossing something with so much history, something so useful, into the landfill. That’s when I decided to try and fix it. And you know what? I'm so glad I did.
That’s intentional homesteading in a nutshell: choosing repair over replacement, valuing durability over disposability, and respecting the resources we have. In this blog post, we'll explore the art of tool repair and upcycling, showing you how to save money, reduce your environmental impact, and build a more self-sufficient homestead by giving new life to your trusty tools. We'll cover everything from basic repair techniques to creative upcycling ideas, so you can keep your tools working hard for years to come. We will also focus on "tool restoration", "DIY tool repair", and "sustainable homesteading".

Section 1: Why Repair & Upcycle Tools? A Homesteader's Ethos
Repairing and upcycling tools isn’t just about saving money (though it certainly helps!). It’s about embracing a core set of values that are central to the homesteading lifestyle: sustainability, frugality, skill-building, and respecting the past.
Sustainability: The environmental impact of manufacturing new tools is significant. Mining raw materials, manufacturing processes, transportation – it all contributes to resource depletion, carbon emissions, and waste. By repairing a tool, you're drastically reducing your footprint. Think about it: that new shovel requires steel forged in a blast furnace, likely powered by coal. Your repaired shovel simply needs a new handle.
Frugality: The cost savings can be substantial. A brand-new high-quality shovel might set you back $50 or more. A replacement handle? Perhaps $15. Even with the cost of a new handle, you're saving money and extending the life of your tool. Over time, these savings add up significantly, freeing up resources for other homesteading projects.
Building Skills: Learning to repair tools is empowering. It fosters self-reliance and a deeper understanding of how things work. Instead of relying on others or simply buying a new replacement, you're developing valuable skills that you can use throughout your homesteading journey. Think of it as another skill to master and pass on to future generations.
Honoring the Past: Old tools often have stories to tell. They represent the hard work and dedication of previous generations. Repairing these tools isn’t just about functionality; it's about honoring their history and keeping their legacy alive. My grandfather's shovel wasn't just a tool; it was a connection to his love for the land.
Reducing Consumption: In a society obsessed with newness, choosing to repair is a radical act. It's a conscious decision to resist the cycle of consumerism and appreciate the value of what you already own. We are already overloaded with "stuff," so make the most of what you already have.

Section 2: Essential Tools and Supplies for Repair
Before you start tackling those tool repairs, you'll need a basic set of tools and supplies. Here's a rundown of the essentials:
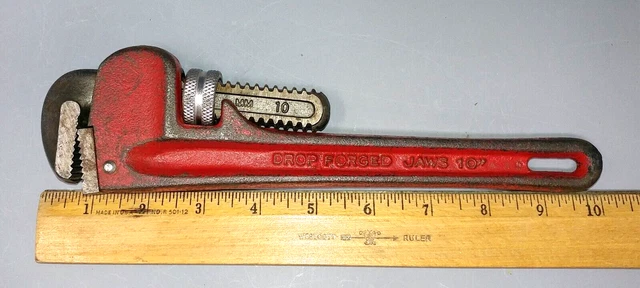
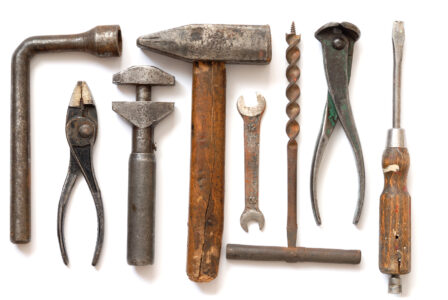
Basic Hand Tools: A good set of screwdrivers (Phillips and flathead), pliers (various sizes), wrenches (adjustable and socket set), a hammer, and a selection of files are essential for most repair jobs. These will allow you to disassemble, tighten, and shape components as needed.
Cleaning Supplies: Rust is a tool's worst enemy. Invest in wire brushes (various sizes and materials), rust remover (chemical or natural options like vinegar), and degreasers to clean and prepare tools for repair. WD-40 works great for loosening stubborn parts.
Lubricants: Keeping your tools properly lubricated is crucial for preventing rust and ensuring smooth operation. Stock up on WD-40 (for general lubrication), penetrating oil (for loosening rusted bolts), and grease (for lubricating moving parts).
Fasteners: It's always a good idea to have a selection of replacement screws, nuts, bolts, and rivets on hand. That way, when you encounter a missing or broken fastener, you can quickly replace it without having to make a trip to the hardware store.
Safety Gear: Don't forget about safety! Always wear safety glasses to protect your eyes from flying debris, gloves to protect your hands, and a dust mask to avoid inhaling harmful particles. Safety first, always!

Section 3: Step-by-Step Repair Techniques (with Specific Examples)
Now, let's dive into some specific repair techniques. These are some common issues you might encounter and how to fix them:
Cleaning and Assessment: Start by thoroughly cleaning the tool. Use a wire brush, rust remover, or degreaser to remove dirt, rust, and grime. This will reveal the true condition of the tool and make it easier to identify the problem. Look for broken parts, rust, misalignment, or other issues.
Sharpening Blades: Dull blades make tools inefficient and even dangerous. Learn how to sharpen common bladed tools like axes, knives, shovels, and pruners using a whetstone or sharpening steel. There are plenty of tutorials online to guide you.
Removing Rust: Rust can weaken tools and make them difficult to use. There are several methods for removing rust, including chemical rust removers, mechanical methods (using a wire brush or sandpaper), and electrolytic rust removal (using baking soda and a battery charger).
Replacing Handles: A broken handle is a common problem. Replacing handles on axes, hammers, and other tools is a relatively simple process that can significantly extend the life of the tool. You'll need a replacement handle, a hammer, and possibly a chisel. Pay attention to how it's done, the proper angle, and any safety precautions you need to be aware of.
Lubricating Moving Parts: Regularly lubricating moving parts will prevent rust and ensure smooth operation. Apply WD-40, penetrating oil, or grease to hinges, joints, and other moving parts.
Repairing Wooden Handles: Cracks in wooden handles can be repaired with wood glue and clamps. Clean the crack, apply glue liberally, clamp the handle tightly, and allow the glue to dry completely.
![Close-up photo of a hand sharpening an axe blade with a whetstone]
Section 4: Upcycling Tools: Giving New Life to Old Gear
Sometimes, a tool is beyond repair, but that doesn't mean it's destined for the landfill. Upcycling is a fantastic way to give new life to old gear and add a unique touch to your homestead.
Repurposing Broken Tools: Turn broken shovels into garden art, create a coat rack from old rakes, or use old gardening tools as decorative accents in your garden. Let your imagination run wild!
Combining Tools: Combine parts from different tools to create something new. For example, you could use an old shovel head to create a decorative wall hanging or combine the handles of two broken hoes to make a longer-handled tool.
Adding New Features: Add new features to existing tools to improve their functionality. For example, you could add a longer handle to a garden trowel for easier use or add a grip to a slippery tool handle.
Safety Considerations for Upcycling: Always prioritize safety when working with power tools and sharp objects during upcycling projects. Wear safety glasses, gloves, and a dust mask.
![An upcycled shovel head, painted and decorated, hanging on a fence as garden art.]
Section 5: Finding Resources and Inspiration
Ready to dive deeper into the world of tool repair and upcycling? Here are some resources to help you get started:
Online Forums and Communities: Join online forums and communities dedicated to tool repair and upcycling. These communities are a great place to ask questions, share tips, and find inspiration.
YouTube Tutorials: YouTube is a treasure trove of repair and upcycling tutorials. Search for specific repair techniques or browse channels dedicated to DIY and homesteading.
Local Libraries and Workshops: Check your local libraries and community centers for repair workshops. These workshops offer hands-on training and guidance from experienced instructors.
Apprenticeship: Look for people who are skilled in tool repair and upcycling, and ask to learn from them. You can never know enough.
Conclusion:
Repairing and upcycling tools isn't just a practical skill; it's a mindset. It's about valuing what we have, embracing resourcefulness, and connecting with the history and heritage of homesteading. By choosing to fix it instead of nixing it, you're not only saving money and reducing your environmental impact, but also building a more self-sufficient and meaningful life. So, next time a tool breaks, resist the urge to throw it away. Take a closer look, see what you can learn, and give it a second chance. You might be surprised at what you can accomplish.
Call to Action: Share your favorite tool repair or upcycling tip in the comments below! We’d love to hear about your experiences and learn from your expertise. Let's build a community of resourceful homesteaders, one repaired tool at a time.