Fire Up Your Homestead: A Beginner's Guide to Cob Oven Construction

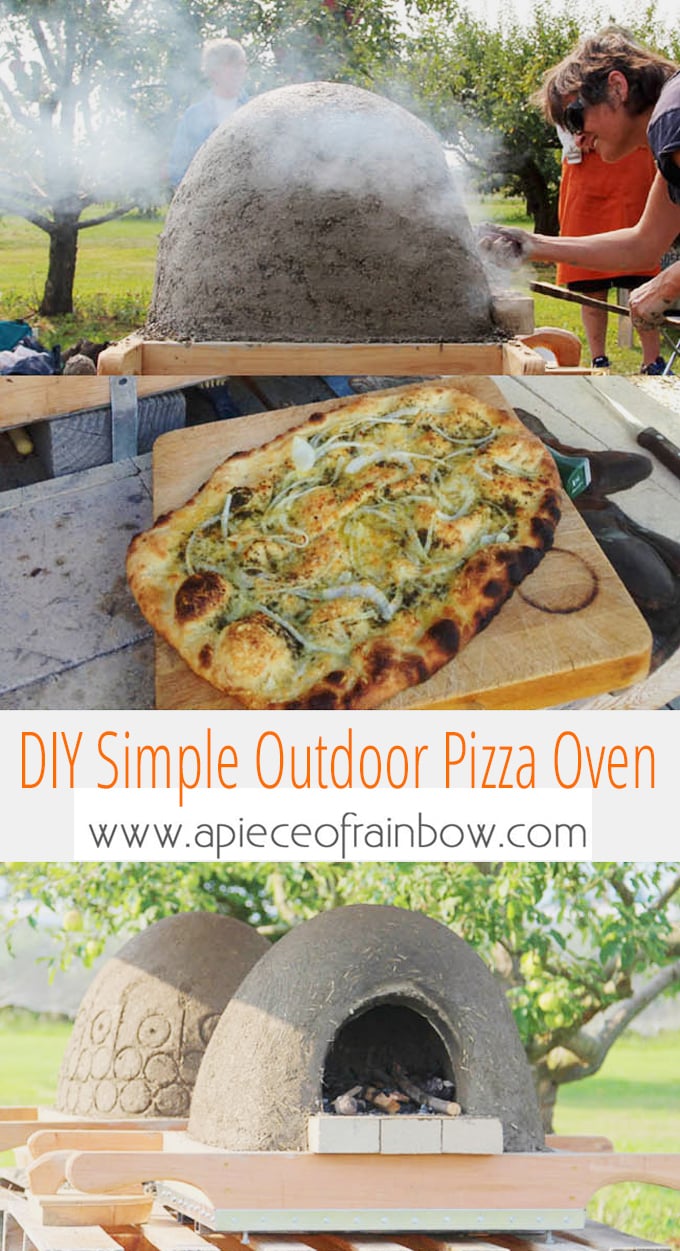
Imagine sinking your teeth into a perfectly crisp pizza, the smoky aroma mingling with the fresh scent of herbs from your garden. Now, imagine that pizza was baked in an oven you built yourself, using nothing but earth, sand, and straw. That's the magic of a cob oven – a sustainable, affordable, and incredibly rewarding project for any homesteader.
For centuries, humans have harnessed the power of earth ovens to bake bread, roast meats, and create culinary masterpieces. These ovens, built from a mixture of clay, sand, and straw (known as cob), offer a unique cooking experience, imparting a distinct flavor and retaining heat for hours. And the best part? Building one is surprisingly simple, even for beginners.
In this guide, we'll walk you through every step of constructing your own cob oven, transforming your homestead into a haven of self-sufficient cooking. We’ll cover everything from site selection and material gathering to the first firing and maintenance, ensuring you have all the knowledge you need to create a functional and beautiful addition to your outdoor space. Get ready to embrace the joy of cooking with fire and earth – let's get building!
Section 1: Planning and Preparation

Careful planning is the cornerstone of any successful homesteading project. Before you start mixing cob, take the time to consider these essential elements:
Site Selection: Choosing the right location for your cob oven is crucial. You'll want a spot that's relatively close to your kitchen or garden for convenience, but also far enough away from your house to minimize fire risk. A level surface is essential for a stable base. Consider prevailing winds and whether you'll need some form of shelter to protect the oven from rain and snow. Make sure the ground can support the weight of the base and oven.
Materials Gathering: The beauty of a cob oven lies in its simplicity and reliance on natural, locally sourced materials. Here's what you'll need:
- Clay Soil: This is the binder that holds everything together. You'll need to test your soil to ensure it has a high clay content. A simple jar test – shaking soil with water and letting it settle – will reveal the proportion of clay, sand, and silt. Look for soil with at least 30% clay. If your soil is lacking, you may need to source clay from a local supplier.
- Sand: Sand provides structure and prevents the cob from cracking. Use coarse builder's sand, avoiding beach sand, which contains salt.
- Straw (or other fibrous material): Straw acts as a reinforcement, adding tensile strength to the cob. Wheat straw is ideal, but other options include hay, rice husks, or even shredded paper.
- Bricks or Stone for the Base: Reclaimed bricks or stones are a great way to reduce costs and add character. You can also use concrete blocks.
- Water: For mixing the cob.
- Mold for the Door: A wooden frame or cardboard box can serve as a temporary mold to create the door opening.
Approximate costs for these materials will vary depending on your location and whether you're using reclaimed materials. Reclaimed materials are key to keeping costs down! Check with local suppliers such as garden centers or home improvement stores or classified sites for used or reclaimed materials.
Tool Inventory: You don't need a lot of fancy tools to build a cob oven. Here are the essentials:
- Shovels
- Buckets
- Tarps
- Gloves
- Measuring tape
- Level
- Trowel
Design Considerations: Before you start building, determine the size of your oven based on your cooking needs. A smaller oven will heat up faster and be more fuel-efficient, while a larger oven will allow you to bake more items at once. Sketch out your plans and dimensions, including the diameter of the oven dome and the size of the door opening.
By carefully planning and gathering your materials beforehand, you'll set yourself up for a smooth and successful cob oven building experience.
Section 2: Building the Base

A solid, well-insulated base is the foundation of your cob oven. It prevents cracking, ensures stability, and helps retain heat. Here's how to build it:
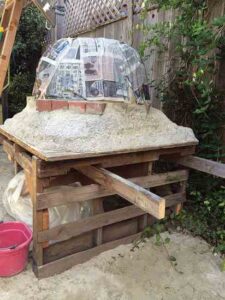
Foundation Construction: Start by creating a level foundation using bricks, stones, or reclaimed concrete. This foundation should be at least 12 inches high to protect the oven from moisture and ground-level temperature fluctuations. Use mortar to secure the bricks or stones together, creating a stable and durable base. The base dimensions should be larger than the footprint of your oven dome.
Creating a Level Surface: Use a level to ensure that the top surface of the base is perfectly level. This is crucial for even heat distribution and optimal oven performance. If the surface is uneven, add mortar or shims to create a level plane. Use a bubble level to verify that the surface is horizontally level or make necessary adjustments.
Adding Insulation (Optional): Insulating the base will significantly improve heat retention. You can use materials like perlite, vermiculite, or even recycled glass bottles. Layer these materials on top of the base, creating a barrier between the ground and the oven floor. Aim for a layer of insulation at least 4-6 inches thick.
With a sturdy and insulated base in place, you're ready to move on to the most exciting part – building the oven dome!
Section 3: Constructing the Oven Dome

The oven dome is where the magic happens. Here's how to create it using a sand mold and layers of cob:
Creating the Sand Mold: The sand mold provides a temporary form for the oven dome. Create a mound of sand on top of the base, shaping it into a dome that is slightly smaller than your desired oven size. Wet the sand thoroughly and compact it firmly to create a stable form that will hold its shape. Smooth the surface of the sand mold to create a smooth interior for your oven. The exact dimensions of the sand mold will depend on your desired oven size, but a typical diameter is around 30-36 inches.
Applying the First Cob Layer: Now, it's time to mix your cob. A good ratio is typically 1 part clay soil, 2 parts sand, and 3 parts straw. Add water gradually and mix thoroughly, until the cob reaches a consistency similar to stiff mud. The cob should be sticky enough to hold its shape, but not so wet that it sags.
Apply the first layer of cob evenly over the sand mold, aiming for a thickness of about 4-6 inches. Pack the cob firmly, ensuring that it adheres to the sand and forms a solid shell. This layer will provide the structural integrity of the oven dome. Allow this layer to dry completely before proceeding to the next step.
Adding Subsequent Layers: Once the first layer is dry, you can add subsequent layers of cob to build up the dome walls. Gradually shape the dome, adding more cob to the top and sides to create the desired form. Reinforce the cob with more straw to increase its strength and prevent cracking. Aim for a final wall thickness of at least 8-10 inches for optimal heat retention.
Door Arch: Creating a sturdy arch for the oven door is essential for structural support. Use a temporary form or mold to support the arch while the cob dries. A simple wooden frame or cardboard box can work well. Position the form at the front of the oven, leaving an opening for the door. Apply cob around the form, shaping it into an arch that is wide and tall enough to accommodate your cooking needs. The ideal door size is typically about 60% of the oven's internal height.
Section 4: Drying, Curing, and First Firing

Patience is key during the drying and curing process. Allowing the cob oven to dry slowly will prevent cracking and ensure its long-term durability.
The Drying Process: Protect the oven from rain and direct sunlight during the drying period, as these elements can cause uneven drying and cracking. Cover the oven with a tarp or build a temporary shelter to shield it from the elements. Allow the oven to dry for several weeks, or even months, depending on the climate. The cob should be completely dry before you proceed to the curing firing.
Identifying and Repairing Cracks: As the cob dries, you may notice some hairline cracks developing. These are normal and can be easily repaired. Mix a slurry of clay and water and apply it to the cracks, filling them in completely. Monitor the oven regularly for any new cracks and repair them promptly. Warn about large cracks and what it means for your oven; significant cracks are a sign of a poorly constructed cob mix.
First Curing Firing: Once the oven is completely dry, it's time to conduct a series of small, controlled fires to cure the cob and gradually harden the oven. Start with a small fire, using dry twigs and kindling. Gradually increase the size of the fire over several days, allowing the oven to heat up slowly. Monitor the oven's temperature and avoid overheating, as this can cause cracking. Build a fire and slowly add wood, and keep the fire towards the center of the oven.
Section 5: Finishing Touches and Maintenance

With the curing process complete, it's time to add the finishing touches and prepare your cob oven for years of delicious cooking.
Applying a Protective Layer: To weatherproof the oven and enhance its appearance, apply a final protective layer of clay slip or lime wash. Clay slip is a mixture of clay and water that can be brushed onto the oven surface. Lime wash is a mixture of lime and water that provides a more durable and water-resistant finish.
Building a Rain Cover (Optional): To protect the oven from the elements and prolong its lifespan, consider building a simple rain cover. A tarp or wooden structure can provide adequate protection from rain and snow.
Maintenance Tips: Regularly clean out ashes from the oven to maintain airflow and prevent buildup. Promptly repair any cracks that develop to prevent further damage. Protect the oven from the elements during the off-season by covering it with a tarp or building a shelter.
Cooking Tips: Experiment with different recipes and baking techniques to discover the full potential of your cob oven. Achieve optimal temperature by using a combination of hardwood and softwood fuel. Learn how to regulate the oven temperature by adjusting the airflow and the amount of wood used.
Sustainable Cooking for a Self-Sufficient Homestead
Building a cob oven is more than just a DIY project; it's an investment in a more sustainable and self-sufficient lifestyle. By using natural, locally sourced materials, you can create a low-cost and environmentally friendly cooking solution that will provide years of delicious meals.
Whether you're baking bread, roasting meats, or creating pizzas, your cob oven will become a cherished part of your homestead. So, gather your materials, roll up your sleeves, and embark on this rewarding journey. With a little effort and patience, you'll be firing up your own cob oven and enjoying the unique flavors of earth-oven cooking in no time!
Ready to take the plunge? Share your questions and cob oven dreams in the comments below! I can't wait to hear about your homesteading journey!