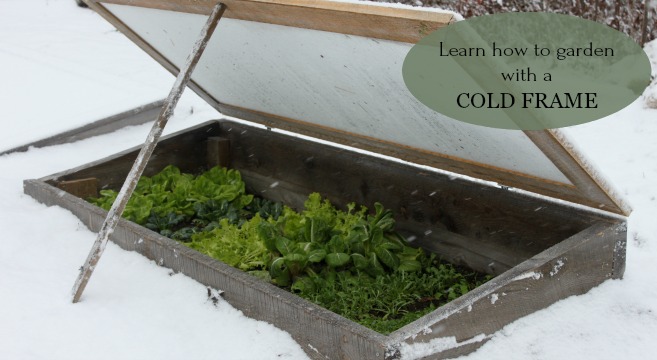
Extend Your Harvest: Build a DIY Cold Frame for Winter Greens
There's nothing quite as disheartening as the first hard frost of the season. One morning, you’re admiring the last tomatoes ripening on the vine, and the next, your beloved garden is a wilted, brown landscape. But what if you could laugh in the face of Jack Frost and continue to harvest fresh, homegrown greens all winter long? With a simple DIY cold frame, you can!
A cold frame is essentially a miniature greenhouse, designed to protect plants from the harsh elements and extend your growing season. It works by trapping solar heat during the day, creating a warmer microclimate that allows hardy vegetables to thrive even when temperatures drop. In this post, we’ll show you how to build your own cold frame and enjoy fresh, homegrown goodness throughout the colder months. Get ready to discover how to create a haven for your plants, harvest fresh produce well into winter, and even get a head start on spring planting!

Why You Need a Cold Frame
A cold frame is more than just a fancy box – it's a game-changer for extending your harvest and protecting your precious plants. Here's why you should consider building one:
Extending the Growing Season
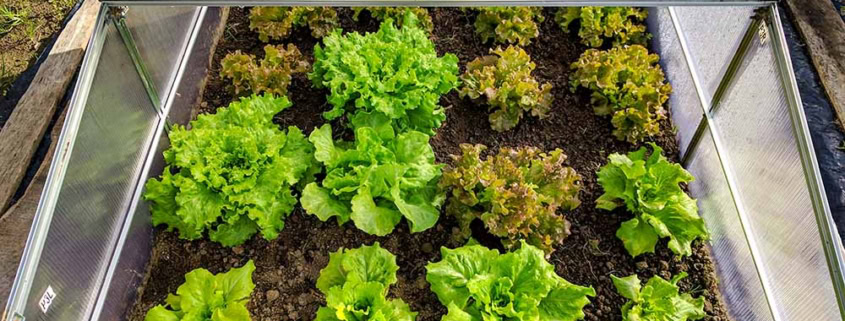
Imagine enjoying fresh spinach salads in December, or harvesting crisp lettuce for holiday sandwiches. A cold frame makes it possible! By providing a sheltered environment, cold frames allow you to harvest greens, root vegetables, and other hardy crops well into the winter months. Some of the best vegetables to grow in a cold frame include:
- Spinach
- Kale
- Lettuce
- Arugula
- Carrots
- Radishes
- Scallions
- Chard
These veggies are known for their ability to tolerate cold temperatures and will continue to grow, albeit slowly, inside a cold frame. You'll have fresh, nutritious food available when everyone else is relying on the grocery store.
Protecting Tender Plants
Unexpected late frosts in the spring or early freezes in the fall can wreak havoc on your garden. A cold frame acts as a shield, protecting tender plants from these sudden temperature dips. This allows you to get a head start on the gardening season by starting seeds earlier in the spring and extending the harvest of late-season crops in the fall. No more anxiously watching the weather forecast and scrambling to cover your plants!
Starting Seeds Early
Cold frames are fantastic mini-greenhouses for starting seeds. By providing a warm and protected environment, they allow you to sow seeds for warm-season crops like tomatoes, peppers, and eggplant weeks before the last frost. This gives your seedlings a significant head start, resulting in earlier and larger harvests. Plus, you'll save money by starting your own seeds instead of buying transplants.
Promoting Soil Health and Sustainability
Extending the growing season with a cold frame is not only beneficial for your harvest but also for the health of your soil. By reducing fallow periods and incorporating winter cover crops within the cold frame, you can prevent soil erosion, improve soil structure, and increase soil fertility. Using your cold frame can result in healthier and more productive garden year after year. It's a win-win!
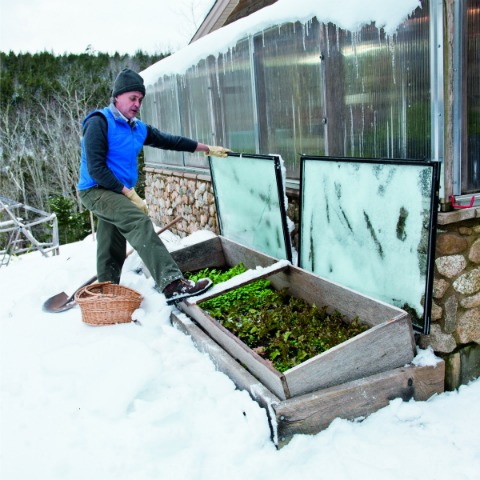
DIY Cold Frame: Choose Your Design
One of the best things about cold frames is that they can be built from a variety of materials and in a range of designs. Here are a few options to consider:
Repurposed Materials
One of the most sustainable ways to build a cold frame is by using repurposed materials. Old windows, pallets, straw bales, and scrap lumber can all be transformed into functional and attractive cold frames. This not only saves you money but also reduces waste and gives your garden a unique, rustic charm. It's a great way to incorporate some farmhouse aesthetics into your garden.
Simple Wood Frame
A basic wooden frame cold frame is easy to build and can be customized to fit your specific needs. You can adjust the dimensions, height, and angle of the frame to optimize sunlight exposure and accommodate different types of plants. This design is also relatively sturdy and can withstand harsh weather conditions.
Straw Bale Cold Frame
For a quick and easy cold frame, consider using straw bales as the sides and an old window as the top. This design is incredibly simple to construct and provides excellent insulation. The straw bales act as natural barriers against the cold, helping to maintain a stable temperature inside the cold frame.
Lean-to Cold Frame
If you have a south-facing wall on your house or shed, you can build a lean-to cold frame against it for added protection and warmth. The wall will absorb heat during the day and radiate it back at night, providing extra insulation for your plants. This design is particularly effective in colder climates.
The design you choose depends on the materials you have readily available, your budget, and your carpentry skills. Pick one that meets your needs and is adaptable to your gardening style.
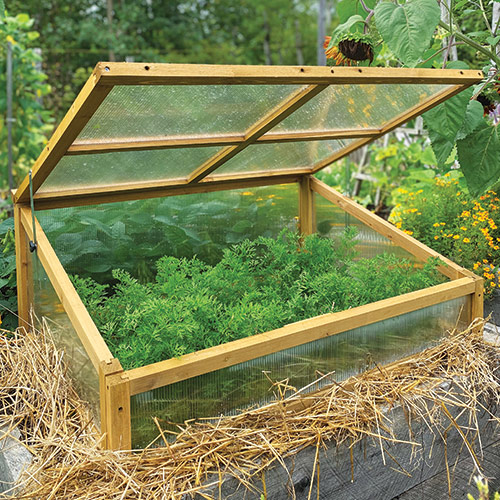
Step-by-Step: Building Your Basic Wooden Cold Frame
Ready to get your hands dirty? Here's a step-by-step guide to building a basic wooden cold frame:
Materials List:
- Two 2' x 4' x 8' untreated lumber boards (for sides)
- One 2' x 4' x 6' untreated lumber board (for ends)
- One sheet of clear polycarbonate, acrylic, or repurposed window approximately 3' x 4' (for lid)
- 3" exterior wood screws
- Two 3" hinges
- Drill
- Saw
- Measuring tape
- Pencil
- Safety glasses
Approximate Cost: $50-$100 (depending on lumber and lid material prices)
Instructions:
Cutting the Wood: Cut the lumber to the following dimensions:
- Two side pieces: 4 feet long each
- Two end pieces: One at 3 feet long and the other at 2 feet long. This creates a slope for better sun exposure and water runoff.
Assembling the Frame:
- On a flat surface, arrange the lumber pieces to form a rectangle with the shorter end piece at the front.
- Use the drill and wood screws to attach the sides to the end pieces. Make sure the corners are square.
- Reinforce the corners with additional screws if needed.
Attaching the Lid:
- Position the polycarbonate, acrylic, or repurposed window on top of the frame, overlapping the edges slightly.
- Attach the hinges to the back edge of the frame and the back edge of the lid, ensuring they are aligned properly.
- Secure the hinges with screws.
Finishing Touches:
- Sand any rough edges to prevent splinters.
- You can paint or stain the frame to protect it from the elements. Be sure to use a non-toxic, exterior-grade paint or stain.
- For added warmth in colder climates, you can insulate the interior of the cold frame with bubble wrap or blankets.
Building a wooden cold frame is a simple and rewarding project that anyone can tackle with basic tools and materials.
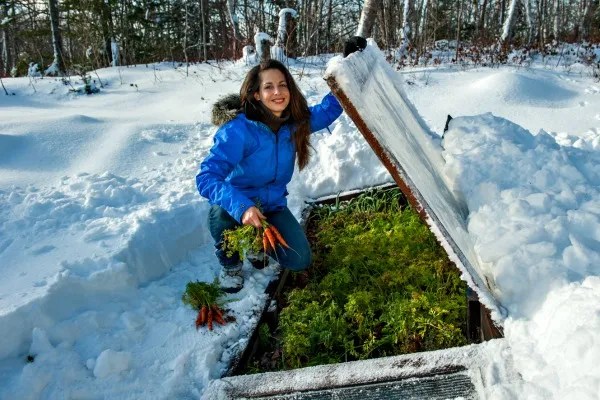
Planting and Caring for Your Cold Frame Garden
Once you've built your cold frame, it's time to start planting! Here's how to ensure a successful winter harvest:
Soil Preparation
The key to a thriving cold frame garden is well-drained, fertile soil. Before planting, amend the soil with plenty of compost to improve its structure and nutrient content. It's also a good idea to test your soil to determine its pH and nutrient levels. Aim for a slightly acidic to neutral pH (6.0-7.0).
Plant Selection
Choose vegetables that are known to tolerate cold temperatures and grow well in cold frames. As mentioned earlier, some excellent options include spinach, kale, lettuce, arugula, chard, radishes, and scallions. You can also grow winter cover crops like rye or oats to improve soil health.
Watering and Ventilation
Water your plants regularly, but be careful not to overwater them, as this can lead to fungal diseases. Water in the morning to allow the foliage to dry before nightfall. Ventilation is also crucial to prevent overheating and fungal diseases. On sunny days, open the lid of the cold frame to allow excess heat to escape. Close the lid at night to trap warmth. Optimal temperature range inside a cold frame is between 40-60°F (4-15°C).
Pest and Disease Control
Keep an eye out for common cold frame pests like aphids and slugs. Use organic pest control methods, such as introducing beneficial insects or applying insecticidal soap. To prevent fungal diseases, ensure good ventilation and avoid overwatering. Remove any diseased leaves promptly.
Extending the Season Further
If you live in a particularly cold climate, you can extend the growing season even further by adding row covers inside the cold frame for extra insulation. You can also use heat mats to provide bottom heat for starting seeds.
By following these tips, you can create a productive and healthy cold frame garden that will provide you with fresh, homegrown produce all winter long.
Your Winter Garden Awaits
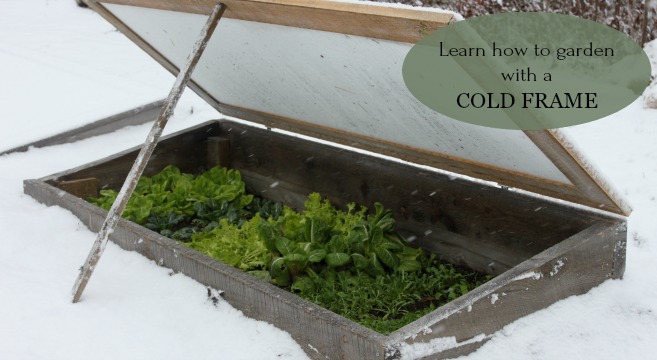
Building a cold frame is a rewarding project that allows you to extend your harvest, protect your plants, and enjoy fresh, homegrown food throughout the year. Don't let the winter months put an end to your gardening fun. Embrace the challenge and experience the satisfaction of harvesting fresh produce even when the ground is covered in snow. Remember to start building your cold frame now, in late summer or early fall, to be ready for the winter season. The rewards will be well worth the effort.
What are your favorite winter crops to grow? Share your tips in the comments below! Have you built a cold frame before? Share your experiences and advice in the comments! Let's grow together!