Extend Your Harvest: A Beginner's Guide to DIY Cold Frames
The garden is quieting down. The vibrant greens of summer are slowly fading, replaced by the amber hues of autumn. There's a certain magic to this seasonal shift, but also a pang of regret as we bid farewell to fresh, homegrown flavors. But what if you could extend the bounty of your garden, savoring those homegrown goodies just a little longer? Enter the cold frame – a simple, affordable, and surprisingly effective solution for the modern homesteader. In this guide, we'll explore how you can build your own DIY cold frame and enjoy a more productive garden with less watering!

Understanding Cold Frames: The Basics & Benefits
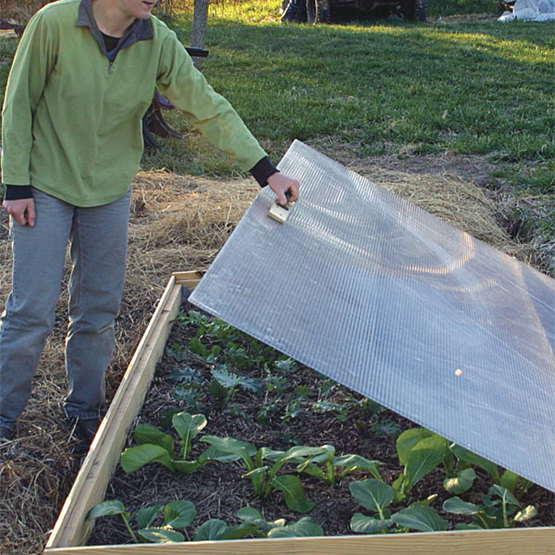
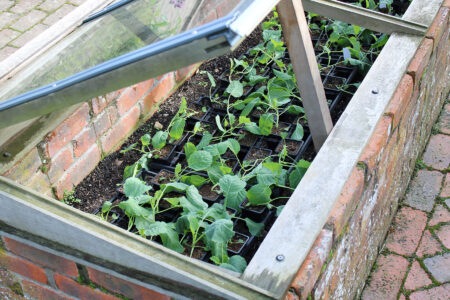
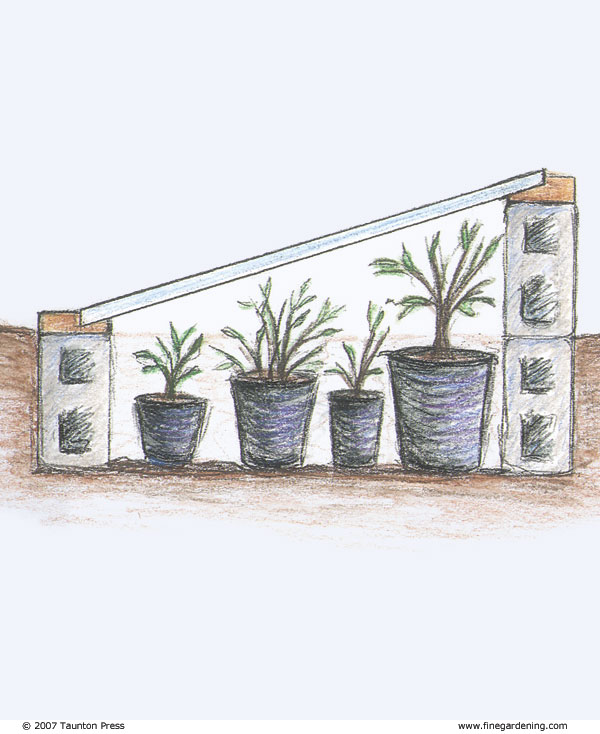
So, what exactly is a cold frame? Simply put, it's a bottomless box with a transparent lid (usually glass or plastic) that traps solar heat to create a microclimate warmer than the surrounding environment. Think of it as a mini-greenhouse for your garden. This warmer environment extends the growing season, allowing you to continue harvesting into fall and even winter.
But the benefits don't stop there! Cold frames offer a range of advantages for the organic gardening enthusiast:
- Extended Growing Season: This is the big one! Protect tender plants from the first frosts and continue harvesting cool-season crops for weeks or even months longer.
- Frost Protection: Shield vulnerable plants from damaging frosts, allowing them to thrive even when temperatures dip below freezing.
- Early Starts: Get a head start on the spring growing season by starting seeds and seedlings in the protected environment of a cold frame. Imagine having tomato seedlings ready to transplant weeks before your neighbors!
- Pest Protection: Cold frames provide a barrier against many common garden pests and animals, reducing the need for potentially harmful pesticides.
- Sustainable Gardening: Reduce your reliance on store-bought produce and embrace a more self-sufficient lifestyle by growing your own food year-round.
Location is Key: Choose a sunny spot that receives at least six hours of direct sunlight per day, preferably facing south to maximize solar gain. A location sheltered from strong winds is also ideal.
Ventilation: Don't forget ventilation! Overheating can be just as damaging as frost. On sunny days, open the lid of your cold frame to allow excess heat to escape and prevent humidity buildup.

Cold frames truly are a simple yet powerful tool for extending the growing season and creating a more resilient and sustainable garden.
DIY Cold Frame Options: From Simple to Stylish
One of the best things about cold frames is that they can be built from readily available and often recycled materials. Here are a few DIY options to consider, ranging from the super simple to the slightly more involved:
- The Simple Straw Bale Cold Frame: This is a fantastic option for beginners. Simply arrange straw bales in a rectangle or square, then cover the top with an old window, a sheet of clear plastic, or even heavy-duty row cover fabric. The straw bales provide insulation, and the transparent covering lets in sunlight. Pros: incredibly easy, inexpensive, uses readily available materials. Cons: less durable than other options, not as aesthetically pleasing.
- The Repurposed Window Cold Frame: Give old windows a new lease on life by turning them into a stylish and functional cold frame. This option involves building a wooden frame to support the windows, creating a more permanent and attractive structure. The sustainability aspect of using repurposed materials is also a huge plus. Be mindful of lead paint (if applicable) and broken glass when working with old windows.
- The Pallet Wood Cold Frame: For a more substantial and durable cold frame, consider using reclaimed pallets. This project requires more time and effort, as you'll need to disassemble the pallets and sand the wood, but the end result is a sturdy and affordable structure. You can find many detailed tutorials online for building pallet wood cold frames.
- The Hinged Wooden Cold Frame: If building your own cold frame seems daunting, you can purchase a DIY kit or a pre-made cold frame. These options offer convenience and often come with detailed instructions and all the necessary materials.

No matter your skill level, budget, or aesthetic preference, there's a DIY cold frame option that's perfect for you.
Building Your Cold Frame: A Step-by-Step Guide (Repurposed Window Focus)
Let's dive into building a repurposed window cold frame – a project that's both sustainable and rewarding.
Materials List:
- Old windows (at least one, preferably more): Free (check local classifieds, salvage yards, or ask friends and neighbors)
- Lumber (untreated cedar or redwood is best for durability): Approximately $30-$50
- Screws (exterior grade): $5-$10
- Hinges (for attaching the windows): $5-$10
- Sealant (for weatherproofing): $5-$10
- Safety glasses, gloves
Tools List:
- Saw (circular saw or hand saw)
- Drill with screwdriver bits
- Measuring tape
- Level
- Safety glasses
Step-by-Step Instructions:
- Planning and Design: Determine the size and shape of your cold frame based on the size of your windows and the available space in your garden. A simple rectangular shape is easiest to build. Draw a simple plan with measurements.
- Cutting the Wood: Cut the lumber according to your plan. You'll need pieces for the base frame and for supporting the windows. Ensure accurate measurements for a snug fit.
- Assembling the Frame: Assemble the base frame using screws. Ensure the frame is square and sturdy. A level will help ensure a flat, even surface.
- Attaching the Windows: Attach the windows to the frame using hinges. Position the hinges so that the windows can be easily opened and closed for ventilation. Consider angling the windows slightly to maximize sunlight exposure.
- Sealing and Finishing: Seal any gaps between the windows and the frame with sealant to prevent drafts and insulate the cold frame. You can also paint or stain the wood for added protection and aesthetics.
- Securing Ventilation: Devise a simple system to keep the window propped open for ventilation. A small piece of wood or a hook-and-eye latch can work well.

Building a repurposed window cold frame is a rewarding and sustainable project with proper planning and attention to detail.
What to Grow in Your Cold Frame: From Greens to Seedlings
Once your cold frame is built, it's time to start planting! The possibilities are endless, but here are a few ideas to get you started:
- Fall & Winter Harvest: Extend your harvest of cold-hardy greens like spinach, kale, lettuce, arugula, and chard. Root vegetables like carrots, radishes, and turnips also thrive in cold frames. Plant seeds or transplants in late summer or early fall for a winter harvest.
- Spring Seedlings: Get a jump start on the spring growing season by starting seeds for tomatoes, peppers, eggplants, and other warm-season crops in your cold frame. This will give you a significant head start and allow you to enjoy an earlier harvest.
- Herbs: Many herbs, such as parsley, thyme, sage, and rosemary, thrive in cold frames, providing fresh flavor throughout the colder months.
Tips for Success:
- Watering: Be careful not to overwater, especially in colder months. Water only when the soil feels dry to the touch.
- Ventilation: Monitor the temperature and humidity inside the cold frame and provide adequate ventilation by opening the lid on sunny days.
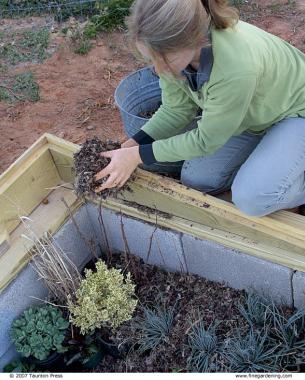
- Soil: Use well-draining soil that is rich in organic matter. Amend the soil with compost regularly to maintain fertility.
- Pest Control: Inspect plants regularly for pests and take appropriate action. Use organic pest control methods whenever possible.
/s3/optimized-images/6194986378.jpg)
Cold frames open up a world of possibilities for year-round gardening, allowing you to enjoy fresh, homegrown produce even during the colder months. They’re beneficial in every stage of a plant's life.
Maintaining Your Cold Frame for Years of Success
Proper maintenance is key to ensuring your cold frame provides years of reliable service.
- Regular Cleaning: Remove debris, leaves, and snow from the cold frame to maximize sunlight penetration.
- Ventilation Management: Adjust ventilation based on weather conditions to prevent overheating and humidity buildup. A simple thermometer inside the cold frame can help you monitor the temperature.
- Soil Health: Amend the soil regularly with compost to maintain fertility.
- Pest and Disease Control: Monitor plants for pests and diseases and take appropriate action. Use organic methods whenever possible.
- Winterization: Insulate the cold frame during the coldest months to provide added protection. Use blankets, straw bales, or bubble wrap.
- Seasonal Adjustments: Remember to adapt to the seasons with what you keep in your cold frame.
:max_bytes(150000):strip_icc()/cold-frame-gardening-GettyImages-886644836-9367eb6c34d045189235f27a9541e82b.jpg)
With proper care and attention, your cold frame can provide years of reliable service, allowing you to enjoy fresh, homegrown produce throughout the year.
Embrace the Extended Harvest & Cozy Living
As the days grow shorter and the nights grow colder, the allure of cozy living becomes even stronger. Imagine stepping outside to your garden, lifting the lid of your cold frame, and harvesting fresh greens for a winter salad. It's a simple pleasure that connects us to the earth and provides a tangible sense of self-sufficiency. Building a DIY cold frame is an investment in a more sustainable and fulfilling lifestyle. Now is the perfect time to start building your own cold frames in preparation for fall and winter!
Have you ever built a cold frame? What are your favorite tips and tricks for extending the growing season? Share your experiences in the comments below! What are your favorite winter greens to keep in a cold frame? Let us know! #BetterHomesAndHarvests #DIYColdFrame #ExtendedHarvest #SustainableGardening